


Page 14 of 24
Step 2: Installing the Switch
You can install your NETGEAR Model FSM7352PS ProSafe 48+4 Fast Ethernet L3 Managed Stackable
Switch with PoE on a flat surface or in a standard 19-inch rack.
Installing the Switch on a Flat Surface
The switch ships with four self-adhesive rubber footpads. Stick one rubber footpad on each of the four
concave spaces on the bottom of the switch. The rubber footpads cushion the switch against
shock/vibrations.
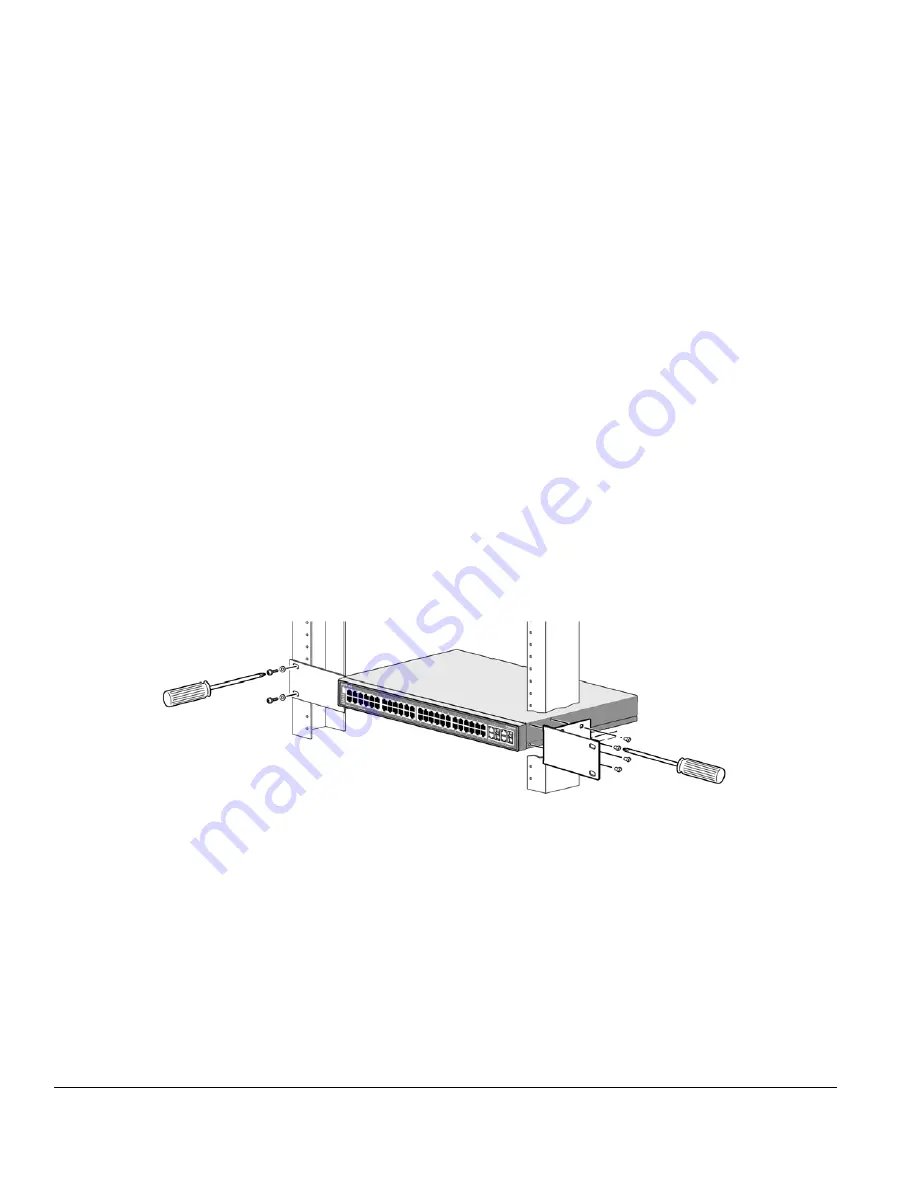
Installing the Switch in a Rack
To install the switch in a rack, use the following procedure (and refer to Figure 3-1). To perform this
procedure, you need the 19-inch rack-mount kit supplied with your switch.
1. Attach the supplied mounting brackets to the side of the switch.
2. Insert the screws provided in the rack-mount kit through each bracket and into the bracket mounting
holes in the switch.
3. Tighten the screws with a #1 Phillips screwdriver to secure each bracket.
4. Align the mounting holes in the brackets with the holes in the rack, and insert two pan-head screws with
nylon washers through each bracket and into the rack.
5. Tighten the screws with a #2 Phillips screwdriver to secure the switch in the rack.
Figure 3-1. Attaching Mounting Brackets
Step 3: Checking the Installation
Before you apply power:
o
Inspect the equipment thoroughly.
o
Verify that all cables are installed correctly.
o
Check cable routing to make sure cables are not damaged or create a safety hazard.
o
Be sure all equipment is mounted properly and securely.
Step 4: Applying AC Power
NETGEAR Model FSM7352PS ProSafe 48+4 Fast Ethernet L3 Managed Stackable Switch with PoE does


