


Chapter 2: Installing the Cabinet
9
2
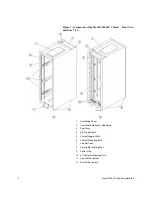
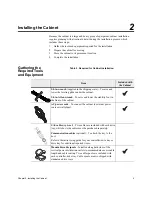
Installing the Cabinet
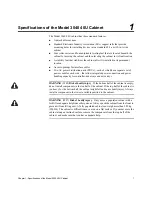
Because the cabinet is a large and heavy piece of equipment, cabinet installation
requires planning with attention to detail during the installation process, which
includes these steps:
1.
Gather the tools and equipment required for the installation.
2.
Prepare the cabinet for moving.
3.
Move the cabinet to its permanent location.
4.
Complete the installation.
Gathering the
Required Tools
and Equipment
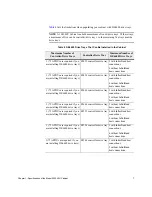
Table 5 Required for Cabinet Installation
Item
Included with
the Cabinet
3/4-in. wrench (supplied in the shipping crate) – To raise and
lower the leveling glides under the cabinet.
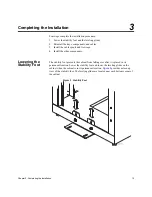
1/4-in. Allen wrench – To raise and lower the stability foot in
the front of the cabinet.
AC power cords – To connect the cabinet to external power
sources (wall plugs).
SAS cables (optional) – Two cables are included with each drive
tray, while host side cables must be purchased separately.
Communication cables (optional) – To attach the tray to the
host.
Refer to the initial setup guide for your controller-drive tray or
drive tray for additional required items.
Mountable cable spools – Installed along both sides of the
vertical power distribution outlets to accommodate excess cable
length and cable routing. Two cable spools are included with
each controller-drive tray. Cable spools are also shipped with
standalone drive trays
Содержание E-Series 3040 40U
Страница 6: ...vi Table of Contents ...
Страница 14: ...8 Model 3040 40U Cabinet Installation ...
Страница 20: ...14 Model 3040 40U Cabinet Installation ...
Страница 31: ......
Страница 32: ...Copyright 2013 NetApp Inc All rights reserved ...