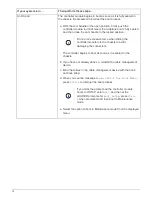
is blinking, it means that the drive has power and I/O is in progress. If the drive firmware is
automatically updating, the LED blinks.
8. If you are replacing another drive, repeat Steps 3 through 7.
9. If you disabled automatice drive assignment in Step 1, then, manually assign drive ownership and
then reenable automatic drive assignment if needed.
a. Display all unowned drives:
storage disk show -container-type unassigned
You can enter the command on either controller module.
b. Assign each drive:
storage disk assign -disk disk_name -owner owner_name
You can enter the command on either controller module.
You can use the wildcard character to assign more than one drive at once.
c. Reenable automatic drive assignment if needed:
storage disk option modify -node
node_name -autoassign on
You must reenable automatic drive assignment on both controller modules.
10. Return the failed part to NetApp, as described in the RMA instructions shipped with the kit.
Contact technical support at
, 888-463-8277 (North America), 00-800-44-638277
(Europe), or +800-800-80-800 (Asia/Pacific) if you need the RMA number or additional help with the
replacement procedure.
Option 2: Replace HDD
1. If you want to manually assign drive ownership for the replacement drive, you need to disable
automatic drive assignment replacement drive, if it is enabled
You manually assign drive ownership and then reenable automatic drive assignment
later in this procedure.
a. Verify whether automatic drive assignment is enabled:
storage disk option show
You can enter the command on either controller module.
If automatic drive assignment is enabled, the output shows
on
in the “Auto Assign” column (for
each controller module).
b. If automatic drive assignment is enabled, disable it:
storage disk option modify -node
node_name -autoassign off
You must disable automatic drive assignment on both controller modules.
2. Properly ground yourself.
3. Gently remove the bezel from the front of the platform.
4. Identify the failed disk drive from the system console warning message and the illuminated fault LED
on the disk drive
5. Press the release button on the disk drive face.
81


