background image

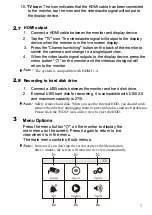
The live screen displays in three views


(Quad view, Dual view or 

Single view) that depends on how many cameras have been selected 

in the Menu (Menu


Camera


Selection). If only one camera has 

been selected, the live view screen will only display a Single view. If 

two cameras have been selected, the live view screen can be 

switched between Single view and Dual view. If three or four cameras 

have been selected, the live view screen can be switched between 

Single view and Quad view. If you are in Dual view or Quad view, tap 

on the camera image area you want to expand to Single view. Tap on 

that image to return to Dual view or Quad view. 

10 

·f 

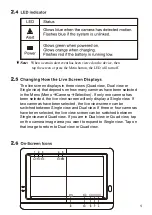
Note: 

W

hen a certain alert event has been viewed on the device, then

tap the screen or press the Menu button, the LED will turn off.


Содержание NE7MHDWCB

Страница 1: ...User Manual NE7MHDWCB ...

Страница 2: ......

Страница 3: ...s windows fNote Motion activity by horizontal movement 1 Avoid mounting the camera close to windows air conditioners heaters refrigerators ovens in direct sunshine andplaces where the temperature can change rapidly or flows of air occur frequently ...

Страница 4: ...hing HDMI output One camera One monitor Two power adapters 9V 800mA for Camera 5V 3A for Monitor Three screws and three anchors One antenna One allen key One ethemet cable User s manual 1 2 3 4 5 6 7 8 9 10 Antenna Pairing button Allen screw Mounting bracket Screw for mounting InfraredLEDs TwentyLEDs provide infrared for night vision PowerLED PIR Passive Infrared Sensor Lens Light sensor 10 13 11 ...

Страница 5: ...Loosen the alien screw 1 2 and the adjustment ring 3 by turning them counter clockwise ...

Страница 6: ...power cable Make sure they are pushed all the way in Plug the power adapter into a wall outlet Adjust the angle of the cameras until the desired view is set Tighten the alien screw and the adjustment ring to secure each camera s position ...

Страница 7: ...into the MicroSD card slot in the monitor if you want to record video The system supports MicroSD cards with a maximum capacity of 256GB f Note The package doesn t include a MicroSD card f Note The battery needs to be fully charged before you turn on the monitor for the first time ...

Страница 8: ...e live view screen can be switched between Single view and Dual view If three or four cameras have been selected the live view screen can be switched between Single view and Quad view If you are in Dual view or Quad view tap on the camera image area you want to expand to Single view Tap on that image to return to Dual view or Quad view 9 10 8 7 5 4 3 2 1 6 f Note When a certain alert event has bee...

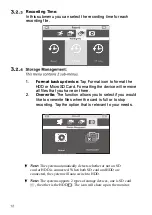
Страница 9: ...Tap again to stop recording 6 Battery Capacity Displays battery capacity 7 Storage This icon indicates that a HOD MicroSD card has been inserted into the system ImA HDD or MicroSD is currently inserted l J III The HDD or MicroSD is currently full It will display the icon when the Non overwrite function has been selected in the Menu Menu Record Non overwrite and the HDD or MicroSD is full The HDD i...

Страница 10: ...gnal will return to the monitor Note The system is compatible with HDMI 1 4 Recording to hard disk drive 1 Connect a USB cable between the monitor and hard disk drive 2 External USB hard disk for recording it is compatible with USB 2 0 and maximum capacity is 2TB f f Note 3 Menu Options Press the menu button O on the monitor to display the main menu on the screen Press it again to return to live v...

Страница 11: ...Pairing Camera 1 4 CameraON OFF Selection Camera1 4 Resolution FHD HD Brightness Lever 1 8 Anti Flicker 50 Hz 60 Hz tFormat HDD MicroSD card Overwrite Non Overwrite ...

Страница 12: ...iew Pairing If you have purchased addition cameras use the pairing function to add the cameras You will also need to use the pairing button located at the back of the camera 1 Tap the camera number you want to pair On the screen you will see a small pairing animation underneath the camera selection 2 Use a paperclip or pen to press the pair button at the back of the camera The red Power LED on the...

Страница 13: ...ra s in HD 720p or FHD 1080P Anti flicker If you find that the camera s have a flicker effect caused by indoor lighting this indicates that the anti flicker function is not set correctly Tap the correct setting for your particular country 50Hz Europe Australia Africa Asia China and Japan East 60Hz America Taiwan Korea and Japan West ...

Страница 14: ...type 3 Tap the icon to go to the second page displaying 12 00pm to 23 00pm f Note ti Motion recording System only records when motion is detected by the camera and will stop recording after 30 seconds from when the last motion was detected Record Setup The record menu contains 4 sub menus ...

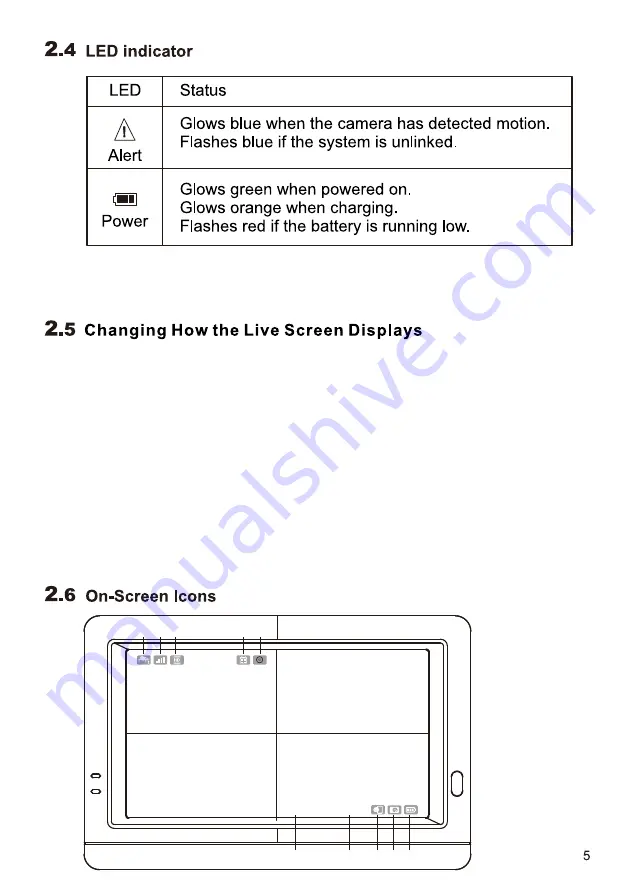
Страница 15: ...HDD The icon will show up on the monitor 1 Format backup device Tap Format icon to format the HOD or MicroSD Card Formatting the device will remove all files that you have on there 2 Overwrite The function allows you to select if you would like to overwrite files when the card is full or to stop recording Tap the option that is relevant to your needs Recording Time In this submenu you can select t...

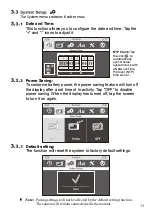
Страница 16: ...er saving feature will turn off the display after a set time of in activity Tap OFF to disable power saving When the display has turned off tap the screen to turn it on again Date and Time This function allows you to configure the date and time Tap the and icons to adjust it The System menu contains 6 sub menus Note Pairing settings will not be affected by the default setting function The camera w...

Страница 17: ... and follow the steps on screen to upgrade your system Warning To make sure your system is working correctly we strongly recommend that you update the firmware to the latest version Language This function allows you to set your preferred language Warning The firmware upgrade process must not be interrupted or the system may be damaged If the system firmware is the latest it will display the messag...

Страница 18: ...ting The default setting is DHCP and the IP address is automatically assigned to the monitor by your router You can use a Static IP but we do not recommend this unless you have some experience with networking ...

Страница 19: ...Battery Alert This selection allows you to choose the alert tones or disable the alerts for low battery Alert Setup ft The Alert menu contains 5 sub menus ...

Страница 20: ... j Note When the alert tone has been heard tap the screen or press the Menu button the alert tone will be stopped ...

Страница 21: ...e list 2 Return to live view 3 Fast backward 4 Pause Play 5 Fast forward 6 Backward speed 7 Forward speed 8 Playback on display device 8 Tap the volume up button and volume down button to adjust the volume level ffilr ...

Страница 22: ...d to a spare port on your router f Note If your router is a Wi Fi router please make sure the distance between the monitor and the Wi Fi router is a distance ofover one meter to provide better performance 1 After downloading and installing the app on your smartphone or tablet locate the app and tap the icon to launch the app From the system you can monitor your home on your smartphone or tablet at...

Страница 23: ...the camera a new name or leave it as displayed Enter the default password 12345 and then tap Save to finish the device setup The UID and QR code label is on the rear of the mon itor 2 Tap the icon then tap QR Code to scan the QR code located on the rear of the monitor You can also tap Add to manually input the UID instead of scanning the QR code ...

Страница 24: ...tatus shows Connection you need to wait until the status changes to online and then tap the device photo to see the live video of the device c Offline Ifthe device status shows Offline you need to tap the icon CD beside the device name and then tap Connection Status to re confirm the Internet connection 4 Device UID 5 Edit device function 6 Device list function 7 Searching events function 8 Add ne...

Страница 25: ......
Страница 26: ...ice name Passw ord If you have changed the device password with another smartphone or tablet you need to tap the row to correct the password 4 Advance Settings Tap this to enter advance settings 5 Reconnect Tap this to re confirm the Internet connection if the camera status shows as being offline ...

Страница 27: ...uality for the video Adjusting the video quality may help if you re having problems when viewing the live video stream Note FHD highvideo quality but low frame rate HD medium video quality and medium frame rate QHD High frame rate but lowvideo quality 3 Alert Interval Tap this to adjust the time that the app will alert you when there is an event You also have the option of turning off alerts 4 Dev...

Страница 28: ...ist screen tap Search to select different search criteria By tapping Custom you can specify a date and time period to search for events A list of all video events matching your search criteria will be displayed Tap an event to play Note There is only video and no audio when you play an event file ...

Страница 29: ... to enter Add Device screen The UID and QR code are located at the rear of the monitor You can manually input the UID or tap Scan to scan the QR code Please hold your smartphone or tablet close to the QR code to scan ...

Страница 30: ...a Online If the device status shows Online you can tap the device photo to see the live video of the device b Co nnectio n If the device status shows Connection you need to wait until the status changes to online and then tap the device photo to see the live video of the device c Offline If the device status shows Offline you need to tap theG icon beside the device name and then tap Reconnect to r...

Страница 31: ... the device photo on the Device List screen and you can see a live video from the camera Camera 1 will be displayed by default If you have multiple cameras configured tap the icon and select the camera that you want to view ...

Страница 32: ...nge Note Ifyou have changed the password you can refer to the new password on the menu Menu System Network at the monitor unit Video Quality Tap this to change the video quality for the video Adjusting the video quality may help if you re having problems when viewing the live video stream 1 2 ...

Страница 33: ...ent You also have the option of turning off alerts 4 Device Info Tap this to see basic network information about your device Event list A list of all video events matching your search criteria will be displayed here Tap an event to play Note There is only video and no audio when you play an event file Tap the icon to select different search criteria By tapping Custom you can specify a date and tim...

Страница 34: ... in the path between the camera and monitor remove the microwave oven or turn it off Make sure the camera and the monitor are within range ofeach other range ofapproximately 300 meters in a clear line ofsight Keep all parts and accessories out of children s reach Fingerprints or dirt on the lens surface can adversely affect camera performances Avoid touching the lens surface with your fingers Shou...

Страница 35: ...f this device and all persons This Transmitter must not be co located or operating in conjunction with any other antenna or transmitter Changes or modifications to this unit not expressly approved by the party responsible for compliance could void the user authority to operate the equipment NOTE This equipment has been tested and found to comply with the limits for a Class B digital device pursuan...

Отзывы: