


AI Wireless Module (AWM) - Setup Guide
Page 5
There is nothing to download – any firmware update will be contained in your controller’s software.
PAIRING THE AWM WITH YOUR LIGHTS
Once you have added the AWM to your Aquabus and have a solid green light you need to pair it with your LED
fixture(s). A single AWM can control up to 12 fixtures.
1)
From the Module Setup web page, select the AWM module. Notice the button ‘Attach’.
2)
Power up your fixture. Once the light starts you’ll get a solid red light
3)
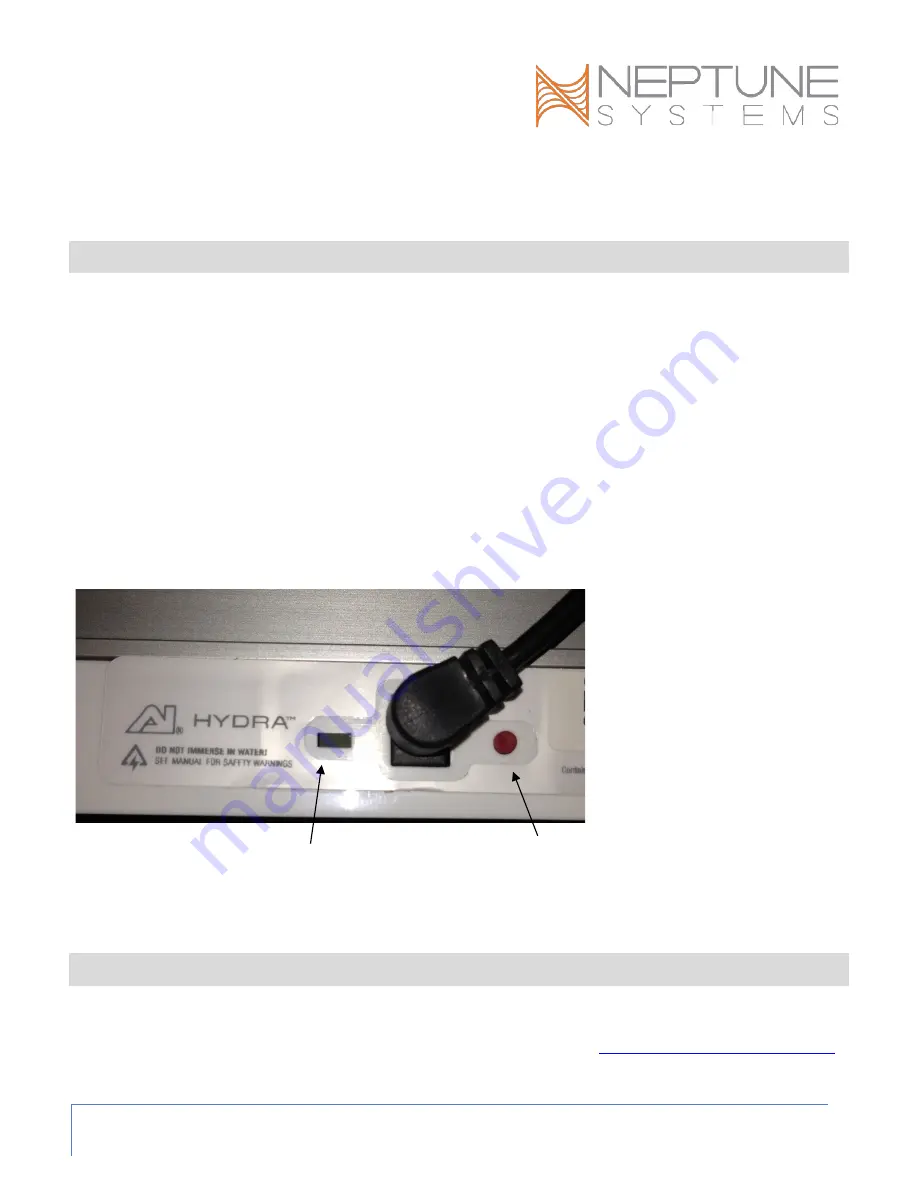
Press and hold the red reset button to the right of the power connector until the status light on the
fixture blinks RED/GREEN – about 7 seconds.
4)
Click the ‘Attach’ button on the Module Setup page
5)
If pairing was successful, the status light on the LED fixture should turn solid green and the Wireless
Status light on the AWM module should also go to solid green. Light will alternate green/yellow when
receiving commands from the AWM.
At this point your controller will create an outlet for your fixture called ‘Hydra_X_1’ where ‘X’ represents the
Aquabus number assigned to your AWM. If this was the second or third fixture the ‘1’would be ‘2’ or ‘3’
respectively (up to 12).
Status light on the Hydra fixture. Reset button
•
Red – no communications to the AWM
•
Green/Yellow – normal communications with the AWM
•
Red/Green flashing – ready to pair with the AWM
PROGRAMMING LIGHTS
Once you’ve established communications with the LED fixture, it’s time to program your lights. Now would be a
good time to add the new light outlet to your Dashboard (for instructions on how to do this, see the
Comprehensive Reference Manual or visit the Neptune Community Forum at
http://forum.neptunesystems.com
and look in the Dashboard forum).
Содержание AI Wireless Module
Страница 1: ...AI Wireless Module AWM Setup Guide...


