Disassembly Guide
50
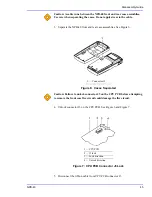
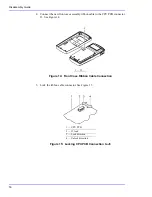
4. Connect the new front case assembly ribbon cable to the CPU PCB connector
J3. See Figure 14.
Figure 14: Front Case Ribbon Cable Connection
5. Lock the ribbon cable connector. See Figure 15.
Figure 15: Locking CPU PCB Connection to J3
1 — J3
1 — CPU PCB
2 — J3 lock
3 — Lock direction
4 — Unlock direction
Содержание Oximax NPB-40
Страница 1: ......
Страница 5: ...Contents NPB 40 iii Power Supply 81 Power Supply Monitoring 81 Index 103...
Страница 8: ...Tables vi This Page Intentionally Blank...
Страница 18: ...Introduction 10 This Page Intentionally Blank...
Страница 22: ...Routine Maintenance 14 This Page Intentionally Blank...
Страница 40: ...Performance Verification 32 This Page Intentionally Blank...
Страница 50: ...Troubleshooting 42 This Page Intentionally Blank...
Страница 66: ...Spare Parts 58 This Page Intentionally Blank...
Страница 70: ...Packing for Shipment 62 This Page Intentionally Blank...
Страница 82: ...Specifications 74 This Page Intentionally Blank...
Страница 90: ...Technical Discussion 82 This Page Intentionally Blank...
Страница 92: ...Technical Discussion 84 This Page Intentionally Blank...
Страница 94: ...Technical Discussion 86 This Page Intentionally Blank...
Страница 96: ...Technical Discussion 88 This Page Intentionally Blank...
Страница 98: ...Technical Discussion 90 This Page Intentionally Blank...
Страница 100: ...Technical Discussion 92 This Page Intentionally Blank...
Страница 102: ...Technical Discussion 94 This Page Intentionally Blank...
Страница 104: ...Technical Discussion 96 This Page Intentionally Blank...
Страница 106: ...Technical Discussion 98 This Page Intentionally Blank...
Страница 108: ...Technical Discussion 100 This Page Intentionally Blank...
Страница 110: ...Technical Discussion 102 This Page Intentionally Blank...
Страница 113: ......


