6
Nektar Impact LX49, LX61 & LX88 User Guide www.nektartech.com
Installing and Setting Up Studio One Artist
The included PreSonus Studio One Artist for OSX and Windows is a powerful and complete DAW that allows you to get started
straight away with your Impact LX, even if you don’t have any other music software.
Installation
The Studio One Artist 2.6 installer can be located on the included DVD and the product key on the white DVD sleeve.
Your Presonus Studio One Artist license is subject to PreSonus’s standard End User License Agreement (EULA) which must be
accepted upon installation. In addition, Studio One Artist requires a personal product registration through the internet and a
computer matching the minimum requirements of the software.
Here are the steps you need to go through to set up Studio One Artist with
the Impact LX:
Locate the Studio One Artist installer on the included DVD
Follow the onscreen instructions to activate, create a user account
and complete installation
Locate the “Impact LX DAW Integration” folder on the included
DVD or download it from “My Downloads” on www.nektartech.com
after registering your product
Run the “DAW Integration Installer” in that folder and follow the
on-screen instructions, selecting Studio One as your DAW.
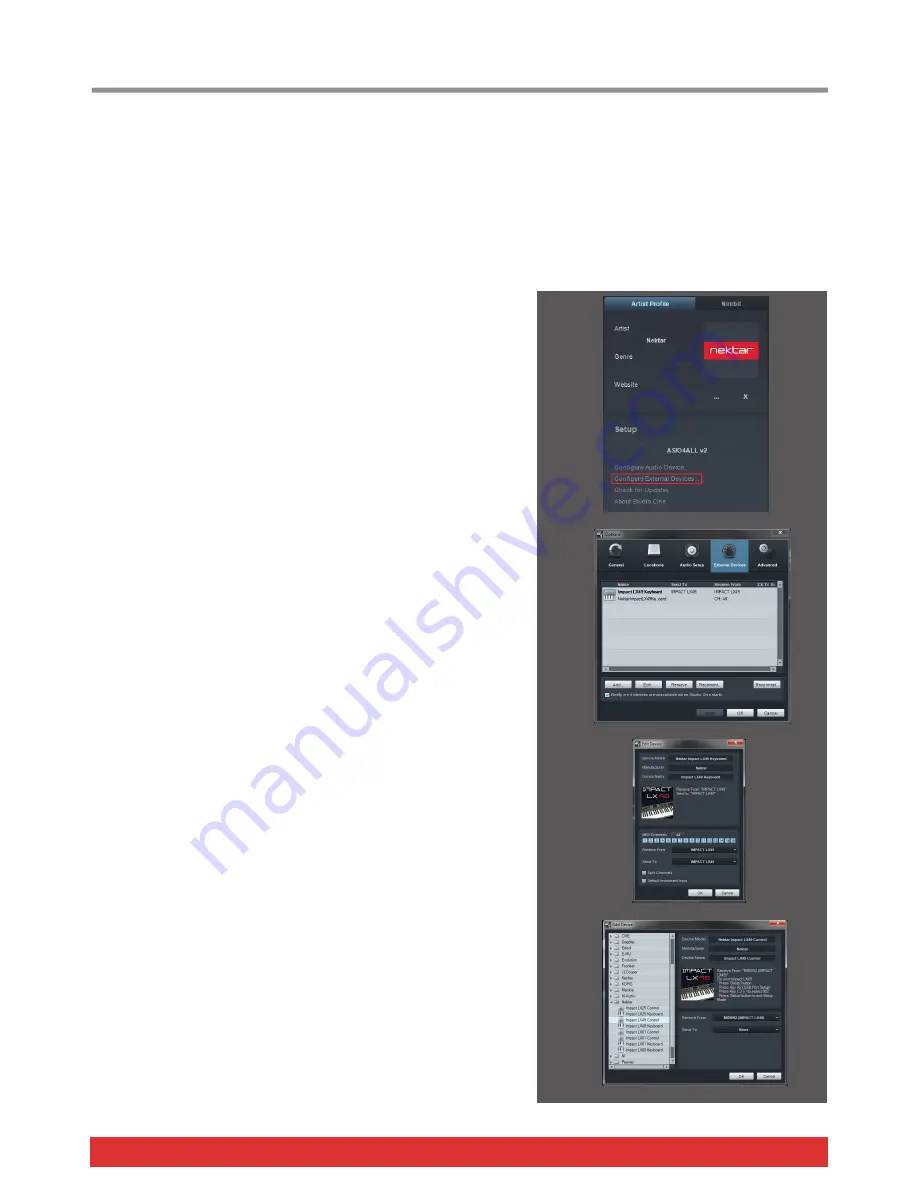
Booting up Studio One Artist you will see an initial setup screen
similar to image 1. Click on “Configure External Devices…”,
highlighted in the red box in image 1
Next you will see the Options menu. Click on “External Devices”.
The options window should now look like image 2
If your Studio One program already show 2 Impact LX devices,
you may be ready to go. Use the following steps for troubleshoot-
ing. If only 1 Impact LX device shows up, you’ll need to complete
the following steps.
Select the Nektar Impact LX device and click “Edit”
In the resulting pop-up window make sure that all the MIDI chan-
nels 1-16 are highlighted in light blue. If they are not light blue,
click the “All” button, just above the indicators. The window
should now look like image 3
Click “Ok” to close the window
Back in the “Options” window, click “Add” to open the “Add
Device” Window
Locate the Nektar folder, click the expand arrow and the click on
the Impact LX Control option.
In the “Receive From” field select Port 2 or MIDIIN2. The window
should now look like image 4
Click “OK” to exit the “Add Device” menu and “OK” again to exit
the “Options” menu
Studio One Artist is now set up to work with your Impact LX.
Studio One Pro
If you are an existing user of Studio One Producer or Professional, the
process is the same.
Image
1
Image
2
Image
3
Image
4


