


www.nektartech.com Nektar Impact GX49 & GX61 User Guide
5
Keyboard & Real-Time Controls
The Impact GX49 features a 49 note (61 note on GX61) keyboard. Each key is velocity sensitive so you can play expressively
with the instrument. There are 4 different velocity curves for the keyboard so you can chose a less or more dynamic curve to
suit your playing style. In addition, there are 3 fixed velocity settings.
We recommend you spend a little time playing with the default velocity curve and then determine if you need more or less
sensitivity. You can learn more about velocity curves, and how to select them, in the “Setup” section.
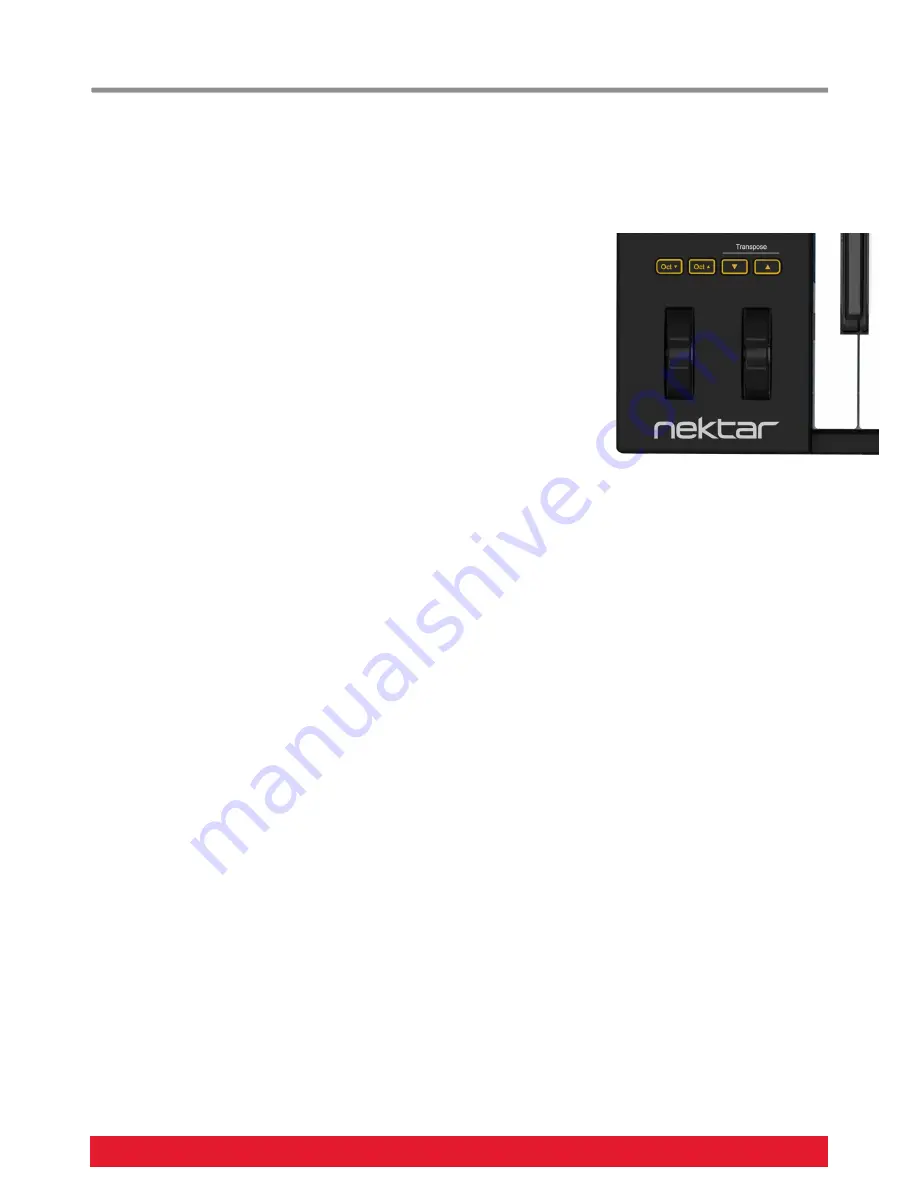
Octave Buttons
To the left of the keyboard you find the Octave buttons (Oct Down/Oct Up).
With each press, the left Octave button will shift the keyboard down one octave.
The right Octave button will similarly shift the keyboard up 1 octave at a time, when
pressed.
Pressing both Octave buttons at the same time resets the setting to 0.
The maximum you can shift the keyboard is 3 octaves down and 4 octaves up (GX61 can
be shifted 3 octaves up), covering the entire MIDI keyboard range of 127 notes.
The below chart shows you the color coding for each octave setting.
Transpose
The Transpose buttons are located to the right of the Octave buttons. They work the same way:
With each press the left Transpose button will transpose the keyboard down one semi-tone.
The right Transpose button will similarly transpose the keyboard up 1 semi-tone at a time, when pressed.
Pressing both Transpose buttons at the same time will reset the transpose setting to 0 (only if transpose is assigned).
You can transpose the keyboard -/+ 12 semi-tones. The Transpose buttons can also be assigned to control an additional 2
functions. Check the Setup section of this guide for more details.
Pitch bend and Modulation Wheels
The two wheels below the Octave and Transpose buttons are by default used for Pitch bend and Modulation.
The Pitch bend wheel is spring loaded and automatically reverts to it’s center position upon release. It’s ideal to bend notes
when you are playing phrases that require this kind of articulation. The bend range is determined by the receiving instrument.
The Modulation wheel can be freely positioned and is programmed to control modulation by default. The Modulation wheel in
addition, is MIDI assignable with settings stored over power cycling so its retained when you switch the unit off.
Foot Switch
You can connect a foot switch pedal (optional, not included) to the 1/4” jack socket on the back of the Impact GX keyboard.
The correct polarity is automatically detected on boot-up, so if you plug in your foot switch after boot-up is complete, you
may experience the foot switch working in reverse. To correct that, do the following:
Switch the Impact GX49 off
Make sure your foot switch is connected
Switch Impact GX49 on
0
[Oct Down]+[Oct Up] both illuminated +1
[Oct Up] illuminated orange
-1
[Oct Down] illuminated orange
+2
[Oct Up] illuminated green
-2
[Oct Down] illuminated green
+3
[Oct Up] illuminated red
-3
[Oct Down] illuminated red
+4
[Oct Up] illuminated yellow (GX49 only)


