


Cleaning and servicing
en
33
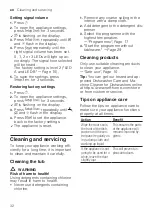
Easy Clean
Deposits, e.g. from remnants of food
and limescale, can cause your appli-
ance to malfunction. To avoid such
faults and reduce odours, we recom-
mend cleaning your appliance at reg-
ular intervals.
Easy Clean combined with machine
care products and machine cleaners
is the right programme for the care of
your appliance.
Tip:
You can get our tested and ap-
proved Dishwasher Care and Ma-
chine Cleaner for Dishwashers online
at https://www.neff-home.com/store
or from customer service.
Easy Clean is a programme which re-
moves various deposits in one wash-
ing cycle. Cleaning takes place in
two phases:
Phase
Removal of
Detergent
Placement
1
Grease and limescale
Liquid machine care product
or machine descaler in
powder form.
Appliance interior, e.g. bottle
hung in the cutlery basket or
powder in the interior.
2
Food remnants and de-
posits
Machine cleaner
Detergent dispenser
To ensure optimum cleaning perform-
ance, the programme doses the de-
tergents independently of each an-
other during the relevant cleaning
phase. Correct placement of the de-
tergents is necessary here.
Run Easy Clean without tableware if
the indicator for Easy Clean lights up
on the control panel or if advised to
do so by the display. The indicator
will go out after you have run Easy
Clean. If your appliance does not
have a reminder function, we recom-
mend performing Machine Care
every 2 months.
Running Easy Clean
Notes
¡
Run the Easy Clean programme
without any tableware in the dish-
washer.
¡
Only use machine care products
and machine cleaners specially
designed for dishwashers.
¡
Make sure that there are no alu-
minium parts, e.g. extractor hood
grease filters or aluminium pans, in
the interior of the appliance.
¡
If you have not run Easy Clean
after 3 washing cycles, the indic-
ator for Easy Clean will go out
automatically.
¡
For optimum cleaning perform-
ance, ensure the correct place-
ment of cleaners.
¡
Follow the safety instructions given
on the packagings of the machine
care products and machine clean-
ers.
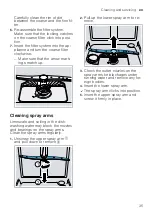
1.
Remove any coarse soiling in the
interior with a damp cloth.
2.
Clean the filters.
3.
Place the machine care product in
the appliance interior.
Only use machine care products
specially designed for dishwash-
ers.
4.
Pour the machine cleaner into the
detergent dispenser until it is filled
completely.
Do not place any additional ma-
chine cleaner in the appliance in-
terior.
5.
Press
.
Содержание S353ITX00E
Страница 1: ...Dishwasher en Information for Use S353ITX00E...
Страница 51: ......


