2 NEC Versa TXi Release Notes
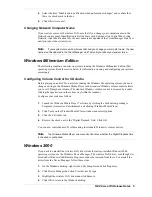
Serial transfer cable
A – Release Clips
C – 9-Pin Serial Port
B – 36-Pin Connector (to Versa)
Connecting a Serial Device
Connect a serial device to your NEC Versa notebook computer as follows.
1.
Check that power to both the NEC Versa notebook and the device are powered off.
2.
Open the printer port cover on the left side of the system.
3.
Align the small, 36-pin connector on the serial transfer cable with the printer port on the
system.
4.
Squeeze the clips on both ends of the connector and insert the connector into the printer
port. Release the clips when the connector is secure.
5.
Align and connect the other end of the serial transfer cable to the 9-pin serial connector on
the serial cable that comes with the device. Turn the screws (if any) on the serial device
connector to secure it.
6.
Connect the other end of the serial cable to the serial device.
Connecting a serial device
7.
Connect the power cable (if any) to the device and a properly grounded wall outlet.
8.
Turn on power to the system and the device.
Note
Check that the device is online before you try to use it. See the instructions that came
with the device for more information.


