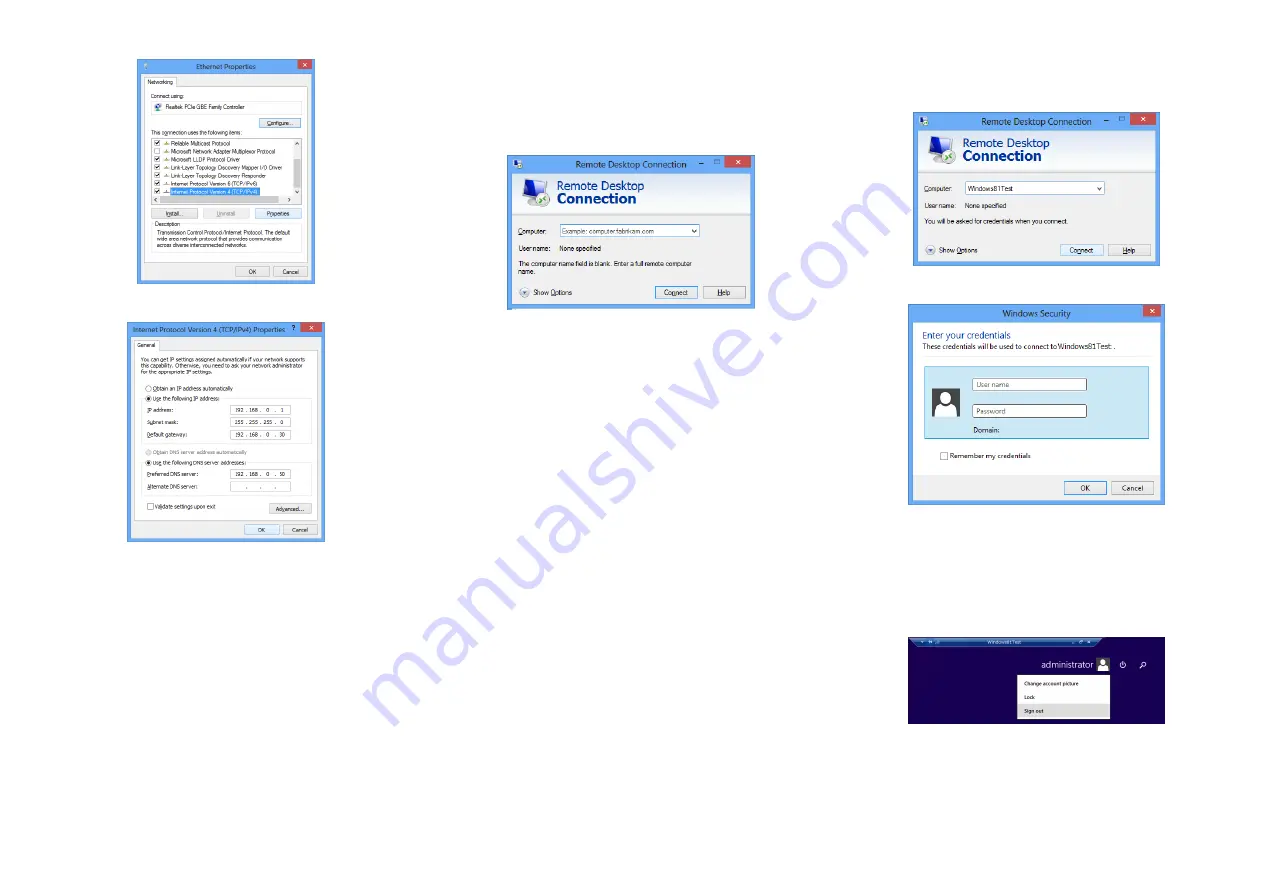
7.
Select
Internet Protocol Version 4 (TCP/IPv4)
and click
Properties
.
8.
Specify the IP address, subnet mask, default gateway, DNS server, and other
settings appropriate to your network environment. Click
OK
.
Step 8 Configure the virtual PC connection
Configure the virtual PC to be connected by using Remote Desktop Connection, which can
be launched from a shortcut icon on the desktop.
1.
Sign in to US310e and launch
Remote Desktop Connection
from its shortcut
icon on the desktop.
2.
In
the
Computer
box, type the computer name or the IP address of the
virtual PC to be connected.
* To configure the virtual PC in detail, click the
Show Options
button and
configure the relevant settings.
* To connect to a Citrix server, launch
Citrix Receiver
from its shortcut icon
on the desktop and specify the connection destination.
* To connect to a VMware Horizon View environment, launch
VMware
Horizon View Client
from its shortcut icon on the desktop and specify the
connection destination.
Step 9 Connect to the virtual PC
Connect to the virtual PC based on the settings you specified in Step 8.
1.
Launch
Remote Desktop Connection
, confirm that the computer name or IP
address is displayed, and then click the
Connect
button.
2.
The network level authentication dialog box is displayed. Enter
User name
,
Password
and
Domain
, then click
OK
.
* If network level authentication is disabled, the network level authentication
dialog box is not displayed and instead the virtual PC signin or logon screen is
displayed.
3.
After signin or logon, you can use the programs installed in the virtual PC.
Step 10 Log off from the virtual PC
After finishing your work on the virtual PC, sign out or log off from the virtual PC.
When you log off from the virtual PC, the US310e desktop appears.


