background image

10

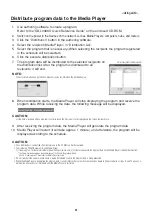
Copy the program data on the memory card of the Media Player

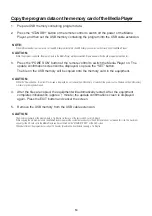
1.

Prepare USB memory containing program data.

2.

Press the “STANDBY” button of the remote control to switch off the power of the Media
Player, and then set the USB memory containing the program into the USB cable extension.

NOTE:

If the USB cable extension is not used, set the USB memory directly into the USB memory connector on the main body of the Media Player.

CAUTION:

When the program is updated, the program data in the Media Player will be overwritten. Please be aware that the old program data will be lost.

3.

Press the “POWER ON” button of the remote control to switch the Media Player on. The
update confirmation screen will be displayed, so press the “SET” button.

The file on the USB memory will be copied onto the memory card in the equipment.

CAUTION:

While the “Now updating... Important!!!” message is displayed, do not remove the USB memory or switch off the power source. The data on the USB memory
or memory card may be damaged.

4.

After the files are copied, the equipment will automatically restart. After the equipment
completes initialization (approx. 1 minute) the update confirmation screen is displayed
again. Press the EXIT button and cancel the screen.

5.

Remove the USB memory from the USB cable extension.

CAUTION:

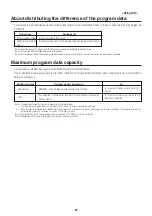
The maximum capacity of the program data is 1.8 Gbytes (in the case of the enclosed SD card (2 Gbytes)).
When copying the program data onto the Media Player, make sure the content data capacity in the USB memory does not exceed this size. The maximum
capacity of the SD card set in the Media Player can be confirmed on the “MEMORY CARD” of the OSD screen.
The update time of the program data is about 15 minutes (maximum) when the data capacity is 1.8 Gbytes.

Содержание SB-L008KU

Страница 1: ...ay Distribution function Program data is distributed via USB memory or to a maximum of 20 Media Players via LAN Important Information This equipment is a Class A Information Technology Equipment certified by the Voluntary Control Council for Interference by Information Tech nology Equipment VCCI In a domestic environment this product may cause radio interference in which case the user may be requi...

Страница 2: ...let prepared by the Federal Communications Commission helpful How to Identify and Resolve Radio TV Interference Problems This booklet is available from the U S Government Printing Office Washington D C 20402 Stock No 004 000 00345 4 For Canada Canadian Department of Communications Compliance Statement DOC This Class A digital apparatus meets all requirements of the Canadian Interference Causing Eq...

Страница 3: ... label side facing up Caution Confirm that the write protect switch is not at LOCK position 2 Turn off the main power of the Display Unscrew the 2 screws Screw A and remove the handle 4 Insert Media Player in the Display 6 Secure the handle by 2 screws Screw A 3 Unscrew the 2 screws Screw B and remove the cover from the OPTION Slot 5 Secure Media Player to the monitor with 2 screws Screw B ...

Страница 4: ...cable 4Audio input connector Connects the sound output from the video device when using the video input connector 5DVI output connector DVI D This is connected to the DVI input connector of the external display Media Player images can be displayed on an external display NOTE Programs using external video images from video input connector cannot be output to the DVI output connector They can only b...

Страница 5: ... user manual 1 POWER button Switches the power on standby 2 OPTION button Set Input signal to Media Player When Media Player is set turn on off the Media Player OSD 3 KEYPAD Enter settings such as date and time 4 MENU button Turn on off the monitor OSD menu 5 UP DOWN button Select setting items at the OSD menu 6 MINUS PLUS button Select setting items at the OSD menu 7 EXIT button Returns to previo...

Страница 6: ...our computer when using it for the first time Refer to the authoring software User s Manual for the installation procedure USB memory Encoded USB memory cannot be used Connection when using USB memory to distribute programs 1 Insert the attached memory card into the memory card connector Page 2 CAUTION Insert the memory card with the label side up Check to make Sure that the write protect switch i...

Страница 7: ...iaplay input to player Apply DATE TIME NETWORK PREVIEW TIMER LANGUAGE VIDEO OUT MEMORY CARD SLIDE SHOW ADVANCED DATE mm dd yyyy 05 05 2008 TIME hh mm ss 06 12 25 DATE TIME NETWORK PREVIEW TIMER LANGUAGE VIDEO OUT MEMORY CARD Select Language English Deutsch Français 日本語 DATE TIME NETWORK PREVIEW TIMER LANGUAGE VIDEO OUT MEMORY CARD S Select Video Output Timing DVI 1920x1080 60 DVI 1360x768 60 DATE ...

Страница 8: ...ht of the display blinks in orange When a program starts the device automatically switches from power save mode to power on and the program is displayed To display the OSD menu of the Media Player in the power save mode press the POWER ON button of the remote control to turn on the power and then press OPTION button Note The display does not enter power save mode in the following situations To dis...

Страница 9: ...y disc However animations and movies cannot be converted Create program data using authoring software Click on the authoring software in the computer to start the program For details on how to use authoring software refer to authoring software User s Manual Save the program data created on a USB memory connected to the computer using the distribution function of the authoring software Content file...

Страница 10: ... copied onto the memory card in the equipment CAUTION While the Now updating Important message is displayed do not remove the USB memory or switch off the power source The data on the USB memory or memory card may be damaged 4 After the files are copied the equipment will automatically restart After the equipment completes initialization approx 1 minute the update confirmation screen is displayed ...

Страница 11: ...set the time for power on off the setting of the program data is valid and the timer setting is void The time set in the program is displayed Select the language for the OSD menu Select the optimal visual output for the display in use This is the remaining area available for use This is the maximum capacity of content that can be used As a rough guide it should be about 90 of the memory card capac...

Страница 12: ...select Yes on the confirmation screen and the equipment will automatically restart NOTE While displaying still images press the direction buttons and the previous or next still image will be displayed How to set the Video Repeat Mode 1 Set the USB memory containing the movie file you wish to display in the Media Player NOTE Change the name of the folder containing the movie file to something other...

Страница 13: ...nput connector AUDIO IN S Terminal video cable commercially available Audio cable Commercially available Output AUDIO L R Y Pb Pr R B G R B G R B G R B G R B G R B G R B G R B G External AV equipment Video game machines etc Compornent output Audio output S Terminal input connector AUDIO IN Compornent cable commercially available Compornent input conversion cable Audio cable Commercially available ...

Страница 14: ...esses to equipment on the NETWORK Normally they are built in with routers The procedure for LAN setting is as follows Media Player LAN setting The Media Player name setting of the Media Player required only in the DHCP mode Authoring software LAN setting LAN connection test Not required for Static IP Open the OSD of the Media Player using the enclosed remote control and conduct settings From Inter...

Страница 15: ...computer and Media Player to the LAN terminal not the WAN terminal of the routers Use commercially available routers LAN cables and hub Use LAN cables that are category 5 or higher LAN straight cable Computer Authoring software Media Player LAN connector LAN straight cable LAN straight cable Computer Authoring software Hub Media Player Media Player LAN connector LAN connector LAN straight cable LA...

Страница 16: ...wn the set IP Address and keep it for reference 4 Select Apply 5 Close the OSD menu using the EXIT buttons CAUTION Set the computer s IP Address according to the network environment NOTE To confirm the IP Address and Netmask of the computer startup the command prompt In the Start menu All programs Accessories in Windows XP Vista 7 and run C ipconfig IP Netmask Gateway DNS Static IP Address setting...

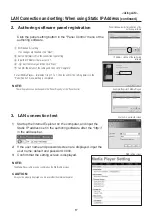
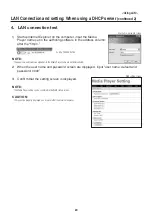
Страница 17: ...rol menu Setting is completed NOTE The settings above can be changed in the Panel Property of the Panel Control 3 LAN connection test 1 Startup the Internet Explorer on the computer and input the Static IP address set in the authoring software after the http in the address bar 2 If the user name and password screen are displayed input the user name default and password 0000 3 Confirm that the sett...

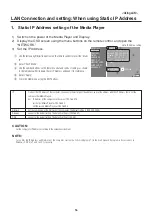
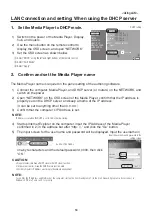
Страница 18: ... on the OSD screen of the Media Player confirm that the IP address is properly set on the DHCP server and keep a memo of the IP address It can be set to anything other than 0 0 0 0 3 Confirm that the computer s IP Address is set NOTE IP Address is set when the DHCP is set in OSD or during startup 4 Startup Internet Explorer on the computer input the IP Address of the Media Player confirmed in 2 in...

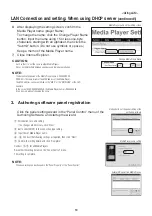
Страница 19: ...NETWORK of the OSD Example In the case of MAC 0050418000e9 the Media Player name is DS348000e9 It can be used without changing the name 3 Authoring software panel registration Click the panel setting wizard in the Panel Control menu of the Authoring Software and startup the wizard 1 Distribution list name setting If no changes are necessary click Next 2 Set to LAN DHCP in the connection type setti...

Страница 20: ... uppercase and lowercase alphabets in the Media Player name are not differentiated 2 When the user name and password screen are displayed input user name default and password 0000 3 Confirm that the setting screen is displayed NOTE The Media Player setting can be confirmed in the WEB setting screen CAUTION I It may not be properly displayed on a browser other than Internet Explorer User name passw...

Страница 21: ...following message will be displayed CAUTION If the data is received while a program is not displayed the message is not displayed and the screen remains black 9 After receiving the program data the Media Player will generate the program data 10 Media Player will restart it will take approx 1 minute and afterwards the program will be displayed according to the schedule CAUTION Once distribution is ...

Страница 22: ...h program data The capacity of one program data is the total capacity of the movie still image and audio data registered Ex When the program distributed to one Media Player registers program 1 still image 1 and movie 1 and program 2 still image 2 and movie 1 the program data capacity will be the total capacity for still image 1 movie 1 still image 2 movie 1 Note 2 After distribution the SD card oc...

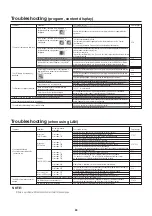
Страница 23: ...er s Manual See Troubleshooting in the display User s Manual Check that the power save mode option setting for the display is ON When the power supply setting in the advanced menu of the OSD menu is Do not supply the device does not enter power save mode Check that the Standby mode setting for the display is Standby Check that the Power supply setting for Media Player is Supply Check that the Powe...

Страница 24: ...00 characters Set the height of telop less than 30 whole display Programs using external video cannot be output to the DVI output connector When switching the movie there is about 10 to 20 seconds where there is no image or audio however this is not an error or malfunction Confirm that there are no errors in the schedule setting of the authoring tool If there are any errors correct the schedule an...

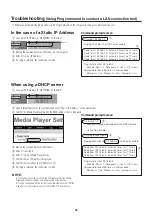
Страница 25: ...ribute confirm that the firewall or security software is not set to block the FTP transmission DATE TIME NETWORK PREVIEW TIMER Static IP IP 192 168 0 2 Netmask 255 255 255 0 Gateway 192 168 0 1 DHCP IP 192 168 0 3 Netmask 255 255 255 0 Gateway 192 168 0 1 DATE TIME NETWORK PREVIEW TIMER Command prompt screen C ping 192 168 0 2 Pinging 192 168 0 2 with 32 bytes of data Reply from 192 168 0 2 bytes ...

Страница 26: ...bit rate Mbps x 1024 kb AUDIO bit rate kbps Ex SD Memory card 2 Gbytes VIDEO bit rate 10 Mbps AUDIO bit rate 128 kbps 2G x 0 9 x 1024 x 1024 x 8 10 x 1024 128 25 min Concerning Memory cards The firmwares Files with img extension are pre written on the enclosed memory card If it is mistakenly erased use the computer to copy the firmware from the firmware_folder in the enclosed CD ROM to the memory ...

Страница 27: ... LAN maximum 20 Output to USB memory INTEL Pentium 3 1 0 GHz or higher recommended 256 Mbytes or more 1024 x 768 65 536 colors or more Microsoft Windows Vista Ultimate 32 bit Ver Microsoft Windows Vista Business 32 bit Ver Microsoft Windows XP Professional 32 bit Ver Microsoft Windows XP Home Edition 32 bit Ver Microsoft Windows 7 Professional 32 bit Ver Microsoft Windows 7 Home Premium 32 bit Ver...

Страница 28: ...Main Profile High Level Up to 1280 x 720 30p or 1920 x 1080 25p AP L3 Advanced Profile L3 Level Up to 1920 x 1080 50i or 1920 x 1080 25p or 1280 x 720 60p The following are not supported Complex Profile File created using the WMV9 BETA encoder WMV1 or WMV2 Note 3 MP HL Main Profile High Level Up to 1920 x 1080 25p or 1920 x 1080 60i or 1280 x 720 60p Details Supports baseline JPEG Supports RGB 24 ...

Страница 29: ...wer cords When you need to dispose of your NEC display products please follow the guidance of your local authority or ask the shop where you purchased the product or if applicable follow any agreements made between yourself and NEC The mark on electrical and electronic products only applies to the current European Union Member States Outside the European Union If you wish to dispose of used electr...

Страница 30: ...PTM Devices Software license information pdf p 27 Net SNMP Software license information pdf p 28 p 34 Thttpd Software license information pdf p 35 Pure FTPd Software license information pdf p 36 Libjpeg Software license information pdf p 37 p 39 Libpng Software license information pdf p 40 p 43 TinyXML Software license information pdf p 44 Refer to the page below for information on the copyright f...

Отзывы: