


44
3. Convenient Features
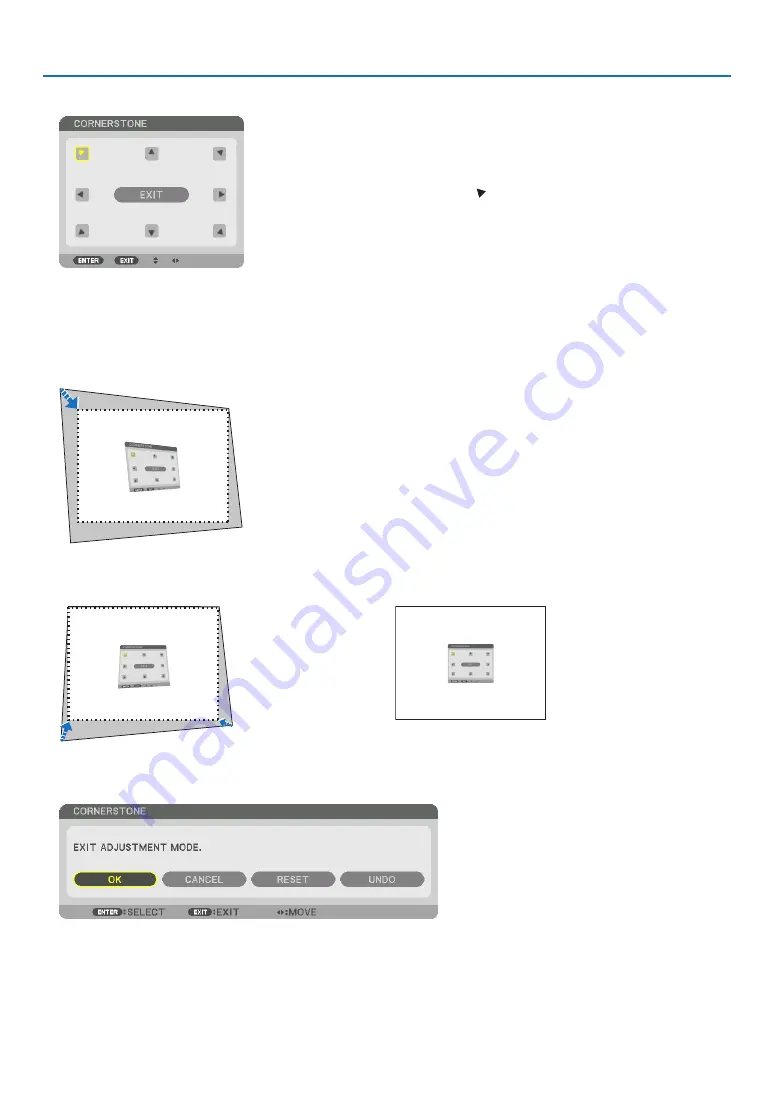
5. Press the
▼
button to align with the [CORNERSTONE] and then press the ENTER button.
The drawing shows the upper left icon ( ) is selected.
The screen will switch to the [CORNERSTONE] screen.
6. Use the
▲▼◀▶
button to select one icon (
▲
) which points in the direction you wish to move the projected
image frame.
7. Press the ENTER button.
8. Use the
▲▼◀▶
button to move the projected image frame as shown on the example.
9. Press the ENTER button.
10. Use the
▲▼◀▶
button to select another icon which points in the direction.
11. Repeat steps from 7 to 10 to complete the cornerstone adjustment.
12. On the [CORNERSTONE] screen, select [EXIT] or press the EXIT button on the remote control.
The confirmation screen is displayed.
13. Press the
◀
or
▶
button to highlight the [OK] and press the ENTER button.
This completes the [CORNERSTONE] correction.
• Returning to the [CORNERSTONE] screen, select [CANCEL] and press the ENTER button.
Содержание NP-PX1005QL-B
Страница 146: ...131 5 Using On Screen Menu VERSION FIRMWARE DATA FIRMWARE2 OTHERS DATE TIME PROJECTOR NAME MODEL NO SERIAL NUMBER ...
Страница 147: ...132 5 Using On Screen Menu HDBaseT SIGNAL QUALITY OPERATION MODE LINK STATUS HDMI STATUS ...
Страница 185: ... NEC Display Solutions Ltd 2018 7N952732 ...


