NEC Display Solutions of America, Inc.
QIG-TMX-55UN
X551UN-TMX4P
Rev 1.0
4
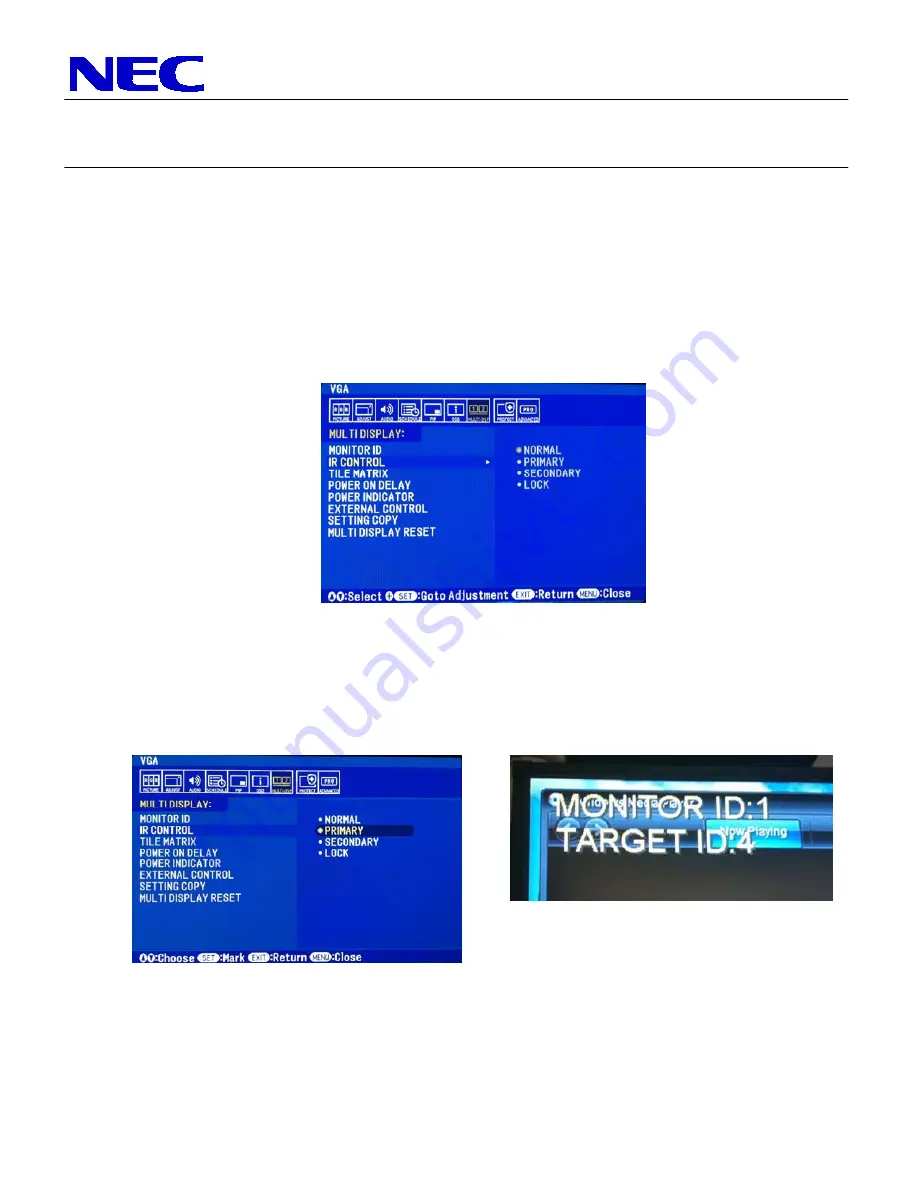
Note that after the ID’s are set, there are two different ways to communicate to each screen
via the IR Remote. If the setting for the ‘IR Control’ within the ‘MULTI-DSP’ menu is set to
‘Normal’, then the IR remote control cabling is being utilized for communication. In order to
communicate to each screen individually, hold down the ‘Remote ID Set’ button on the
remote control, tap the number of the ID that you want to communicate with, then release
the Remote ID Set button. To test if this was done correctly, press the MENU button and
the OSD should now only appear on the display in which the remote control is
corresponding to. Also, more information on this is located within the User’s Manual.
To communicate to each display over the RS232 connection, make sure that the first display
(monitor ID 1) has its IR control set to ‘Primary’, while all others are set to ‘Secondary’.
When this is set, press the ‘Display’ button and the Monitor ID and Target ID should come
up in the left corner of each screen. Use the [+] and [-] buttons on the remote to change the
Target ID to the desired display you wish to communicate with then press ‘Display’ again. If
the menu is then pressed, the OSD menu should appear on the screen of the desired ID.
7.
Use the TileMatrix feature to setup the 2x2 Video Wall. The Tilematrix feature of the NEC
Display allows for one image to be expanded and displayed over a 2x2 Video Wall Setup.*
This is accessed through the OSD (On-Screen Display) Controls under the “MULTI-DSP”
main menu icon. Under the TileMatrix sub-menu, enable the feature and set the necessary


