English-8
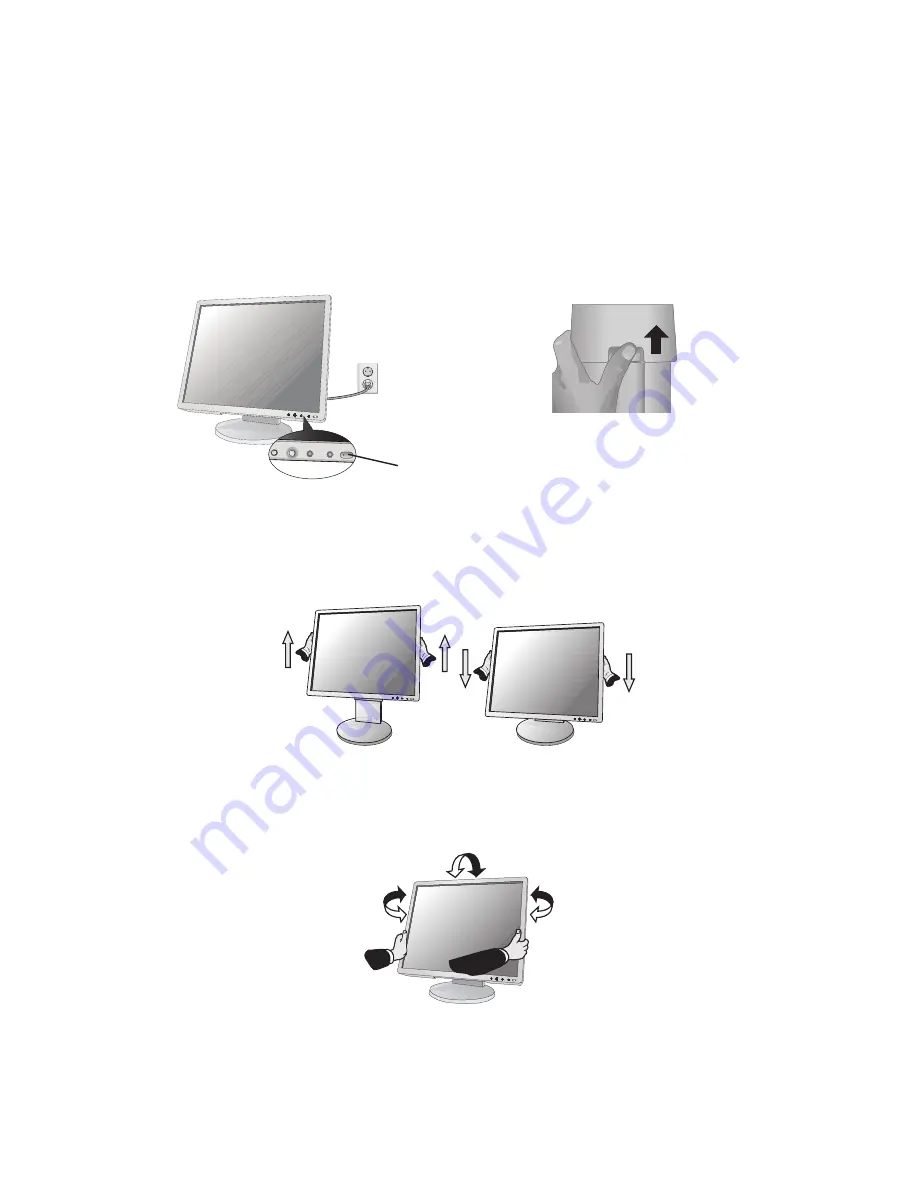
8. Connect the power cord to the power outlet (
Figure E.1
).
NOTE:
If you have difficulty removing the cable cover, please push the lower opening upward to remove it, as show in
Figure E.2
.
NOTE:
Please refer to
Caution
section of this manual for proper selection of AC power cord.
9. Turn on the monitor with the front power button and the computer (
Figure E.1
).
10. No-Touch Auto Adjust automatically adjusts the monitor to optimal settings upon initial setup for most timings.
For further adjustments, use the following OSD controls:
• Auto Adjust Contrast (Analog input only)
• Auto Adjust (Analog input only)
Refer to the
Controls
section of this User’s Manual for a full description of these OSD controls.
NOTE:
If you have any problems, please refer to the
Troubleshooting
section of this User’s Manual.
Figure E.1
Power Button
Figure E.2
Figure RL.1
Raise and Lower Monitor Screen
The monitor may be raised or lowered. To raise or lower screen, place hands on each side of the monitor and lift or lower to
the desired height (
Figure RL.1
).
NOTE:
Handle with care when raising or lowering the monitor screen.
Tilt and Swivel
Grasp both sides of the monitor screen with your hands and adjust the tilt and swivel as desired (
Figure TS.1
).
NOTE:
Handle with care when tilting and swivelling the monitor screen.
Figure TS.1
Содержание MultiSync EA191M
Страница 1: ...MultiSync EA191M User s Manual ...


