E-29
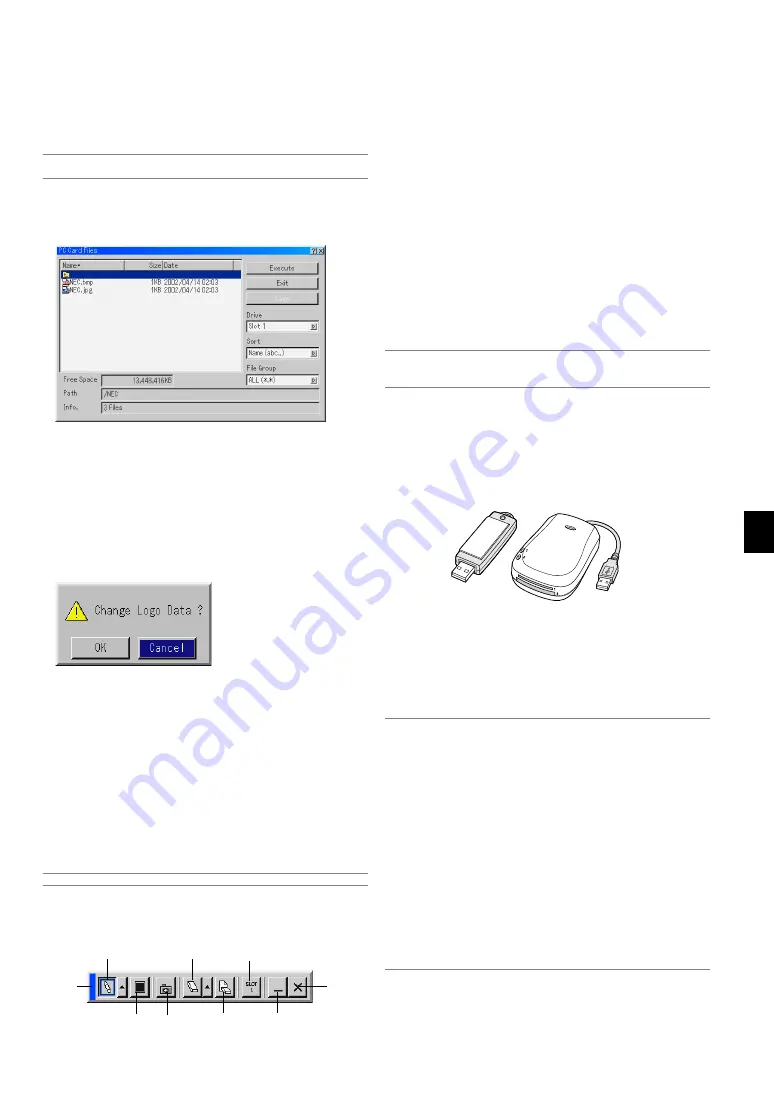
Changing Background Logo
You can change the default background logo using the PC Card Files
feature.
NOTE:
File size must be 256KB or less. Other file formats than JPEG and BMP
are not available.
1. From the menu, select [Tools]
→
[PC Card Files] to display a list of all
the files stored in the PC card so that you can select a file you want to
use as a background logo.
2. The Logo button allows you to select a background logo from graphic
files on a PC card and change to it as the background logo.
3. Use the SELECT
or
button to select a JPEG or BMP file for your
background logo.
4. Use the SELECT
and then
button to select "Logo".
5. Press the ENTER on the remote control or the cabinet. You will get
the confirmation dialog box.
6. Select "OK" and press the ENTER button. This completes changing
a logo for the background.
* Once you have changed the background from the NEC logo to an-
other, you cannot return the logo to background even by using Fac-
tory Default. To do so, repeat the above steps. The NEC logo file is
included on the supplied CD-ROM NEC Projector User Supportware
(Logo/nec_bb_x.jpg).
Making Freehand Drawings on a Projected
Image (ChalkBoard)
The ChalkBoard feature allows you to write and draw messages on a
projected image.
NOTE:
The ChalkBoard feature is available only when a USB mouse is used.
From the menu, select [Tools]
→
[ChalkBoard] to display the ChalkBoard
tool bar that contains the following icons.
Drag
Pen
Eraser
Drive
Exit
Clear
Color
Drag ............ Drags to move the tool bar by clicking on the blue part.
(for USB mouse operation only)
Pen .............. Left-click and drag to draw. Left-click [
] or right-click the
pen icon to display the pen palette containing four lines of
different thickness from which you can select a line you
prefer by left-clicking.
Color ........... Selects a color. Left-click to display the color palette from
which you can select a color you prefer by left-clicking.
Capture ....... Left click to capture and save freehand drawings in the
PC card.
Eraser ......... Left-click and drag to erase part of a drawing. Left-click
[
] or right-click the eraser icon to display the eraser pal-
ette containing four eraser of different thickness from which
you can select an eraser you prefer by left-clicking.
Clear ........... Left-click to clear the drawing completely from the
ChalkBoard screen.
Drive ............ Switches between PC Card slot 1 and 2.
Hide ............. Hides the tool bar by left-clicking. Right-clicking anywhere
on the screen displays the ChalkBoard tool bar again.
Exit .............. Clears the complete drawing and exits the ChalkBoard.
NOTE:
• The menu is not available while you display the ChalkBoard screen.
• Switching slides clears a drawing completely.
Capture
Hide
USB Memory Device or USB Memory Card
Reader Support
The projector is compatible with either a USB memory device or USB
memory card reader which supports the viewer and security features.
• To use a USB memory device or USB memory card reader, connect
the device to the USB port (type A).
• Select one of the Drive icons in the Viewer toolbar, Capture toolbar
and PC Card File setting screen. Up to four drives can be accepted.
• To use a USB memory device as a Protect key for Security function,
select one from the Drive icons in the Security setting screen.
NOTE:
• Some USB memory devices (brands) or USB memory card readers may not
work.
• You cannot use a USB memory device and a USB memory card reader when
connecting a USB mouse to the projector.
Using a USB HUB that allows multiple USB memory devices or card readers
is not supported either.
• Do not do the following while the USB memory device or USB memory card
reader’s access indicator is lit or flashing (while data is being accessed.) Do-
ing so can damage your USB memory device or USB memory card in the
reader. Back up your data in case it will need to be restored.
* Pulling out the USB memory device or USB memory card reader from the
USB port of the projector.
* Pulling out the memory card from the USB memory card reader
* Turning off the main power switch or unplugging the power cable.
• The drive for ”USB 1-4” is displayed only when the USB memory device or
USB memory card reader is connected to the projector. The drive for “USB 1-
4” may be displayed differently from the one in the USB memory card reader.
• Some USB memory devices (brands) or USB memory cards cannot be used
as Protect key for the projector’s Security function.


