87
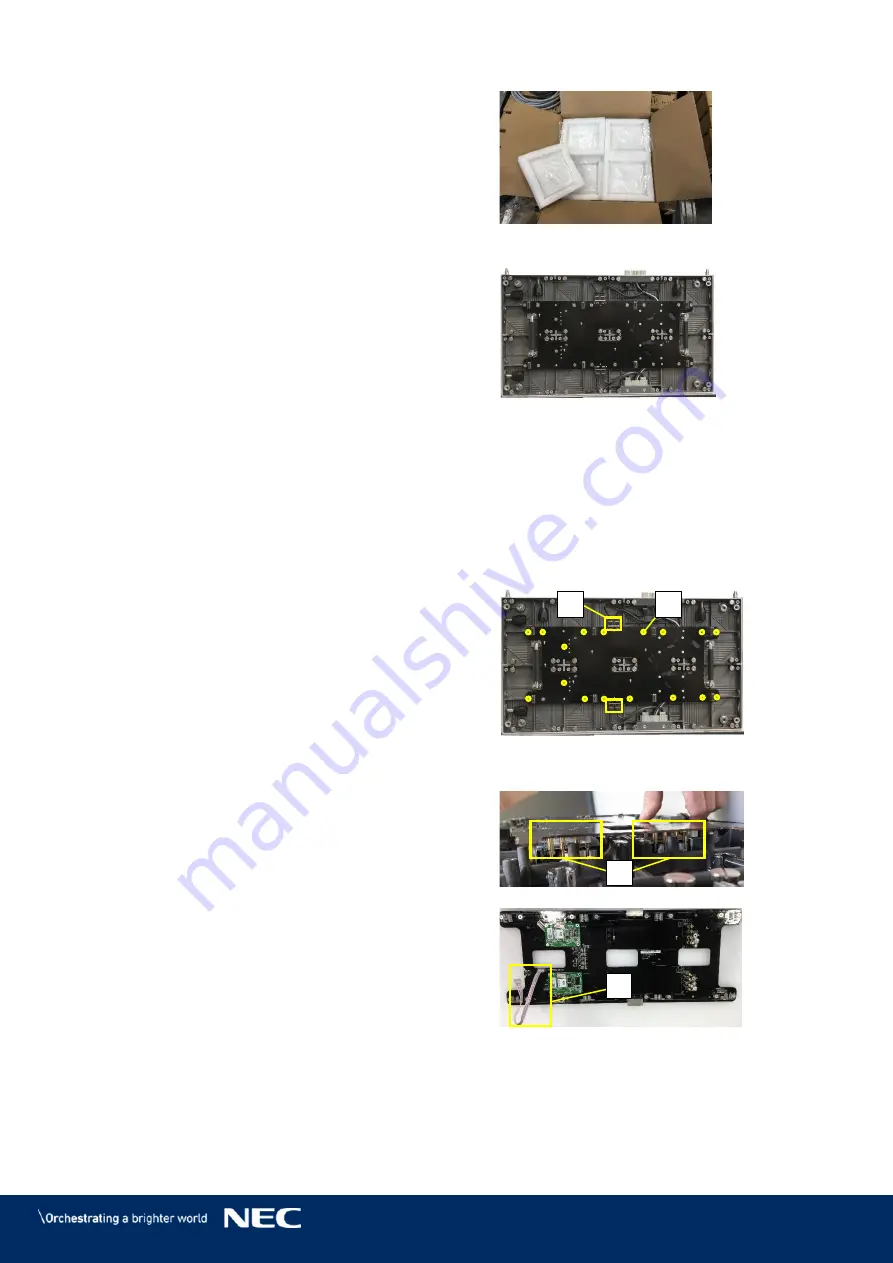
Put the removed Pixel card into its foam
Step 5)
form.
Figure 118: Foam Forms for Pixel Cards
After removing all Pixel cards, the cabinet looks like
shown in Figure 119.
Install new Pixel cards
Take the Pixel cards out of the spare part
Step 6)
package.
Place the Pixel card carefully by hand or
Step 7)
Service Tool to the screen.
Load the calibration data on the new Pixel
Step 8)
card (see 7.4 Update the Calibration Data
after Installing All Pixel Cards).
Figure 119: Cabinet without Pixel Cards
Remove the Hub Board
10.5.2
For servicing the Hub board, you need to remove the Pixel cards first (see 10.5.1).
Disconnect the Ethernet connections (A)
Step 1)
from the Hub board.
Remove the 16 screws (B), which connect
Step 2)
the Hub board to the cabinet.
Figure 120: Screws on Hub Board
Pull the Hub Board straight off the Cabinet.
Step 3)
Be careful not to damage the Power supply
interfaces (C) on the Hub board and the
PSU.
Disconnect the Signal light cable (D) from
Step 4)
the cabinet.
Now you can access the power supply in the
Step 5)
Cabinet and the Receiving cards on the Hub
board.
Re-install the Hub board in reverse order.
Step 6)
Take great care not to bent any connectors.
Figure 121: Removal of Hub Board
A
B
C
D
Содержание LED-FA025i2-220
Страница 61: ...61 Figure 78 Screen Settings for 8 8 Controller...
Страница 91: ...91 Part Name AC terminal Hub For 0 9 mm only CAT cable Mask For 1 5 1 9 2 5 3 8 mm only...
Страница 96: ...96 LED FA015i2 137 Data Connections 15 1 3 LED FA015i2 137 Power Connections 15 1 4...
Страница 97: ...97 LED FA019i2 165 Data Connections 15 1 5 LED FA019i2 165 Power Connections 15 1 6...
Страница 99: ...99 LED FA012i2 220 Data Connections 15 1 9 LED FA012i2 220 Power Connections 15 1 10...


