5-12
1.3 Operational description of OSD control
Each OSD function is available by pressing the buttons (MENU, -, +, AUTO) located on the lower section of
the front bezel.
1.3.1 Function of each button
The basic function of each button (also called a key, but it bears the same meaning) is explained below.
In case of no OSD display, either buttons of MENU, -, + or AUTO may be pressed to display an OSD menu.
1) OSD function control
MENU
: Displays the OSD and selecting the adjusting function by pressing this button or exiting the
OSD after keeping press this button.
-
: Moves the cursor downward to select adjustment item after OSD menu is displayed or the
tab is moved leftward to decrease the adjusting value by pressing this button after the
adjustment function is selected.
+
: Moves the cursor upward to select adjustment item or the tab is moved to the right to
increase the adjusting value by pressing this button.
AUTO
: The auto sync function is activated by pressing this button.
2) Hot key function control
MENU
: Displays the OSD and selecting the adjusting function by pressing this button or
exiting the OSD after pressing this button.
DVI/D-SUB (-)
: An input signal is selected by defining whether it should be picked up from the DVI
connector or the D-SUB connector. Each time this button is pressed directly, a change
takes place between the DVI connector and the D-SUB connector.
+
: The auto contrast function is activated by press this button directly.
AUTO
: The auto sync function is activated by pressing this button.
Note: Unless otherwise specified, the D-SUB input should be used in each inspection.
1.3.2 Procedures for the basic operation
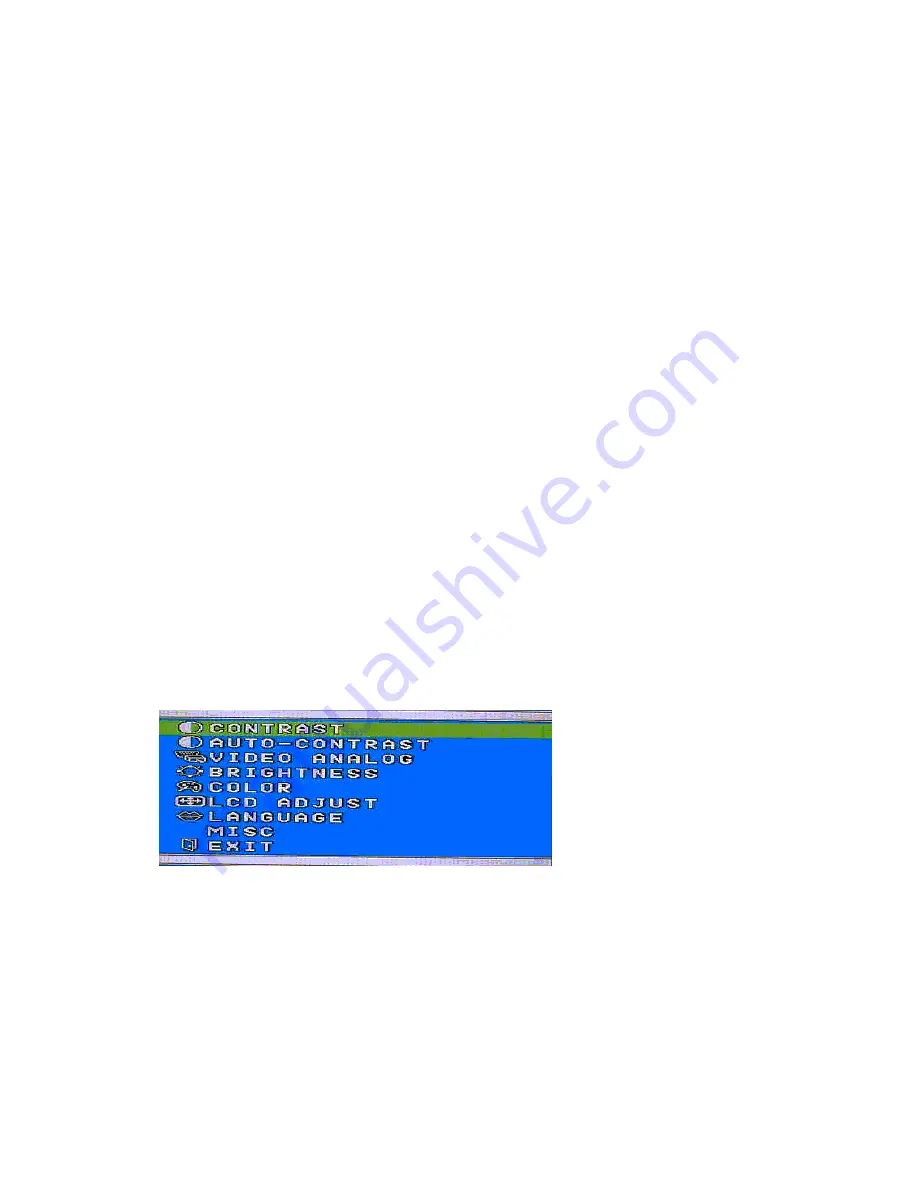
1) Press the MENU button and confirm that the main menu shown below is displayed.
2) The selection tab moves to the way down rolling and up rolling with the -down and +up buttons. When
the adjustment tab has been selected, select the adjustment item by the using the MENU button and
set up the adjusting value with the +right and -left buttons. In case when an adjustment item of
automatic adjustment function (AUTO-CONTRAST or AUTO-SYNC) has been selected, execute this
automatic adjustment by the using the MENU button.
3) When the inspection is over, press the MENU button for a while or select EXIT item to exit from the
OSD menu.
Содержание LCD1920NX BK - MultiSync - 19" LCD Monitor
Страница 4: ...1 1 USER S MANUAL 1 A Version MultiSync LCD1920NX TM ...
Страница 32: ...1 29 English âesky Deutsch Ελληνικά Español Français Italiano Nederlands Polski Русский Türkçe ...
Страница 49: ...3 6 SYMBOL CODE DESCRIPTION 15 79PZ0004 LCD MODULE 19 0 TFT FLC4 15 ...
Страница 51: ...3 8 SYMBOL CODE DESCRIPTION 23 BASE BRACKET HINGE HOLDER LCD1920NX 24 MAC SCREW MB M3 0 4 0L Zn Cc 23 24 ...
Страница 100: ...7 9 2 4 3 Circuit diagram ...
Страница 134: ...SYMBOL Part No for AmTRAN Part No for NMV DESCRIPTION C99 0111 3470 5106 79PZ0059 C M MULTI 47PF 50V NPO 8 12 ...
Страница 146: ...SYMBOL Part No for AmTRAN Part No for NMV DESCRIPTION C99 0111 3470 5106 79PZ0059 C M MULTI 47PF 50V NPO 8 24 ...
Страница 172: ...MODEL LCD1920NX LCD MAIN BD 1 7 SCHEMATIC DIAGRAM 10 1 Schematic Diagram ...
Страница 173: ...MODEL LCD1920NX LCD MAIN BD 2 7 SCHEMATIC DIAGRAM 10 2 ...
Страница 174: ...MODEL LCD1920NX LCD MAIN BD 3 7 SCHEMATIC DIAGRAM 10 3 ...
Страница 175: ...MODEL LCD1920NX LCD MAIN BD 4 7 SCHEMATIC DIAGRAM 10 4 ...
Страница 176: ...MODEL LCD1920NX LCD MAIN BD 5 7 SCHEMATIC DIAGRAM 10 5 ...
Страница 177: ...MODEL LCD1920NX LCD MAIN BD 6 7 SCHEMATIC DIAGRAM 10 6 ...
Страница 178: ...MODEL LCD1920NX LCD MAIN BD 7 7 SCHEMATIC DIAGRAM 10 7 ...


