Hardware Installation
2-71
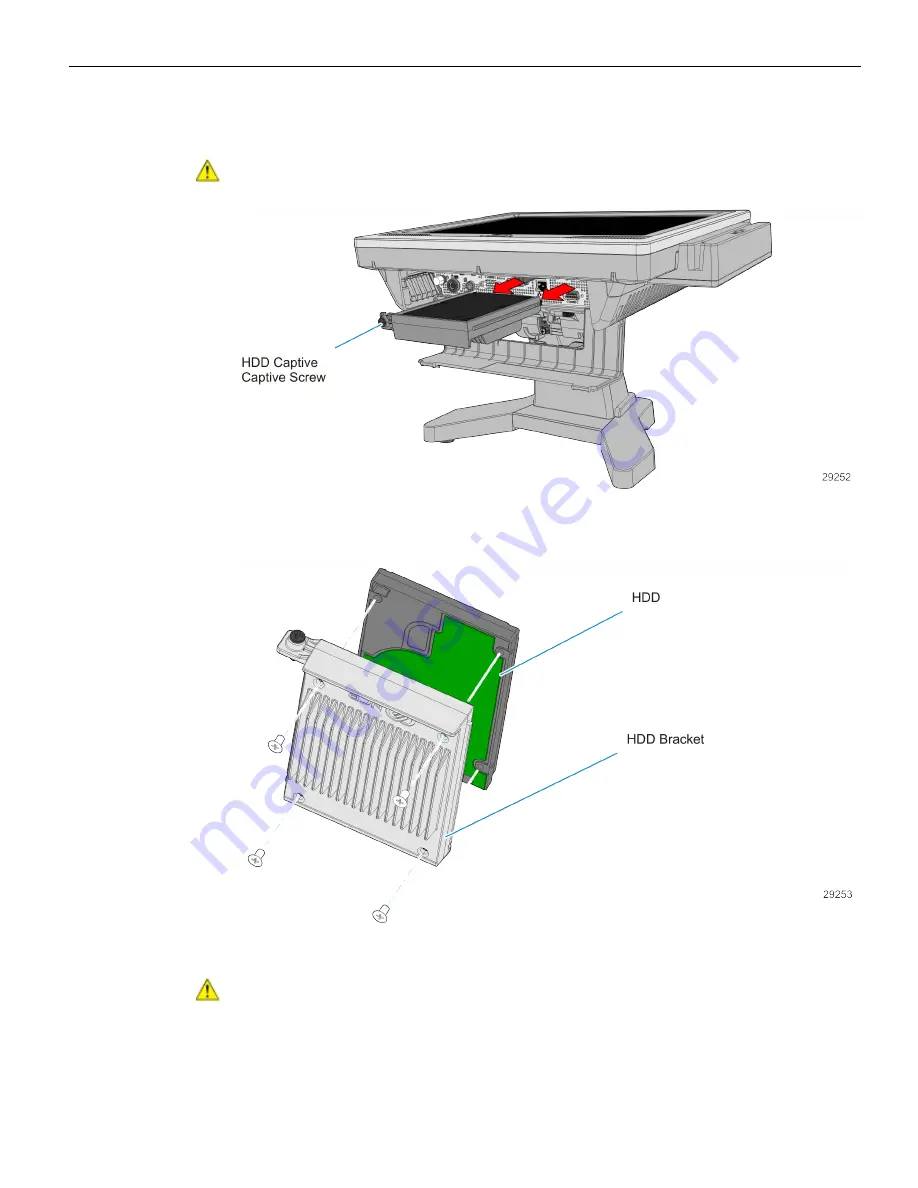
3. Loosen the captive screw in the HDD Bracket.
4. Remove the HDD from the Terminal.
Caution:
Exercise care in handling the HDD. Do not drop or stack it.
5. Remove the HDD from the HDD Bracket (4 screws).
6. Install the new HDD in the HDD Bracket.
Caution:
Do not over tighten the screws.
7. Insert the HDD in the terminal and secure it with the Captive Screw.
Содержание RealPOS 25
Страница 1: ...USER GUIDE NCR RealPOS 25 7610 POS Release 2 0 B005 0000 2017 Issue D...
Страница 10: ...x...
Страница 17: ...Product Overview 1 7 Note Touch Customer Displays are NOT supported via 7610 K452 and 7610 K453...
Страница 18: ...1 8 Product Overview Operator Controls Power Switch The power switch is located behind the Cable Cover...
Страница 40: ...1 30...
Страница 58: ...2 48 Hardware Installation Cable Connections Using DVI Interface...
Страница 60: ...2 50 Hardware Installation Cable Connections Using DVI Interface...
Страница 62: ...2 52 Hardware Installation Cable Connections Using DVI Interface...
Страница 63: ...Hardware Installation 2 53 Installing a 5982 6 5 Inch LCD 1 Remove the Base from the Display 2 screws...
Страница 74: ...2 64 Hardware Installation Dual Display Clone 1 Select Multiple Displays...
Страница 82: ...2 72...
Страница 94: ...3 84...
Страница 102: ...4 92...
Страница 112: ...6 102...
Страница 116: ...7 106...
Страница 121: ...2x20 Customer Display Interface 8 111 CP437...
Страница 122: ...8 112 2x20 Customer Display Interface CP852...
Страница 123: ...2x20 Customer Display Interface 8 113 CP858...
Страница 124: ...8 114 2x20 Customer Display Interface CP866...
Страница 125: ...2x20 Customer Display Interface 8 115 CP932...
Страница 126: ...8 116...
Страница 132: ...9 122...
Страница 134: ...A 2 Powered Serial Port Settings Motherboard 1 x...
Страница 135: ...Powered Serial Port Settings A 3 Motherboard 2 x...
Страница 136: ......
Страница 138: ...B 6 Display Color Adjustment Windows 7 Select Color Enhancement on a Windows 7 system...


