2
7761-K003 (Wall Mount with No Expansion)
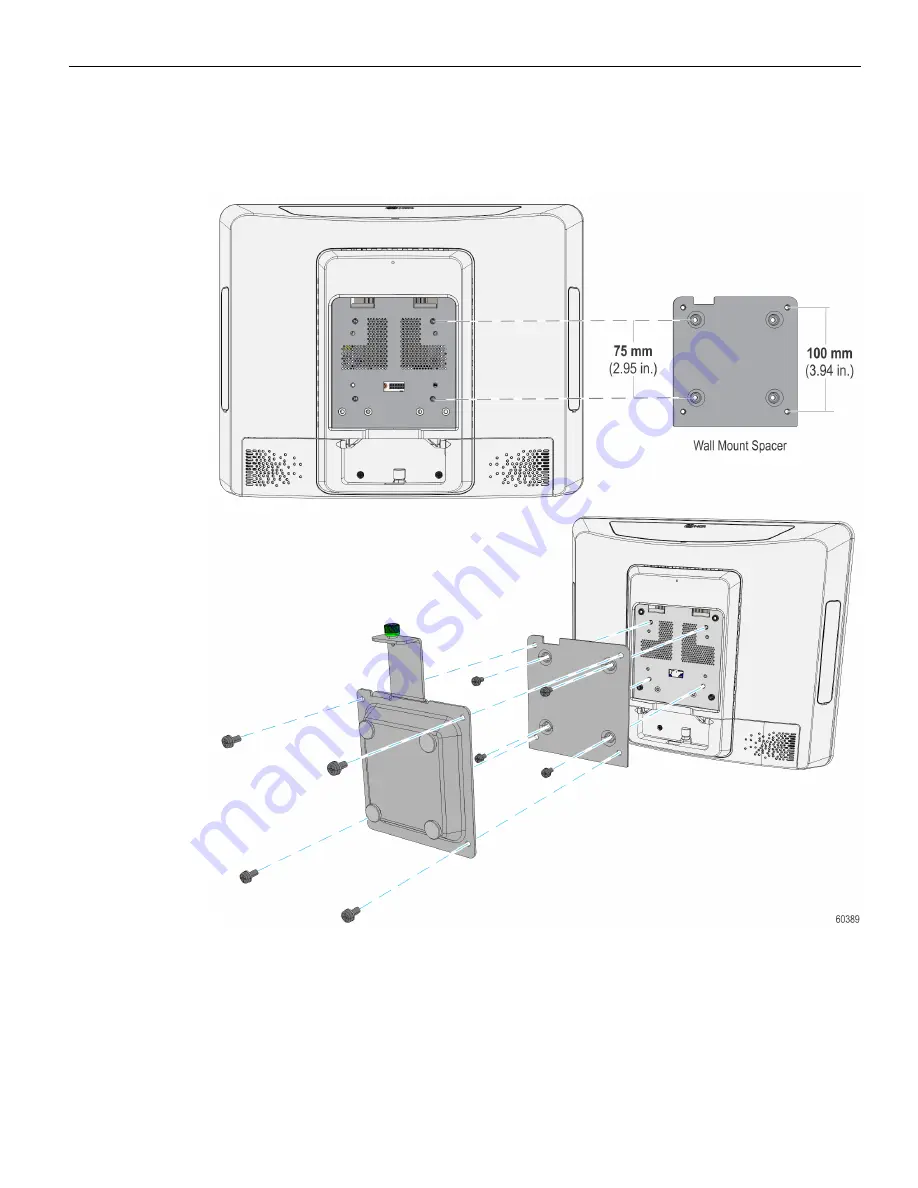
Installation Procedure
1. Install the Wall Mount Spacer and Wall Mount Bracket (with thumbscrew facing up)
onto the back of the terminal and secure with the supplied screws (8).
Страница 1: ...KIT INSTRUCTIONS Wall Mount with No Expansion 7761 K003 Issue B...
Страница 2: ...th NCR NCR s copyright notice must be included It is the policy of NCR Corporation NCR to improve products as new technology components software and firmware become available NCR therefore reserves th...
Страница 3: ...ii Revision Record Issue Date Remarks A Jan 2016 First Issue B May 2017 Removed reference to VESA...
Страница 4: ...Wall Mount with No Expansion Introduction This kit provides a wall mount for the P1535 P1235 POS with no expansion module...
Страница 5: ...K003 Wall Mount with No Expansion Installation Procedure 1 Install the Wall Mount Spacer and Wall Mount Bracket with thumbscrew facing up onto the back of the terminal and secure with the supplied sc...
Страница 6: ...te with UP arrow pointing up to the vertical surface using lag screws 4 Make sure you install the screws into the studs or that you use hardware of similar strength Use the bracket as a template to ma...
Страница 7: ...ansion 3 Hang the terminal on the Mount Plate a Insert the mushroom studs on the Wall Mount into the elongated slots on the Mount Plate b Slide the terminal down to lock the brackets together c Secure...
Страница 8: ...side the Mount Plate a Loosen the screws 2 of the Mount Plate b Hook the Power Supply Bracket over the screws Re tighten the screws Note To install the Power Supply bracket independently from the Moun...
Страница 9: ...Wall Mount with No Expansion 2 Insert the power supply into the bracket AC Connector on top 3 Install the front cover of the bracket 4 Secure the bracket with the thumbscrew and the AC Power Cord with...