Wall Mount - Serial Expansion
3
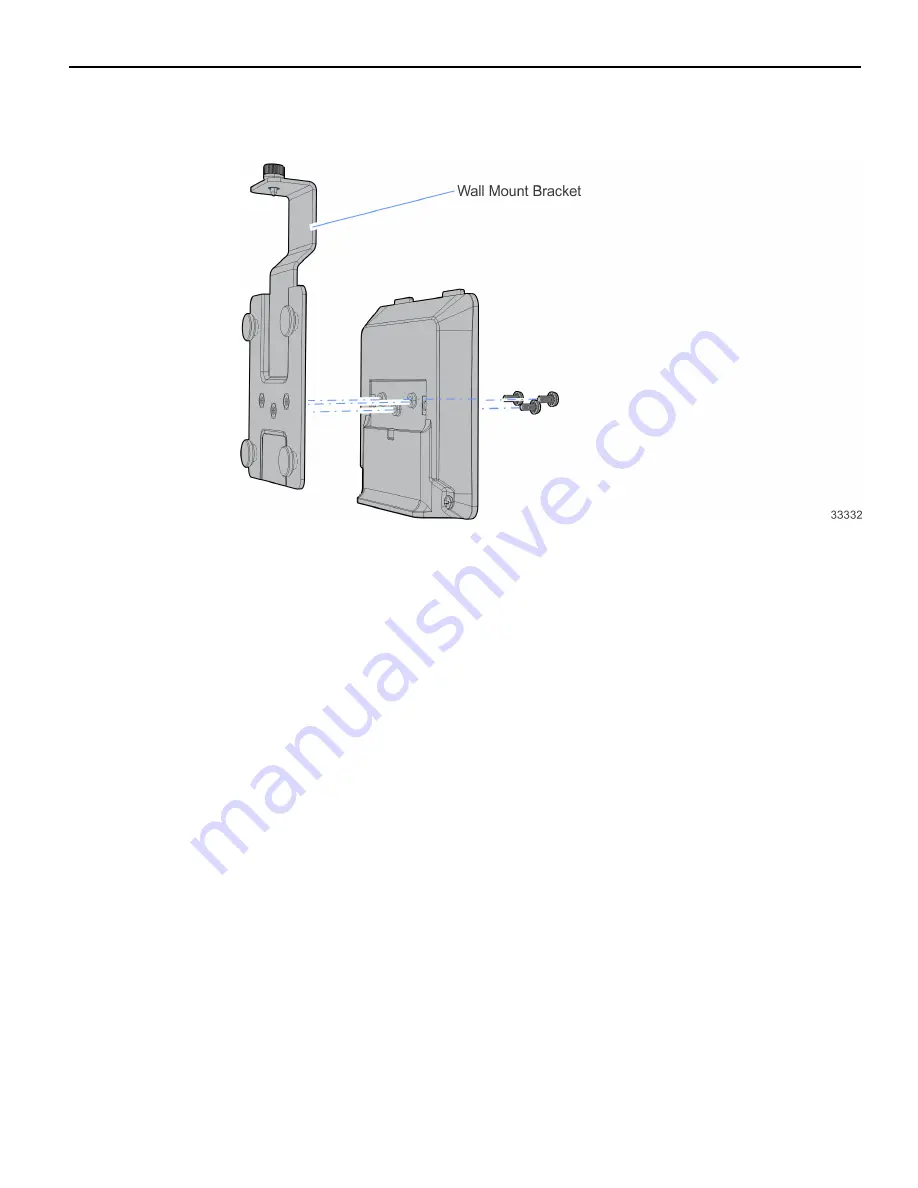
3. Install the Wall Mount Bracket (with the thumbscrew facing up) onto the Serial
Expansion Module with the supplied screws (3).
4. Reinstall the Serial Expansion Module onto the terminal.
Страница 1: ...Kit Instructions Wall Mount Serial Expansion 7702 K322 Issue B...
Страница 2: ...must be included It is the policy of NCR Corporation NCR to improve products as new technology components software and firmware become available NCR therefore reserves the right to change specificati...
Страница 3: ...Wall Mount Serial Expansion This kit provides components to secure a RealPOS XR7 POS that is configured with the Serial Expansion feature to a vertical surface...
Страница 4: ...e screws into the studs or to use hardware of similar strength Use the Wall Mount as a template to mark the location of the holes or use the dimensions shown below 2 Remove the Serial Expansion Module...
Страница 5: ...Mount Serial Expansion 3 3 Install the Wall Mount Bracket with the thumbscrew facing up onto the Serial Expansion Module with the supplied screws 3 4 Reinstall the Serial Expansion Module onto the ter...
Страница 6: ...Wall Mount a Insert the mushroom studs on the Wall Mount Bracket into the elongated slots on the Wall Mount b Slide the terminal down to lock the Wall Mount Bracket and Wall Mount together c Secure t...