7360-K079 Remote Scanner Bracket
5
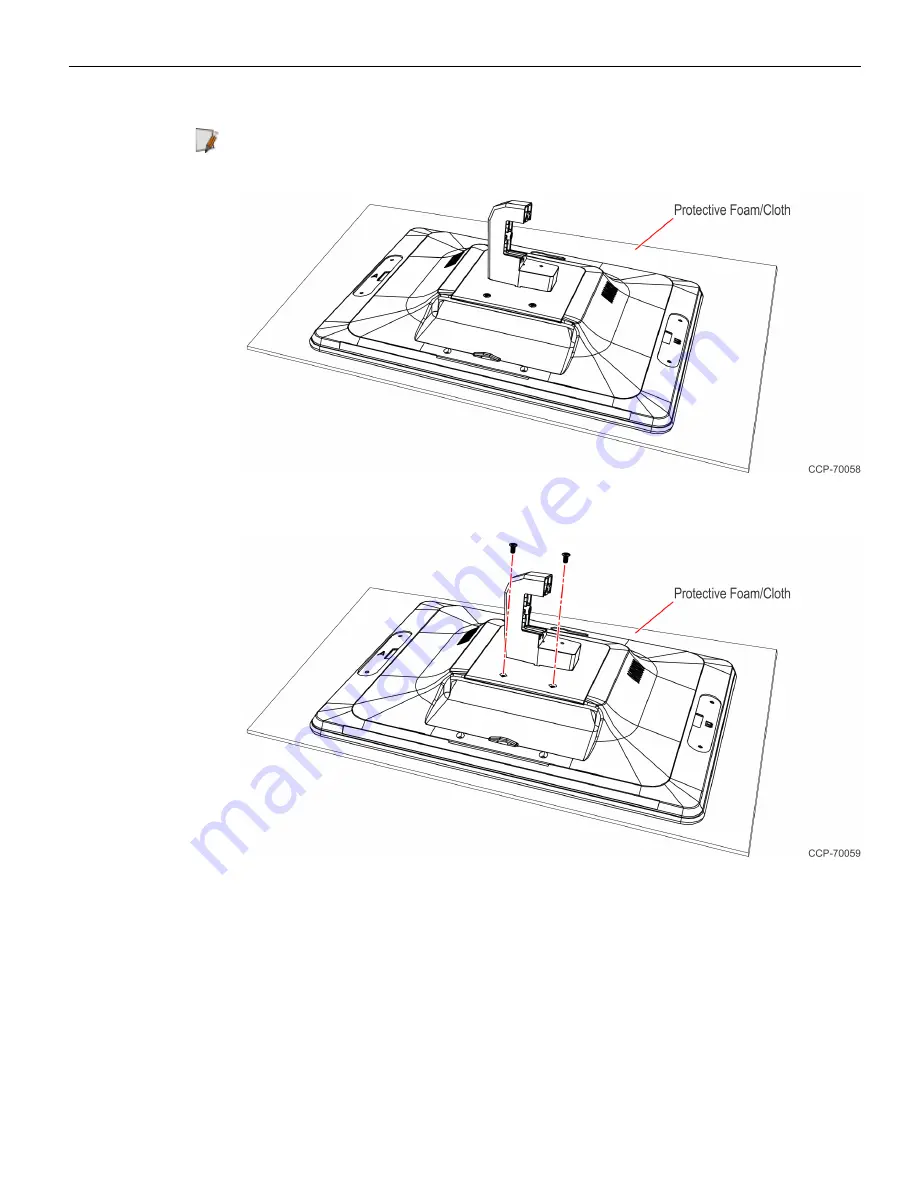
7. Lay the display face down on a flat surface.
Note:
Always use a soft material (cloth, foam) to protect the display screen when
placing the display face down.
8. Remove the two screws.
Страница 1: ...Kit Instructions Remote Scanner Bracket 7360 K079 Issue B...
Страница 2: ...der the terms and conditions of an agreement you have with NCR NCR s copyright notice must be included It is the policy of NCR Corporation NCR to improve products as new technology components software...
Страница 3: ...i Revision Record Issue Date Remarks A Dec 2016 First issue B Jun 2017 Updated IP PDF template...
Страница 4: ...Remote Scanner Bracket The kit contains the components to add a bracket to mount the Remote Customer Scanner to the secondary display of the NCR FastLane SelfServ Checkout 7360 Kit Contents...
Страница 5: ...ation Procedure 1 Attach the RCS Mounting Bracket to the 7360 RCS Mount Assembly using two M4 nuts 2 Place the Remote Customer Scanner on the RCS Mounting Bracket 3 Slide the Scanner in the direction...
Страница 6: ...ner to the 7360 RCS Mount Assembly using a screw 5 Route the Remote Customer Scanner Cable as shown and secure with cable ties 6 Remove the Secondary Display from the back of the Tri Light Pole a Disc...
Страница 7: ...Scanner Bracket b Remove the two screws from the Right hand Brace c Remove the Right hand Brace then remove the Secondary Display from the Tri Light Pole Note The Left hand Brace is attached to the b...
Страница 8: ...079 Remote Scanner Bracket 5 7 Lay the display face down on a flat surface Note Always use a soft material cloth foam to protect the display screen when placing the display face down 8 Remove the two...
Страница 9: ...he 7360 RCS Mount Assembly on the back of the display using the two M4 x 8 screws included in the kit 10 Reinstall the Secondary Display to the back of the Tri Light Pole a Align the embossed feature...
Страница 10: ...7360 K079 Remote Scanner Bracket 7 b Align the pins of the Right hand Brace with the holes on the Left hand Brace c Secure the Braces using two screws...
Страница 11: ...8 7360 K079 Remote Scanner Bracket 11 Reconnect the Display Cables to the back of the Secondary Display 12 Insert the Remote Customer Scanner Cable down the Tri Light Pole...
Страница 12: ...7360 K079 Remote Scanner Bracket 9 13 Use a key to unlock the tower 14 Raise the terminal...
Страница 13: ...15 Remove the 7879 Scanner from the bucket area a Lift and remove the Scale Plate from the 7879 Scanner b Grasp the front of the 7879 Scanner and lift up then grasp the back of the Scanner and slide...
Страница 14: ...emote Customer Scanner Cable and route as shown d Connect the Remote Customer Scanner Cable to USB Port C or Port D on the back of the 7879 Scanner 16 Reinstall the 7879 Scanner into the bucket area 1...