background image

21

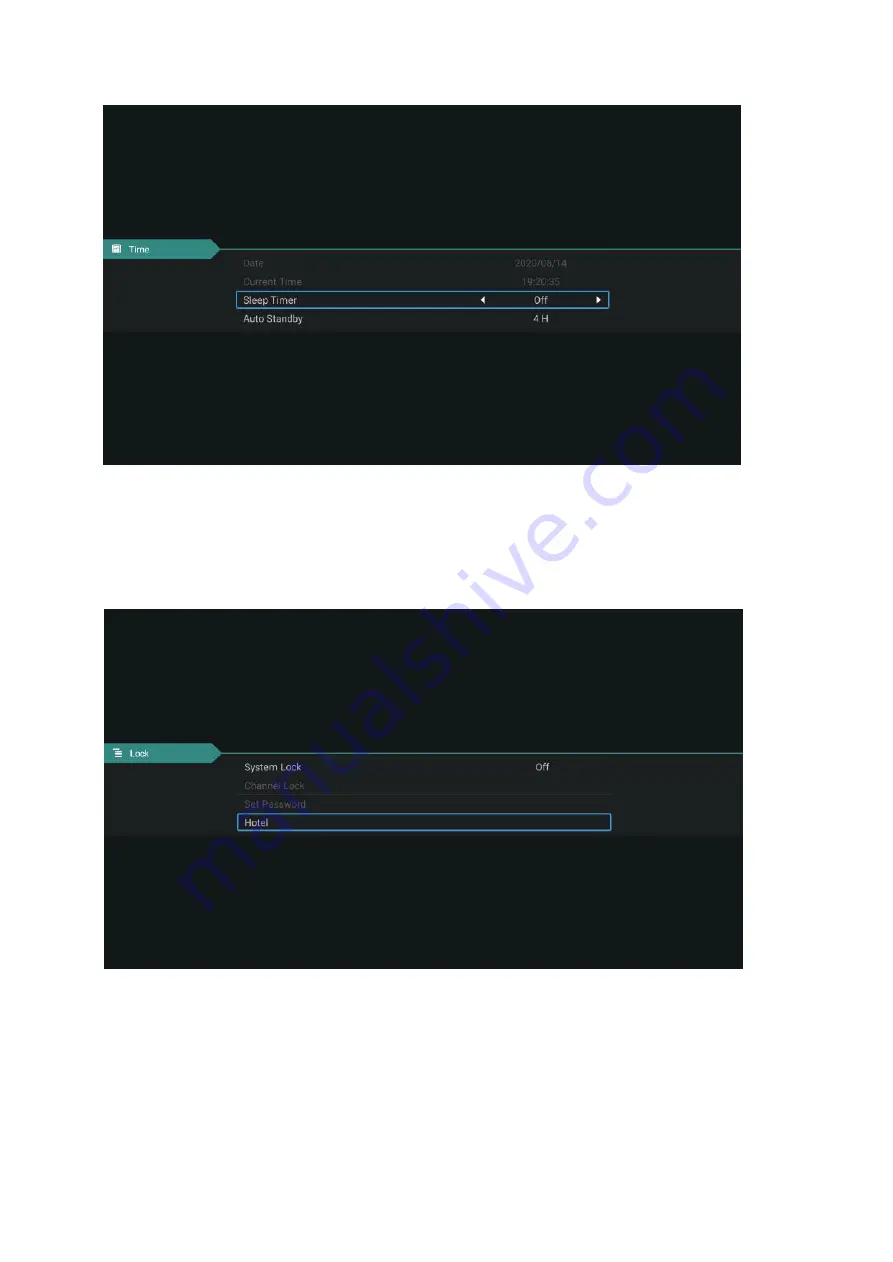
Time

Date/Current time:

This is not adjustable, when there is a signal when the automatic calibration.

Sleep time:

The system provides OFF/10/20/30/60/90/120/180/240min sleep time to choose from.

Auto Standby: 

The TV will shift to Standby mode in 3H/4H/5H/OFF as you can choose. 

Lock

System Lock

Choose with the up and down keys,then open the lock function with left and right keys. Please remember that initial
password is 0000.If you want to adjust password, you firstly should select option of set password and then input old
password, new password. When new password you input again is correct and make sure above operation, this

mean that you successfully reset password. When you want to shield some programs you don’t like, please select
the option of block program and input the channel number.

Содержание NCE24SMTDVDBT9.0

Страница 1: ......

Страница 2: ...number sticker provided to be placed on the equipment is damaged modified or removed a NCE reserves the right to reject claims for any services or work where the Customer requesting such work or serv...

Страница 3: ...nce from or to other products and or sources j Inability of the product to read or output damaged or copied media g removal and reinstallation of an internal component not performed by a factory autho...

Страница 4: ...are left on the screen for extended periods of time Such damage to the screen is not covered by the warranty Please ensure that the precautions in any documentation supplied with your product are foll...

Страница 5: ...w Remote control NCE Smart DTV warranty terms conditions First Time lnstallation 14 Select input source 15 TV MENU 15 Picture 17 Sound 18 Channel 19 Function 20 Time 21 Lock 21 Media Operation 23 Blue...

Страница 6: ...Power Supply 05...

Страница 7: ...Installation 06...

Страница 8: ...Use and Maintenance 07...

Страница 9: ...Important Safety Instructions 08...

Страница 10: ...Important Safety Instructions gently 09...

Страница 11: ...he OSD menu is active this button functions as down control for the menu 2 MENU This button activates the OSD menu If a sub menu is active pressing this button will return selection to the previous me...

Страница 12: ...Names of each part Back View 11 EARPHONE COAX AV IN AV L IN AV R IN USB RF IN CVBS OUT L LINE OUT R HDMI1 ARC DC IN HDMI2 RJ45...

Страница 13: ...guage in DVD mode 15 YELLOW button used for TXT DTV and TV D SETUP DVD mode setup 16 BLUE button used for TXT DTV and TV D MENU Menu buttons in DVD mode 17 SLEEP button setting the TV to turn off auto...

Страница 14: ...T SHIFT A B Repeats various sections of a playback S MENU turning on off the menu in your browser and applications RECODER Press to record program Repeat Repeat mode selection in DVD mode HOME Return...

Страница 15: ...ontains language settings and network settings Language settings you can set the TV operating language Network settings you can set according to the connection wireless network settings WIFI connectio...

Страница 16: ...he left or right button to select the corresponding input source and press the Enter button to enter the relevant source TV MENU Press the menu button to display the menu press the up and down keys to...

Страница 17: ...and then use the left and right keys to adjust the color temperature to cool normal warm Noise Reduction Press up down key to select Noise Reduction option Press left right key to select Off Low Mediu...

Страница 18: ...umes of the left speaker and the right speaker are not the same you can adjust the Balance to suit your personal preference Auto Volume Surround Select the Auto Volume option then turn the Auto Volume...

Страница 19: ...o store and also select the color and sound system Press the up and down keys to select the Search option press the left and right button to search and you can modify the frequency by fine tuning choo...

Страница 20: ...ts Audio Language can switch the first audio language through the left and right direction keys the default is English Second Audio Language can switch the second audio language through the left and r...

Страница 21: ...ose with the up and down keys then open the lock function with left and right keys Please remember that initial password is 0000 If you want to adjust password you firstly should select option of set...

Страница 22: ...el number that is powered on by default Channel Type Max Volume Press to select the max volume option and set the parameters through the left and right keys Default Volume Press to select the default...

Страница 23: ...you can make some operation through the left and right keys Video Through the upper and lower keys selected video icon press the confirmation key to confirm then press right to the folder press the c...

Страница 24: ...APP applications music sports Different regions will receive different push content Settings Pick the image of setting and Press OK button to appear the interface of the android setting The following...

Страница 25: ...are 4 types of connection select focus and enter the password in the list of connections use without password protected connection manually add hot name to connect and point to point direct connectio...

Страница 26: ...sion number information Software Update You can set the software local upgrade automatically prompt to update the version automatically upgrade the latest version automatically download the latest ver...

Страница 27: ...Here you can check the local memory capacity and current usage Date time The date and time can be updated automatically based on the network or time zone or you can turn off automatic updates and upda...

Страница 28: ...28 Reset Here you can reset the unit After reset the data of Android system will be cleared Bluetooth Enter the bluetooth setting menu for bluetooth search and pairing operation...

Страница 29: ...29...

Страница 30: ...30...

Страница 31: ...31...

Страница 32: ...nd L W H MM Net Dimension without stand L W H MM Packaged Dimension L W H MM Net Weight KG Gross Weight KG Signal Support USB Format for Movie max display resolution 1920 1080 USB Format for Photo max...

Страница 33: ...P N 4 16 0001 FOR CUSTOMER SUPPORT PLEASE CONTACT YOUR DEALER OR EMAIL NCEWARRANTY NCE COM AU Monday to Friday AEST 8 00AM 5 00PM...

Страница 34: ......

Отзывы: