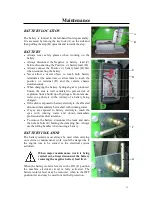
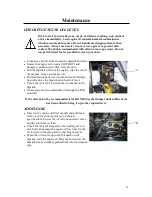
NC SW6 Скачать руководство пользователя страница 30


30 

Maintenance 


BEFORE YOU START 


• 

Clean the machine before starting any maintenance. 

• 

Allow the machine to cool. 

• 

Ensure strict cleanliness is observed at all times. 

• 

Do not smoke near any fluids. 

• 

Beware of scalding from hot oils, check oil temperature before draining. 

• 

When checking fluid levels on dumper, ensure the machine is switched off, positioned 
on firm stable ground, with the handbrake applied. The area should be well ventilated, 
and free from all sources of possible contamination (i.e. quarry dust, grinding sparks or 
similar). Never check fluid levels near naked flames or hot surfaces. 


CLEANING 


• 

When cleaning it is preferable to use a biodegradable cleaner. 

• 

Do not use solvents or similar products, which can damage rubber and plastics. 

• 

Take care to clean the oil and fuel tank filler necks. 

• 

Areas around drain plugs should also be cleaned. 

• 

Never direct a pressurised water jet on electrical equipment. 
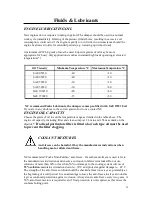
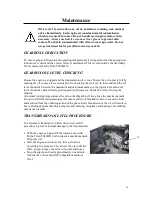
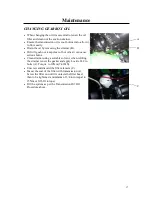
 

CHANGING OILS 


• 

Ensure the machine is on solid level ground. 

• 

Only carry out lubrication tasks in a clean area free of contamination of the air. 

• 

Draining of oils is best carried out when they are warm NOT HOT. 

• 

Clean up spilt oil immediately. 

• 

Use only fresh oils of the recommended type and grade. 

• 

Contaminated water / Fluids / Oils / Filters must be disposed of in an environmentally 
safe way. 


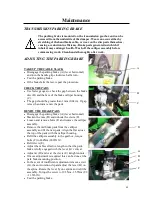
WORKING ON THE HYDRAULIC SYSTEM


Never attempt to tighten or loosen hydraulic fittings when the engine is 
running. Hydraulic oil leaks at high pressure can easily penetrate the skin. 
If the skin is penetrated with hydraulic oil, seek expert medical attention 
immediately. 


BRAKE FLUID


Under NO circumstances must conventional brake fluid be used or added 
to the brake system. This will cause damage to the rubber sealing 
components and may cause the brakes to fail. 


ALL COVERS AND PANELS MUST BE FITTED BEFORE DUMPER IS USED. 

Содержание SW6

Страница 1: ...E INSTRUCTION MANUAL NC ENGINEERING HAMILTONSBAWN LTD 2 Killyrudden Road Hamiltonsbawn Co Armagh BT61 9SF Tel 028 38871970 Fax 028 38870362 email sales nc engineering com www nc engineering com REVISI...

Страница 2: ...ore it is very important that your new equipment operations and instructions are explained to you by a Dealer Representative following delivery of your equipment This will explain the operating contro...

Страница 3: ...rations used in this manual are correct at the time of issue NC reserves the right to make changes in this manual at any time without prior notice Copyright 2010 NC Engineering Hamiltonsbawn Ltd All r...

Страница 4: ...17 6T PST Maintenance Manual 19 Service Record 20 Service Schedules 21 Torque Settings 24 Fluids and Lubricants 25 Safety Information 28 Maintenance 29 Battery 30 Air Cleaner 31 Coolant System 32 Engi...

Страница 5: ...n designed and manufactured in accordance with the following European Standards 2006 42 CE Machinery Directive Measured Sound Power Level 102 dB LWA Guaranteed Sound Power Level 103 dB LWA Net Install...

Страница 6: ...ise Level Declaration The noise levels are measured according to ISO6395 1998 The noise level of this machine is LWA 103dB A LPA 85dB A LWA A Weighted sound power level LPA A Weighted sound pressure l...

Страница 7: ...Arm aha m s 2 4 The above figures are for reference purposes only It is the responsibility of the employer to access vibration exposure based on the actual site conditions and operating practices at t...

Страница 8: ...ximum Automatic safety lock to hold skip in a central position when travelling Heavy duty fully welded skip with 8mm thick steel base reinforced around top for greater strength Operated by a multi axi...

Страница 9: ...tio 18 6 1 Engine compression see Note 2 Direction of rotation viewed from front crank shaft pulley end Clockwise Valves 4 per cylinder Valve tip clearances measured cold inlet 0 19 to 0 27mm 0 007 to...

Страница 10: ...urately achieved failure to tighten accurately to the specified angle could result in the bolt preload being incorrect this will lead to eventual failures It is good practice to replace all bolts that...

Страница 11: ...sioner retaining bolts 22 26 16 19 Item Torque Setting Angle Nm lbf ft Oil sump retaining bolts A 22 26 16 19 Oil sump plug B 40 60 30 44 Item Torque Setting Angle Nm lbf ft Rocker cover retaining bol...

Страница 12: ...ector retaining 22 26 16 19 bolts Item Torque Setting Angle Nm lbf ft Water temperature sender switch 22 26 16 19 Item Torque Setting Angle Nm lbf ft Cold start advance switch 22 24 16 19 Item Torque...

Страница 13: ...etaining bolts 22 26 16 19 Item Torque Setting Angle Nm lbf ft High pressure fuel pipes 25 29 19 22 Item Torque Setting Angle Nm lbf ft Power take off PTO pump bolts SAE A M10 bolts 43 51 32 38 SAE B...

Страница 14: ...Nm lbf ft Starter motor retaining bolts 43 51 32 38 Item Torque Setting Angle Nm lbf ft Alternator retaining bolts 47 34 7 Item Torque Setting Angle Nm lbf ft Oil cooler drain plug 20 25 15 18 Item T...

Страница 15: ...ed it can be obtained from the NC Spares department Ref No Symbols Description 1 Engine Oil Level 2 Engine Coolant Level 3 Fuel and Water Sedimentor 4 Transmission Oil Level 5 Axle Service Points 6 Ax...

Страница 16: ...e Point Drive Shafts 17 Transfer Box Oil Level 18 Transmission Oil Filter 19 Oil Pressure Filter 20 Axle Oil 21 Engine Oil Filter 22 Fuel Filter 23 Check Drive Shaft Bolts 24 Air Filter Element 25 Tra...

Страница 17: ...be obtained from NC spares department Part No Symbol Descriptions DEC 1920 001 Tyre pressure and wheel nut torque DEC 1920 002 Hydraulic Oil DEC 1920 003 Fuel DEC 1920 004 Stay clear of tipping area D...

Страница 18: ...DEC 1920 014 Recommended brake fluid DEC 1920 015 Recommended brake fluid Circular DEC 1920 016 No repairs to ROPS DEC 1920 017 Stay clear of pinch points DEC 1920 018 Read manual Apply handbrake bef...

Страница 19: ...ance of the machine ensure the service tasks are carried out at the correct intervals see service schedules If the machine is working in adverse conditions then the service intervals should be reduced...

Страница 20: ...500 Hr Date Hour Reading First 5000 Hr Date Hour Reading First 6000 Hr Date Hour Reading First 6500 Hr Date Hour Reading First 7000 Hr Date Hour Reading First 7500 Hr Date Hour Reading First 8000 Hr D...

Страница 21: ...lant or Oil Leaks Check Fuel Pre Filter Water Sedimentor Check for contamination Drain Oil Filter Change All Hoses Condition Check Radiator Clean Fan Belt Condition Check Fuel Filter Change Air Cleane...

Страница 22: ...el Check Transmission Oil Change Transmission Filter Change Transmission Strainer Clean Drive Shafts Security Functional Test Forward Reverse Gear Change operation Check Transmission Main Line Pressur...

Страница 23: ...Steering Ram 2 No Points Note First 50 Hr Service only HYDRAULICS SYSTEM Service Points Fluid Levels Operation 10 Hr 100 Hr 500 Hr Return to tank filter element Change Pressure filter element Change S...

Страница 24: ...3 4 117 87 9 16 14 3 13 16 170 125 5 8 15 9 15 16 238 175 3 4 19 1 1 8 407 300 7 8 22 2 1 5 16 650 480 1 25 4 1 1 2 970 715 1 1 4 31 7 1 7 8 1940 1430 1 1 2 38 1 2 1 4 3390 2500 METRIC Grade 8 8 Bolts...

Страница 25: ...If a diesel particulate filter is fitted a low ash type oil must be used to prevent the filter clogging COOLANT MIXTURES Anti freeze can be harmful Obey the manufacturers instructions when handling ne...

Страница 26: ...ceptible to the abrasive nature of dirt particles Increased wear will almost certainly lead to greater leakage uneven running and poor fuel delivery WATER Water can enter the fuel through poor storage...

Страница 27: ...YP SAE90 BP Energear Hypo 90 AXLE OIL NC recommend Mobil 424 International Specification API GL4 M2C 41B 134D JD20C 23 Litres Alternative Suppliers 1 Shell Spirax S4 TXM BP Tractran 10 NC recommend Mo...

Страница 28: ...uchs Renolit EP2 grease Alternative Suppliers 1 GENERAL GREASE POINTS Multi purpose grease 1 Do not mix different type of oils grease as they may react with each other If topping up use the same type...

Страница 29: ...lift heavy objects on your own WHEN REPAIRING Safety prop tipped skips Always wear eye protection Always wear ear protectors when in a noise environment Release any pressure from the hydraulic system...

Страница 30: ...d drain plugs should also be cleaned Never direct a pressurised water jet on electrical equipment CHANGING OILS Ensure the machine is on solid level ground Only carry out lubrication tasks in a clean...

Страница 31: ...cinity of a battery being charged If the skin is exposed to battery electrolyte the affected skin must immediately be washed with running water If eyes are exposed to battery electrolyte wash the eyes...

Страница 32: ...leaning or replacing is to check Never run the engine with the filtration elements removed from the air cleaner Squeeze the solids ejector C to remove material from the pre cleaner drop tube To servic...

Страница 33: ...coolant to drain into a suitable container Flush the system by pouring clean water into the expansion tank filler neck Refit the bottom hose and tighten the clip Dispose of used coolant in an environm...

Страница 34: ...ller cap B and add clean fresh oil of the correct grade see technical specification Ensure the oil is from an clean source and the container is clean Check the oil level frequently when adding oil too...

Страница 35: ...e Through the filler point fill the engine with the recommended oil to the MAX mark on the dipstick Wipe up any spilt oil and replace the filler cap ensuring it is secure Operate the engine until the...

Страница 36: ...ears Early breakdown of the oil will result in heavy sludge deposits that block oil ports and build up on splines and bearings Overfilling may cause oil leaks TRANSMISSION OIL FILL PROCEDURE It is ext...

Страница 37: ...f hot oil as it can cause serious burns Clean strainer using a suitable solvent when refitting the strainer renew the gasket and apply Loctite 242 to bolts A Torque to 10Nm 7 4lbf ft Unscrew and disca...

Страница 38: ...d to 25km h 15mph If it is necessary to tow the dumper for distances in excess of 1 5 kilometres 1mile the drive shafts to each axle must be disconnected To prevent oil starvation and possible seizure...

Страница 39: ...park brake is engaged and that one pair of wheels is blocked on each side Ensure the skip is in the lowered position and locked in the forward position Ensure the brake fluid reservoir is full and th...

Страница 40: ...gap should be greater than 1mm 0 04 in If gap is less than 1mm renew the pads RENEW THE BRAKE PADS Disengage the parking brake A lever horizontal Slacken the nuts D and unhook the clevis E Loosen and...

Страница 41: ...third gear Make sure the brake pedals are engaged push down hard on the brake pedal and select forward drive If the dumper starts to move forward during the test immediately apply the foot brake and...

Страница 42: ...urate oil level checking At the drive head casing remove fill level plug A Oil should be level with the bottom of the fill level hole If necessary top up with the recommended axle oil Clean and refit...

Страница 43: ...max and min decal shows the operator the correct level The pump incorporates a load sensing valve for the steering and also has two outlets one for the steering and one for the main system A return t...

Страница 44: ...cap fitted to seal them Fit new valves pumps motors filters etc if all the ports have not been plugged Use dirty containers for oil storage Use dirty containers or funnels for filling the hydraulic s...

Страница 45: ...C other filters may be of lesser quality and lead to increased wear in the hydraulic components resulting in oil leaks SUCTION STRAINER FILTER Empty the tank according to the above procedure The sucti...

Страница 46: ...ck hydraulic oil level and top up as required Fill the fuel tank to prevent condensation forming inside the tank and contaminating the fuel Store the machine on flat level ground which is not liable t...

Страница 47: ...ve the exhaust lagging as this is a temperature resistant material If the exhaust is to be removed always ensure it is refitted with lagging of the following minimum specification Must be able to with...

Страница 48: ...48...

Страница 49: ...49...

Страница 50: ...harts are designed to identify causes through a process of elimination starting with the simplest and most easily rectified faults There are many reasons why the dumper may malfunction Due to the leve...

Страница 51: ...the air intake and exhaust intake for blockage or obstruction remove as required Check the air filter elements for signs of blocking replace as required Fuel drain return line blocked or not connected...

Страница 52: ...and connected to the top of the fuel tank Check the fuel inlet restriction Maximum inlet restriction to the fuel transfer pump must not exceed 100mm Hg 4 Hg Injection pump timing incorrect If the pump...

Страница 53: ...ure that the alternator is functioning correctly and charging the battery No electrical connection to the starter solenoid Check voltage to solenoid Crankshaft rotation restricted Manually turn the en...

Страница 54: ...as required Fuel is aerated Check the fuel system for loose connections and possible air ingress points Rectify and bleed the fuel system Fuel lift pump not operating correctly fuel supply inadequate...

Страница 55: ...e of diesel used Refer to Fluids Lubricants section for recommended diesel fuels If the fuel is suspect verify by operating the engine with clean fuel from a temporary tank Inlet and exhaust valve cle...

Страница 56: ...ly restricted Check replace the fuel filter s Check fuel lines for restriction Fuel is contaminated or incorrect grade of diesel used Refer to Fluids Lubricants section for recommended diesel fuels If...

Страница 57: ...diesel fuels If the fuel is suspect verify by operating the engine with clean fuel from a temporary tank Inlet and exhaust valve clearances set incorrectly Set the valve clearances to the recommended...

Страница 58: ...rom a temporary tank Injection pump timing incorrect If the pump has recently been removed and replaced the timing could be incorrect if the correct removal procedures were not followed The timing can...

Страница 59: ...ep face and hands well clear of pressurised fluid and wear protective glasses If fluid penetrates your skin seek medical help immediately Fuel filter s blocked fuel supply restricted Check replace the...

Страница 60: ...or Remove extra injector sealing washer Inlet exhaust valve clearances set incorrectly Set the valve clearances to the recommended clearances Injection pump timing incorrect If the pump has recently b...

Страница 61: ...d or incorrect grade of diesel used Refer to Fluids Lubricants section for recommended diesel fuels If the fuel is suspect verify by operating the engine with clean fuel from a temporary tank Fuel fil...

Страница 62: ...netrates your skin seek medical help immediately Fuel tank cap vent breather blocked Inspect rectify as required Replace cap if necessary Fuel is aerated Check the fuel system for loose connections an...

Страница 63: ...gine mounts Refer to correct installation procedure and torque figures Inlet exhaust valve clearances set incorrectly Set the valve clearances to the recommended clearances Engine compression low in o...

Страница 64: ...clean the injector If the problem still persists the injector must be checked by a FIE specialist or replace with new Worn or malfunction fuel injection pump FIP Injection pump not delivering fuel Ch...

Страница 65: ...ct if the correct removal procedures were not followed The timing can only be checked by a FIE specialist using the correct equipment One or more injector worn or malfunctioning White blue smoke at op...

Страница 66: ...ion pump FIP Injection pump not delivering fuel Check for operation of the FIP The FIP must be taken to a local FIE specialist to have the fuel delivery timing checked Ensure that all obvious causes h...

Страница 67: ...ank Intake air or exhaust leaks Refer to Charts A13 A14 Engine compression low in one or more cylinders Check the engine compression Injection pump timing incorrect If the pump has recently been remov...

Страница 68: ...leaks in the manifold or turbocharger gaskets Look for a cracked manifold Valve guide seals are leaking Replace valve guide stem seals as required One or more injector worn or malfunctioning Check an...

Страница 69: ...the lubricating oil change intervals Excessive leaking out of the breather tube system blocked Check the breather tube areas for sign of lubricating oil loss If necessary replace the breather gauze Lu...

Страница 70: ...ft pump leaking Repair or replace the fuel lift pump One or more injector worn or malfunctioning Check and externally clean the injector If the problem still persists the injector must be checked by a...

Страница 71: ...Review reduce the lubricating oil change intervals Pressure switch or gauge fault Verify the pressure switch is functioning correctly Lubricating oil filter blocked Change lubricating oil filter Revie...

Страница 72: ...Look for reduced viscosity from dilution with fuel Fuel dilution in lubricating oil can originate from fuel injection pump driveshaft seal or fuel transfer pump Review reduce the lubricating oil chan...

Страница 73: ...ine and components for seal gasket or hose connection leaks Make sure all hose clips are in good condition and torqued to the recommended figure Overheating or compression gasses leaking resulting in...

Страница 74: ...ith water Temperature gauge sensor faulty Verify that the gauge and temperature sensor are correct Thermostat faulty incorrect or missing Check replace thermostat Air or combustion gasses in the cooli...

Страница 75: ...ct Thermostat faulty open not sealing Check replace thermostat Coolant not flowing by temperature sensor A total coolant loss may result in the gauge showing a low temperature initially Check coolant...

Страница 76: ...box Check selector lever is engaging the gears on the gearbox turret Check handbrake sensor switch Check transmission oil level Check Action 1 Is there noise when selecting direction YES Check 3 NO Ch...

Страница 77: ...ure setting 15 Is pump being driven by converter YES Check pump pressure NO Renew damaged parts 23 Is the noise present when in neutral or when in gear NEUTRAL Check 24 IN GEAR Check 27 16 Are clutch...

Страница 78: ...n YES Renew worn parts NO Check 31 31 Are dog teeth gear worn YES Renew NO Check 32 32 Are selector rod detent springs broken YES Renew NO Check 33 33 Are the selector rods worn or broken YES Renew NO...

Страница 79: ...NO Ensure that clutch is disengaged when dump pedal is pressed 41 Are steel chips embedded in the bronze YES Continue using chips will either embed blow bronze or be rejected NO Check 42 42 Are the sy...

Отзывы: