1 0
1 5
-P ress th e
button the sc reen w ill display:
-When th e menu displays on th e scree n, pres s the
b utton ag ain to exit.
-P ress
to e xit all m enus.
MENU
M ENU
EXIT
Pict ure mod e
Contrast/Br ightness/Sharpness/Tint/Color
Press up or do wn bu tton to selec t it ,the n pres s left o r right butto n to se t the p icture mode
as Perso nal, S tanda rd, Dynamic or Sof t.
-P ress u p or down bu tton to selec t Cont rast/B rightness/Sh arpne ss/Tin t/Colo r,then press
le ft or rig ht but ton to adjust .
-T he Co ntrast/Bright ness/S harpn ess/C olor can be a djuste d from 0-100 .
-T he Tin t can b e adju sted f rom -5 0 to 50 .
M AIN M ENU
Onc e the i nitial p rogram ming is ente red it is
retain ed in memo ry unti l chan ged, th e
c an alw ays b e oper ated u nder th e sam e
cond itions.
Th e setti ngs wi ll be re tained in the mem ory until the s etting s are c hange d even after
settin g the player to the stand by mod e.
1.Pre ss MENU bu tton.
3.Pre ss MENU bu tton a gain to return to cu rrent s etting item.
4.Pre ss EX IT to c lose th e setting me nu .
Th e unit contai ns different s etting menu s.
TV
Com mon pr oc e dure for init ial s etti ngs
2.Us e the le ft or r ight bu tton o n the remote contro l or VO L- or VOL+ button on the unit t o
sel ect pre ferred page , each page f or setting the value will d isplay. Then press the up or
dow n button on the re mote c ontrol or CH - or CH + button on the un it to se t.
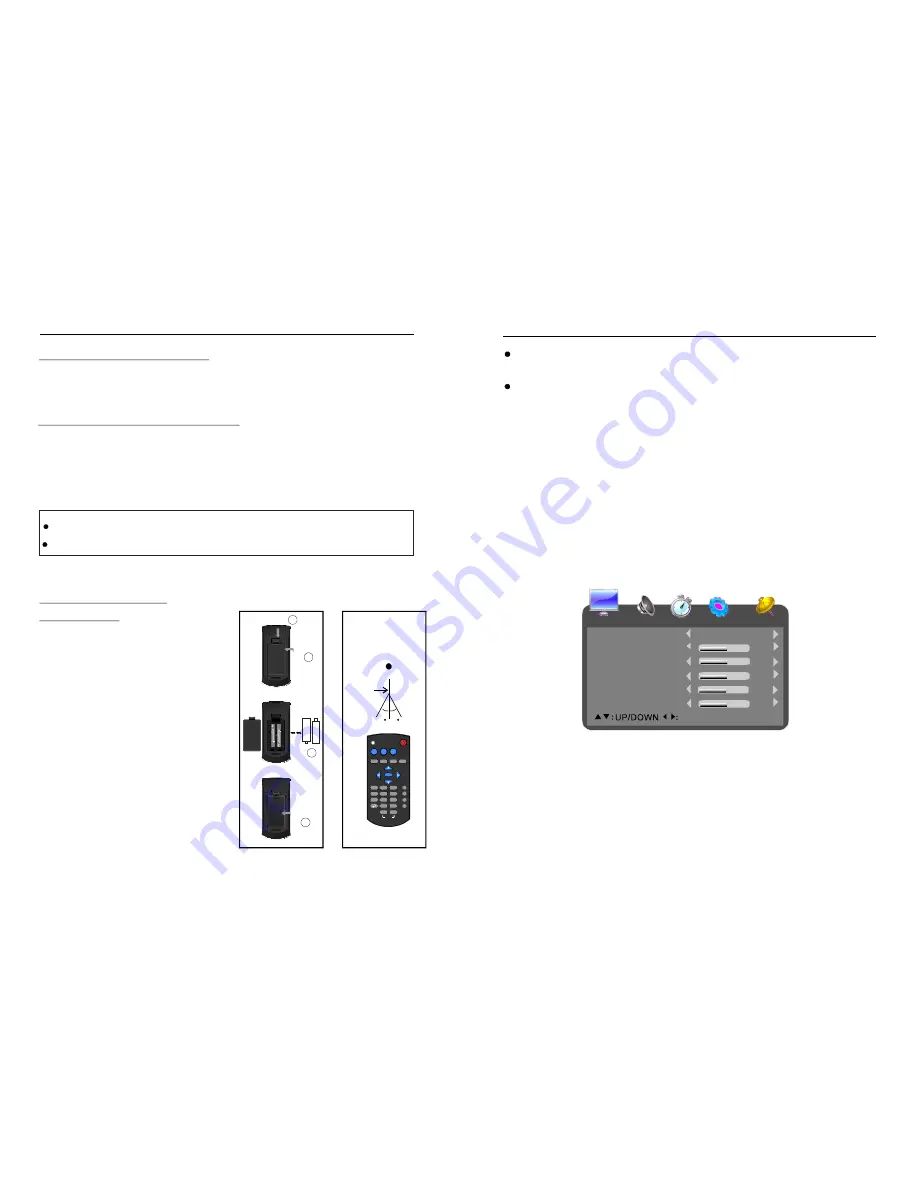
1.PICTURE SETUP
Pic ture Mode
Standa rd
Contrast
50
Brightness
50
Sharpne ss
50
Tint
0
Color
50
ADJUS T
:EXIT
MENU
REMOTE CONTROL
OPERATI ON
Po int the remo te con trol fro m no m ore
th an abo ut 6 m from t he rem ote co ntrol
se nsor a nd wit hin abo ut 60 of the front
of the pl ayer
.
o
(F ig2)
-Th e ope rating distance m ay vary
accordin g to the brightness of the
roo m.
-Do not point bright lights at remote
control sensor.
-Do not place object s between the
rem ote control and th e rem ote c ontrol
sensor.
-Do not use thi s rem ote control while
simultaneously operating the remote
control of any other equipment.
NO TE:
Note:
D o not drop, s tep on or oth erwise impac t the r emote control. This may damag e the
parts or le ad to malfun ction.
If the re mote c ontrol is not going to be u sed fo r a lon g time , remo ve the batter ies.
REMOT E CONTROL PREPARATION
BATTERY INSTALLATION
Ins tall the batte ry as t he foll ow pic ture. Be sure nega tive an d posi tive te rminal s are
pos itione d as in dicate d in th e battery com partm ent.(F ig1 )
SERVICE LIFE OF BATTERIES
-The b atterie s norm ally la st for about one ye ar alth ough this de pends on ho w often, and
fo r how often the rem ote c ontrol is used .
-If the remote contr ol fails to wo rk eve n when it is o perate d nea r the p layer, replac e the
b atterie s.
-Use tw o size AAA b atteri es.
PICTURE
AUDIO
TIME
OPTION
CHANN EL
/
/
Fig1
4
PRESS
3
OPEN
OPEN
+
+
+
+
OPEN
O PEN
O PE N
PUSH
2
1
RE MO TE C ONT ROL
S ENS OR
Fi g2
6m
30
PIC TU R E
MTS
ZOO M
ME N U
SLE EP
E PG
EX IT
EN TER
1
3
4
5
6
8
9
0
V OLU ME
IN FO
C H +
C H-
TV /AV
2
3
4
5
6
7
7
7
8
8
9
7
7
0
7
7
-
7
7
7
7
MU TE
P OWER
-
+
30
Содержание NT-1001
Страница 2: ......


