background image

8

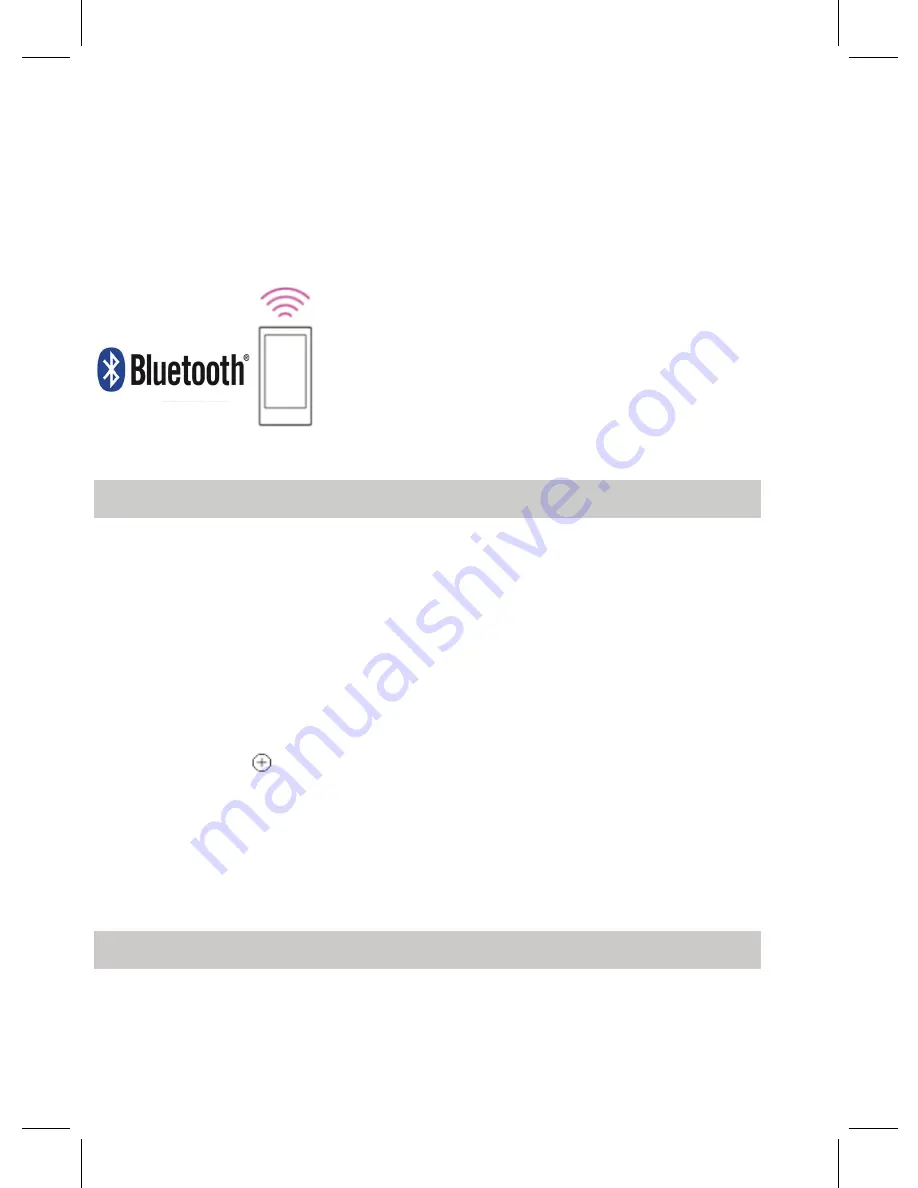
3. Establish a wireless connection from the wireless router to your smartphone. 

If Wi-Fi is not available, you can use data. 


4. Activate the Bluetooth functionality on your smartphone device. 
* The Google Home app uses Bluetooth to identify the headphones. 
5. Open the Google Home app and follow the on-screen instructions to set the initial 
settings for the headphones. 

SETTING UP SIRI ASSISTANT

1.  To set up Siri Assistant on your headphones, you need an iPhone, iPod touch, or iPad
with iOS 12 or later. 
2. To begin, ensure that your iOS device has Bluetooth mode turned.
3. Turn on the headphones. Then hold your unlocked iOS device within a few 
centimeters of the headphones, until the setup screen appears. Tap “Set Up” and follow
the on-screen instructions. 
Note: If the setup screen does not appear automatically, open the Home app on your
iOS device, tap the     , then tap Add Accessory. Tap “Don’t Have a Code or Can’t 
Scan?”, then select the headphones in the Nearby Accessories list. If you do not have the
Home app already installed, you can download it from the App Store.
4. Listen for “Hey Siri” in the Siri & Search settings menu of your iOS device.

VOICE ASSISTANT

1. Connect the unit with your phone with Siri or Google Assistant through Bluetooth.
2. Press the        button on the unit, then speak your requests to the Microphone 

on the unit.

M

Содержание NE-968

Страница 1: ...ease read this user manual carefully to ensure proper use of this product and keep this manual for future reference MODEL NE 968 Voice Controlled Bluetooth Headphones with Google Assistant Siri Assistant ...

Страница 2: ...to excessive heat such as direct sunlight fire or the like Changes or modifications not expressly approved by the manufacturer could void the user s authority to operate this device Usage of controls or adjustments of performance procedures other than those specified herein may result in hazardous exposure Recharge the battery when the device indicates that the battery is low It is recommended to ...

Страница 3: ... used in accordance with the instructions may cause harmful interference to radio communications However there is no guarantee that interference will not occur in a particular installation If this equipment does cause harmful interference to radio or television reception which can be determined by turning the equipment off and on the user is encouraged to try to correct the interference by one or ...

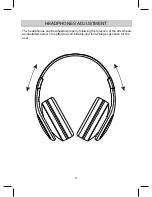
Страница 4: ...The headphones can be adjusted properly following the direction of the arrowhead as illustrated below This affords a comfortable and form fitting experience for the user HEADPHONES ADJUSTMENT 4 ...

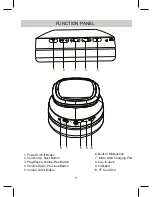
Страница 5: ... Off Button 4 Volume Down Previous Button 3 Play Pause Hands Free Button 2 Volume Up Next Button 7 Micro USB Charging Port 9 Indicator 8 Aux In Jack 6 Built In Microphone 10 TF Card Slot 5 5 MIC CHARGE LINE IN USB TF 10 5 Voice Control Button ...

Страница 6: ...attery incorporated in this product is not user replaceable A Before first time use charge approximately 2 hours until the unit is completely charged B Recharge and store the unit within the temperature range of 5 C 35 C 40 F 95 F C Do not charge longer than 24 hours Excessive charging or running the unit until the battery fully drains will damage battery Battery life will be extended if you keep ...

Страница 7: ...the Button to refuse the incoming call Press the Button twice to redial the last dialed phone number NOTES The latter one inserted will be selected as a playing source If the auxiliary cable is inserted into the AUX IN jack or the TF Card inserted into the card slot the unit will be switched to AUX IN or TF Card mode 7 Press and hold the or button to skip to next or previous track 1 Press and hold...

Страница 8: ...rned 3 Turn on the headphones Then hold your unlocked iOS device within a few centimeters of the headphones until the setup screen appears Tap Set Up and follow the on screen instructions Note If the setup screen does not appear automatically open the Home app on your iOS device tap the then tap Add Accessory Tap Don t Have a Code or Can t Scan then select the headphones in the Nearby Accessories ...

Страница 9: ... you may need to activate your Wifi or phone data streaming Mobile Phone Connect to the hone audio device s MP3 layer mobile phone or iPod iPad etc MP3 AUX IN 2 Insert the other end of the 3 5mm aux cable cable to the AUX IN jack of the unit 4 Play music on external player 1 Insert one end of the 3 5mm auxiliary cable to the AUX OUT jack on the external player While playing Do not insert the TF Ca...

Страница 10: ...g service SYMPTOM POSSIBLE CAUSE POSSIBLE SOLUTION Can t power on Built in battery drained Recharge the battery Volume level of paired connected device is in low level Rise the volume level of the paired connected device Volume level of the connected paired device too high Reduce the volume level of the connected paired device BT not unctioning The external BT device had NOT paired to the unit Pai...

Страница 11: ...ge by DC 5V through Micro USB port NOTE The unit will power off when no any operation no Bluetooth connection no Line In cable or TF Card inserted for 10 minutes SUPPORT If you have problems with your device please consult the instructions detailed in this manual Please also visit us on the web at www naxa com to get the latest news alers and documentation for your device For addition assistance p...

Отзывы: