Naxa NDC-401 Скачать руководство пользователя страница 8


7

2. Basic operation   

2.1 Battery Installation 

Slide  down  the  Battery  Cover  and  insert  two  new  AA  alkaline  batteries.  Align  with 

correct polarity of battery terminals. Close Battery Cover. 
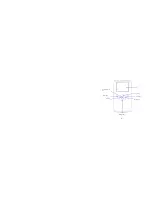
2.2 Use SD card 

Insert  the  SD  memory  card  into  the  SD  card  slot.  Push  it  down  until  the  card  stays 

latched. Do not force – check card’s position according to the position 

mark on the camera.   

Push  and  release  inserted  card  if  you  wish  to  remove  or  replace  the 

card.       

Turn your camcorder OFF before inserting / removing the SD Card. 

- Note that the SD Card has a tiny LOCK switch on the side. Set the 

switch to un-LOCK position to be able to record videos and take still pictures. 

2.3 Power on/off 

In power-off state, press and hold the power key (

) to power ON the camera. 

In power-on state, press the power key (

) to power OFF the camera. 

In  power-on  state,  if  you  leave  the  camera  idle  for  1  minute  it  will  power  off 

Содержание NDC-401

Страница 1: ...0 ...

Страница 2: ...1 Contents Function Description 2 Notice for Use 2 System Requirements 4 Basic operation 7 ArcSof MediaImpression 10 Product Specifications 12 Standard accessories 13 ...

Страница 3: ...l video camera as some parts may cause electric shock 2 Moisture pressure collision and heat may damage this digital video camera Memory and storage 1 SD can be used with a maximum capacity of 16GB 2 When buying an SD card take the digital video camera with you to ensure compatibility 3 SD cards have a write protect switch which can be used to prevent accidental deletion of data When this switch i...

Страница 4: ...ime take out the battery and keep in a dry and dark place Other notes 1 When switching image output between LCD display and video devices be sure to exit from the play or record state 2 Never keep the digital video camera in an extremely hot or damp environment 3 TV programs movies music images and other resources may be protected by copyright therefore without prior permission the shooting use of...

Страница 5: ...luded Operation System Microsoft Windows 2000 XP Vista 7 CPU Above Intel PIII667 or CPU of equal performance Memory Above 128 MB Sound card and display card DirectX8 or above CD ROM 4 speed or above Hard Disk 300 MB or more useable space Other One standard USB 1 1 or USB 2 0 port The camera is compatible with all Mac OS ...

Страница 6: ...5 USB Connector Power Key TV Out Port Resolution Switch SD Card Slot Speaker Strap Holder Microphone LED Light Lens Battery Cover Tripod USB Switch ...

Страница 7: ...6 LCD Delete Key Mode key Up Key Right Key Left Key Down key Shutter Record Key ...

Страница 8: ... the position mark on the camera Push and release inserted card if you wish to remove or replace the card Turn your camcorder OFF before inserting removing the SD Card Note that the SD Card has a tiny LOCK switch on the side Set the switch to un LOCK position to be able to record videos and take still pictures 2 3 Power on off In power off state press and hold the power key to power ON the camera ...

Страница 9: ...r capture mode press left key or right to enter playback mode Press Mode key to exit playback mode and return preview mode 2 5 Change resolution You can select High or Low resolution for recording videos or taking still pictures Slide the Resolution Switch located on camcorder s side and select desired position LCD screen will display Hi or Lo indicating selected resolution 2 6 Record Video In vid...

Страница 10: ...utput After the camera is powered on insert the terminal of the TV cable into the TV output port of the camera and yellow When the inserted memory card is full the LCD will display Memory Full then the camera will stop recording automatically If the SD card is locked when you press the Shutter key the LCD will display Card Locked and the camera will not record Before insertion or removal of card p...

Страница 11: ...r ON 2 Insert camcorder USB connector into computer s USB port or use supplied USB extension cable to make the connection 2 12 Download files from camera to PC 1 After connecting to a PC go to My Computer and open the Removable Disc The photos or videos will be saved in the DCIM 100MEDIA folder in the removable disc Choose the desired photo video in the 100MEDIA folder and copy drag with mouse it ...

Страница 12: ...11 Open USB port Connect camera to PC 1 Connect camera to PC 2 ...

Страница 13: ...ange 120cm infinity Digital focusing 4 Shutter Electronic LCD display 2 0 inch TFT Display Resolution VGA 640 480 QVGA 320 240 White balance Automatic Exposure Automatic File format AVI Video out TV out Storage media SD card max 16GB USB port USB 2 0 port Dimension LxWxH 112 6 mm 58 6 mm 28 6mm Weight 93g Without Battery ...

Страница 14: ...13 Standard accessories Installation CD User manual TV cable ...

Отзывы: