


36
Smart
V 3.0
|
User Manual for Palm OS
®
5
Points of Interest (POI) Editor
You can add custom Points of Interest (POIs) using the POI Editor. Custom POIs can be set to announce when in
close proximity at the
Active POI Settings
screen.
Step 1. Create a Custom POI File
1. Create a New POI File.
• On the
Map
menu, click
POIs
. The
POI Editor
window will open.
• On the
File
menu of the POI Editor, click
New Text File
. The
POI
File Name
window will open.
• Type a name for the file in the
File Name
box and click
OK
. The
file name can be up to eight characters with no spaces.
2. Add a POI to the POI File.
• On the
Edit
menu, click
New
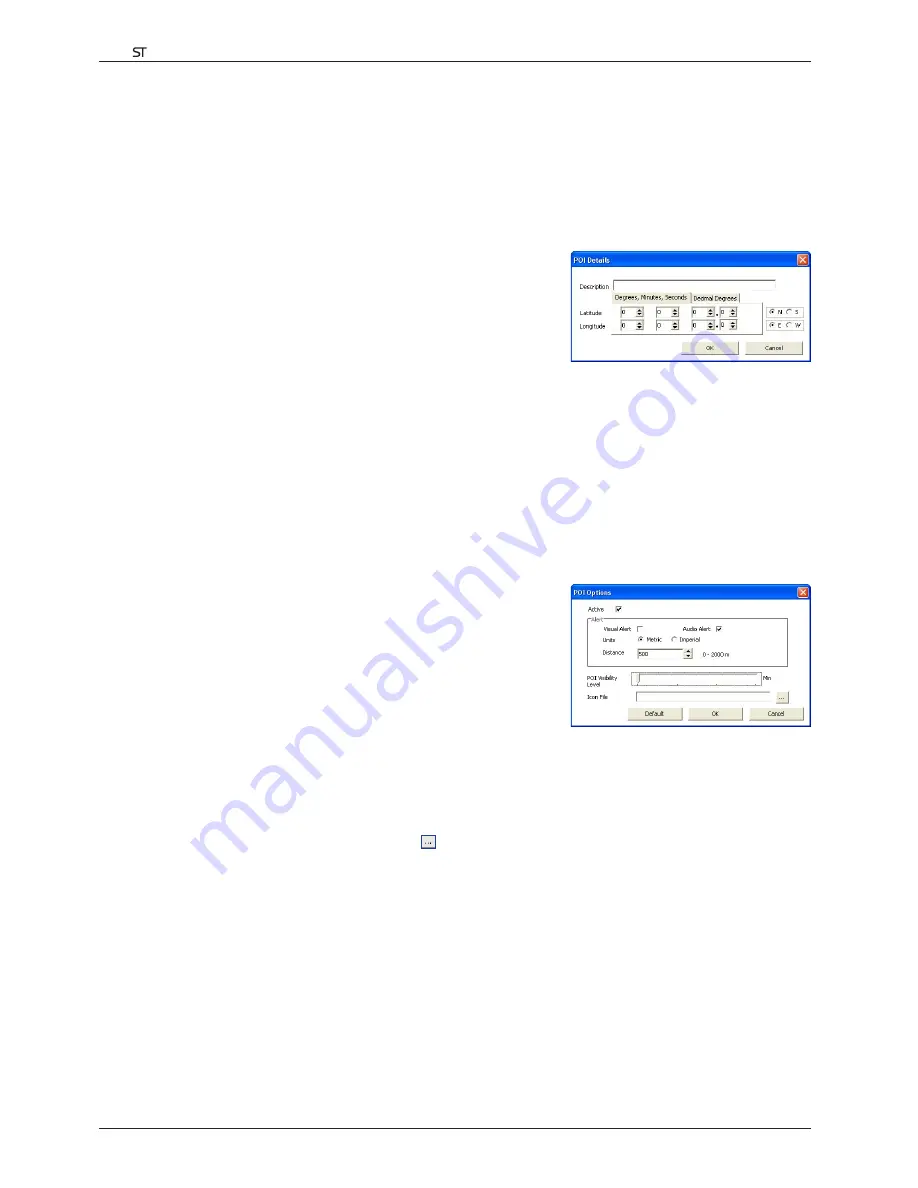
. The
POI Details
window will
open.
• Type a description for the POI in the
Description
box.
• On the
Degrees, Minutes, Seconds
tab, type or select the degree, minute and second of the POI
longitude in the
Longitude
boxes.
• On the
Degrees, Minutes, Seconds
tab, type or select the degree, minute and second of the POI latitude
in the
Latitude
boxes.
3. Repeat step 2 until all POIs have been added to the POI file.
4. On the
File
menu, click
Save
. The POI file is saved.
Step 2. Save Custom POI File to your handheld
1. On the
File
menu, click
Save to Device
. The
POI Options
window will open.
2. Modify the POI settings as required:
• To activate the POI select the
Active
check box. If you do
not activate the POI, you will only be able to configure the
Importance
and
Icon File
settings.
• To enable a visual warning when the POI is in close proximity,
select the
Visual Alert
check box.
• To enable an audible chime when the POI is in close proximity,
select the
Audio Alert
check box.
• To change the units used to measure distance for this POI, select
the
Metric
or
Imperial option
.
• Select the distance from the POI at which the visual warning should display or the audible chime is heard,
from the
Distance
box.
• Move the
Importance
slider left or right to indicate the priority that the POI has where two or more POIs
are in the same locale.
• Type the path to the icon file to be used to represent the POI, in the
Icon File
box, or select the icon file
from your local or network drive clicking , locating the file and clicking
Open
. The file must be a bitmap
(.BMP) graphic with a minimum of 6x6 pixels and a maximum of 32x32 pixels.
3. Click
OK
and follow the prompts. The POI file is saved to the handheld.
• If you want to change the name of the file, edit the name for the file in the
File Name
box of the
POI File
Name
window and click
OK
. The file name can be up to eight characters with no spaces.
Deleting a Custom POI File from your handheld
1. On the
Device
menu, click
Manage POI Files
. The
Manage POI Files
window will open, displaying a list of
custom POI files installed on your handheld.
2. Click the
File Name
or
Size
of the POI file to delete.
3. Click
Delete
. The file is removed from the list, but is not yet deleted.
4. If you want to delete more than one file, go to step 2.
5. Click
OK
and accept the changes. The selected file or files are deleted.
Содержание Smart V3
Страница 1: ...Smart V3 for Palm OS 5 User Manual English ...
Страница 2: ......
Страница 4: ...4 Smart V 3 0 User Manual for Palm OS 5 ...
Страница 41: ...Bluetooth GPS Receiver 4100 4420 4470 User Manual English Edition ...


