LA000510C © 2006 Navman NZ Ltd. All rights reserved. Proprietary information and specifications subject to change without notice
.
Figures
Figure 2-1 Equipment supplied in the Jupiter 20 GPS Development kit
............................. 4
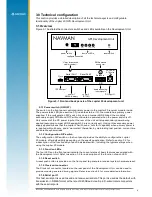
Figure 3-1 Front and back panels of the Jupiter 20 development unit
............................... 6
Figure 3-2 Configuration DIP switch
..................................................................................
7
Figure 3-3 Function LEDs on front panel
...........................................................................
8
Figure 3-4 Pin layout of the clock out connector
................................................................
9
Figure 3-5 Internal layout of the Development Unit
...........................................................
9
Figure 3-6 Jupiter 20 adapter board
..................................................................................11
Figure 4-1 Development Unit test equipment
....................................................................1
3
Figure 5-1 DR interface connector (rear of unit)
................................................................14
Tables
Table 3-1 DIP switch settings
.............................................................................................
7
Table 3-2 Pin functions of the clock out connector
............................................................
9
Table 3-3 Mating connector part description
......................................................................
9
Table 3-4 Pin functionality
.................................................................................................10
Table 3-5 Signals available on the test points
...................................................................10
Table 3-6 Connections J1 (2 mm pitch header) and J2 (2.54 mm pitch header)
..............11
Table 5-1 Gyro input specifications
....................................................................................................15


