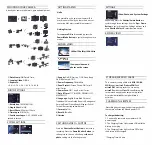
MOUNTING YOUR CAMERA
Attach your camera to helmets, gear and equipment.
+
r
+
e
+
'''
,
<
+•+■
�16
('t+
+
=�
<+t'+•
=
:k-
2)
Date Stamp:
Off/Date & Time
3)
Looping Video:
Off/On
4)
Exposure:
+-2.0/+-1.7 /+-1.3/+-1.0/+-0.7/+-0.3/0
PHOTO SETTINGS
■
1)
Resolution:
1 M/2M/3M/5M
2)
Single Shot:
On/Off
3)
Burst Photo:
3 Photos/1 Photo
4)
Time Lapse:
Off/2s/1 Os
5)
Continuous Lapse:
2,3,5, 10,20,30 or 60
second intervals
SYSTEM SETTINGS
GETTING STARTED
Hello
Congratulations on your new camera! This
user manual will help you learn the basics of
capturing life's most incredible moments!
Getting Started
Turn
camera ON
and repeatedly press the
Power/Mode Button
to cycle through camera
modes.
RECORD VIDEO
1080p/720p 30fps/VGA 30fps
View your videos and
photos on the screen
1)
Sounds:
On/Off, Start-up 1/2/3/None, Beep
On/Off, Volume 0/1 /2/3
2)
Power Frequency:
50Hz/60Hz
3)
Panel Protect
(Screen Saver): Off/1 min/3
mins/5 mins
4)
Power Save:
Off/1 min/3 mins/5 mins
5)
Date
&
Time:
YYYY /MM/DD, DD/MM/YYYY,
MM/DD/YYYY
6)
Language:
English/Simplified Chinese/
Traditional Chinese/Italian/Spanish/Portuguese/
German/Dutch/France/Czech/Magyar/Polish/
Turkish/Russian/Japanese/Korean
7)
Format:
No/Yes
8)
Reset All:
No/Yes
9)Version
CAPTURING VIDEO
+
PHOTOS
Press the
Shutter/Select Button
to start/stop
recording. Press the
Down/Shutter Button
to
take a picture. You can also change
video
and
photo
settings in the Settings menu.
SETTINGS
■
Video, Photo, ••d Sy,tem
s,ttlng,
Repeatedly press the
Shutter/Select Button
to
cycle through three settings. Use the
Up
or
Down
Button
to cycle through the Settings options and
press
Shutter/Select
to select desired option.
RECORD VIDEO
■
.
STORAGE/MICRO SD CARDS
This camera is compatible with
8GB, 16GB &
32GB
capacity
microSD, microSDHC,
and
microSDXC
memory cards. You must use a
microSD
card with a
Class 10
speed rating. We
recommend using brand name memory cards
for maximum reliability in high-vibration
activities.
CHARGING
THE
BATTERY
If recording is occurring when battery reaches 0%,
the camera will save the file and power OFF.
To charge the battery:
1. Connect the camera to a computer or USB
power supply.
2. The Charging Status Light remains ON while the
battery is charging.
3. The Charging Status Light will turn OFF when
the battery is fully charged.
* Charging Time: 4 hours


