52 Venting the Boiler
WARNING
Improper venting of the boiler can result in excessive levels of
carbon monoxide, which can lead to severe personal injury or
death.
This boiler must be vented in accordance with the
“Venting of Equipment” section of the latest edition of the
ANSI Z223.1/NFPA 54 Natural Fuel Gas Code in the USA
and/or the “Venting systems and air supply for boilers“
section of the latest version of the CAN/CGA B149.1 Natural
Gas and Propane Installation Code in Canada, as well as all
applicable local building codes and regulations.
Follow all
instructions and guidelines when venting the boiler. Venting
should be performed only by a licensed professional.
The boiler must be properly vented to ensure a constant supply of
clean intake air and to ensure that exhaust air is properly removed
from living areas. When venting the boiler, follow these guidelines:
●
Do not install the boiler in areas with contaminated air
(containing a high level of dust, sawdust, sand, flour, aerosols,
or any other such airborne contaminants), as contaminants
can cause operational problems. The warranty does not cover
damage caused by contaminants in the installation area. If
you must install the boiler in an area with contaminated air,
use direct venting to supply air from outside the building. We
recommend regular filter cleaning and maintenance in these
areas.
●
For best results, keep the venting system as short and straight as
possible.
●
Locate the boiler as close as possible to the vent termination.
●
Do not connect the boiler vent to a vent for any other gas boiler
or vent stack.
●
For horizontal runs, slope the horizontal section upward toward
the vent termination at a rate of
1
/
4
in per foot (2% slope).
●
Create an airtight seal at each joint in the exhaust and intake air
pipes from the boiler collar to the vent termination.
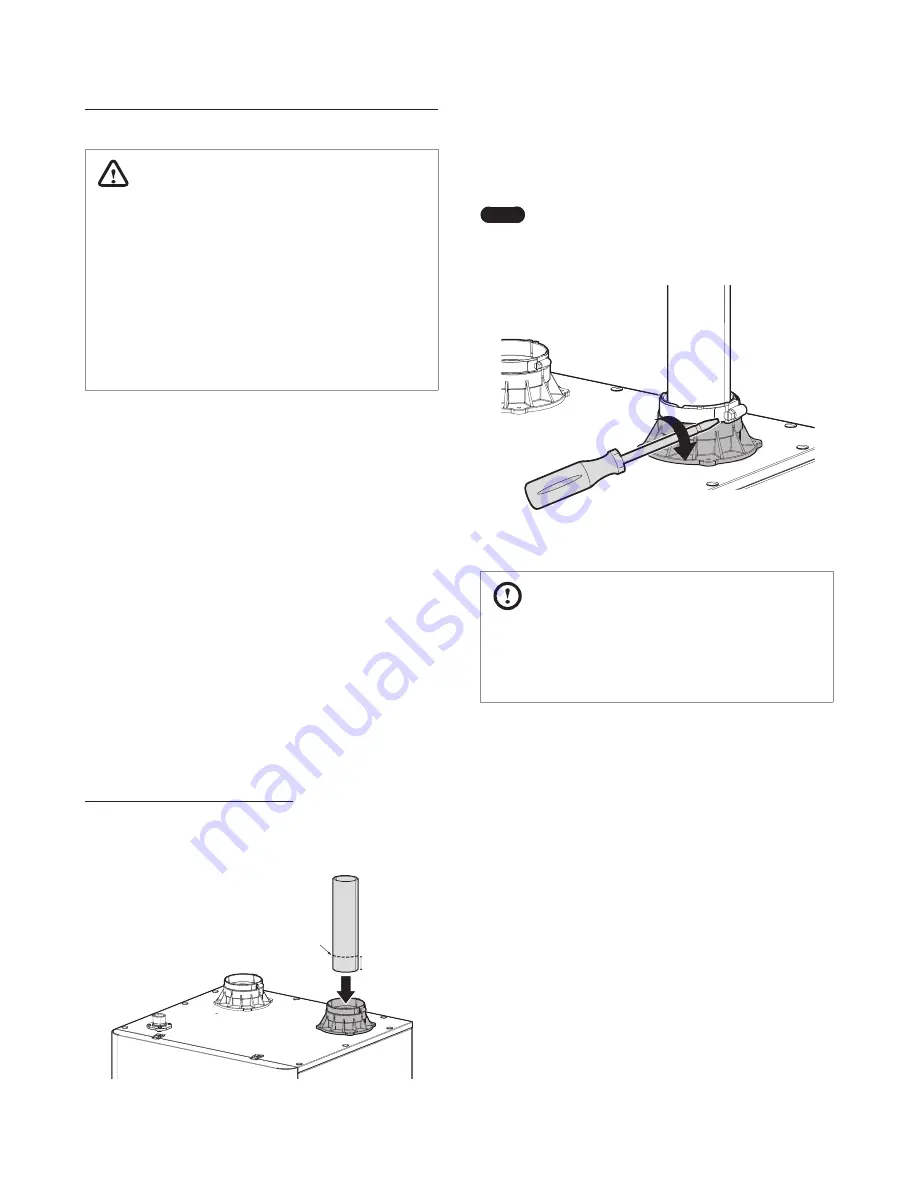
Connecting the Pipe to the Vent Collar
1. Measure 1-
3
/
4
” inches from the end of the vent pipe, then draw
a mark at that distance.
Mark 1-3/4” from
the end of the pipe
1-3/4”
2. Insert the pipe into the vent collar to start the vent run. Make
sure to completely slide the vent into the collar until the end
makes contact with the bottom of the socket.
Note
Verify that 1-
3
/
4
” of the pipe has been completely
inserted into the collar and that the mark is no longer
visible.
3. Tighten the clamp with a screwdriver to properly seal the joint.
CAUTION
Do not start the vent run with a 90° street elbow at the vent
collar. Using an elbow directly at the collar will not allow for a
tight seal between the appliance and vent pipe. A length of
straight pipe must be used when starting the vent run.
●
To avoid moisture and frost build-up and to maintain clearances
to openings on adjacent homes, 45° elbows, 90° elbows, or tees
may be attached to the end of the termination vent pipe to
direct the exhaust plumes away from buildings, as long as the
total allowable vent lengths, maximum number of elbows, and
distances to air intake restrictions are observed.
●
Do not store hazardous or flammable substances near the vent
termination.
●
If this boiler will be installed in areas where snow is known to
accumulate, protect the vent termination from blockage.
●
Ensure that the vent termination is at least 12 in (305 mm) above
ground, 12 in (305 mm) above the highest anticipated snow
level, or as required by local codes, whichever is greater.
●
Support the vent pipe with hangers at regular intervals or as
required by local codes.
●
Exhaust and intake air pipes must be glued and properly
supported at least every 4 ft (1.2 m).
●
The vent for this appliance shall not terminate over public
walkways; or near soffit vents or crawl space vents or where
condensate or vapor could create a nuisance or hazard or cause
property damage; or where condensate or vapor could cause
damage or could be detrimental to the operation of regulators,
relief valves, or other equipment.
5. Venting the Boiler
Содержание NFC-175
Страница 122: ...Memo...
Страница 123: ...Memo...


