background image

START/ENTER key to use the default calorie setting (300 Kcal), and start the workout. Or you can push STOP/RESET to start program

setup. Use the

and

keys to adjust the CAL value, and then push the START/ENTER key to start the workout. The CALORIES

display starts to count down from the set CAL value to zero.

Results / Cool Down Mode

After a workout the TIME display shows 00:00 and the console shows the Workout Results. You can start your workout cool down.

The LCD display shows each workout data value for 4 seconds: TIME, MILES (KM), CALORIES, CAL/HR, AVG/MPH (KMH), AVG

PWR, AVG/HR, MAX HR. The PULSE display shows the current BPM value. The LEVEL display starts at 1.

If there is no RPM or PULSE signal, the console automatically goes into Sleep Mode.

Pausing or Stopping

1. Push the STOP/RESET button to pause your workout. WORKOUT PAUSED mode shows on the Display.
2. Push START/ENTER to continue your workout, or push the STOP/RESET button to stop the workout.

Console Setup Mode

The Console Setup Mode lets you set the units of measure to either English or Metric, adjust the contrast of the display, and

stop or start the motivational messages. Motivational messages show on the screen to increase your enthusiasm and to give

positive feedback while you are working out.

1. Hold down the LOCK/SCAN button and Increase button together for 3 seconds while in the POWER-UP

MODE to go into the CONSOLE SETUP MODE.

2. Push the Increase/Decrease buttons to change between ELLIPTICAL and BIKE.
3. Push START/ENTER to set.
4. Push the Increase/Decrease buttons to change between ENGLISH and METRIC units.
5. Push START/ENTER to set.
6. Push Increase/Decrease to adjust the screen contrast (BACKLIGHTS; “5” = maximum intensity, “1” =

minimum).

7. Push START/ENTER to set.
8. The Console shows TOTAL HOURS.
9. Push START/ENTER.
10. Push Increase/Decrease to turn motivational messages off or on.
11. Push START/ENTER to set.
12. Push Increase/Decrease to set which software version to use (“SW30 V1.0” = x20 machine, “SW40

V1.0” = x40 machine, or “NLS 514” = 514 machine).

13. Push START/ENTER to set.

Note:

Push STOP/RESET for previous screen.

16

16

16

Содержание R514

Страница 1: ...Nautilus Nautilus Nautilus U R514 U R514 U R514 Exercise Exercise Exercise Bikes Bikes Bikes 003 3244 051812D...

Страница 2: ...ance 16 Operations 11 Troubleshooting 19 Adjustments 11 Contacts 24 Quick Start Manual Program 12 Manuel du Propri taire 25 2 2 2 To validate warranty support keep the original proof of purchase and r...

Страница 3: ...This machine contains moving parts Set up and operate this machine on a solid level horizontal surface Stabilize the Pedals before you step on them Use caution when you step off the machine Disconnect...

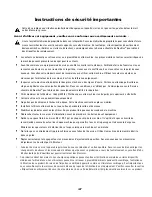
Страница 4: ...MENT Gardez les enfants et les animaux de compagnie loign s de cette machine en tout temps Lisez et familiarisez vous avec le Manuel du propri taire et avec tous les avertissements avant d utiliser ce...

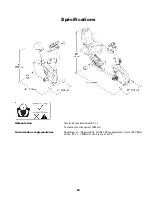
Страница 5: ...ons Power Requirements Operational Voltage 9VDC Operating Current 1500 mA Regulatory Approvals AC Power Adapter UL listed CSA certified or equivalent Rated 120V60Hz Input 9VDC 1500mA Output Class 2 or...

Страница 6: ...gazine Rack E Stabilizers M Water Bottle Holder F AC Adapter Plug N Fan G Pedals O Heart Rate Chest Strap H Levelers Console The Console provides important information about your workout and lets you...

Страница 7: ...n push to start and push again to turn off G LOCK SCAN button Cycles through your workout variables for 6 seconds each Push STOP RESET for manual control of the scan function Push STOP RESET again to...

Страница 8: ...program Stop exercising if you feel pain or tightness in your chest become short of breath or feel faint Contact your doctor before you use the machine again Use the values calculated or measured by t...

Страница 9: ...trong enough to be detected by the sensors CHR detection may be limited to walking or slow jogging due to the extreme muscle artifacts and hand motion generated by a comfortable running style If your...

Страница 10: ...s always use your best judgment when you increase your exercise time or intensity Fat Burning Target Heart Rate Heart Rate BPM beats per minute Age Maximum Heart Rate Target Heart Rate Zone keep withi...

Страница 11: ...nter the ball of your foot over the center of it Your leg should be bent slightly at the knee 2 If your leg is too straight or your foot cannot touch the Pedal move the seat down on the upright bike o...

Страница 12: ...om the RPM sensor as a result of pedaling the machine Auto Shut Off Sleep Mode If the Console does not receive any input in approximately 5 minutes it will automatically shut off The LCD display is of...

Страница 13: ...the STOP RESET button to go back to the previous screen or character 3 In the ADD USER option push START ENTER 2 times and the console display will show the Name prompt Note Use the Increase Decrease...

Страница 14: ...to set the Time for the workout default is 30 00 Use the Increase Decrease buttons to adjust the Time value and push START ENTER to set the time Profile Programs These programs automate different resi...

Страница 15: ...et a heart rate goal for your workout The program monitors your heart rate in beats per minute BPM from the Contact Heart Rate CHR sensors on the machine or from a Heart Rate Monitor HRM chest strap N...

Страница 16: ...rkout Console Setup Mode The Console Setup Mode lets you set the units of measure to either English or Metric adjust the contrast of the display and stop or start the motivational messages Motivationa...

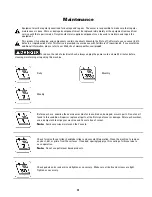
Страница 17: ...To reduce the risk of electrical shock always unplug the power cord and wait 5 minutes before cleaning maintaining or repairing this machine Daily Monthly Weekly Before each use examine the exercise...

Страница 18: ...ion NOTICE Be careful when you move the bike All abrupt motions can affect the computer operation 18 18 18 Leveling the Bike Levelers are found on each side of the Rear Stabilizer and on the Frame Rai...

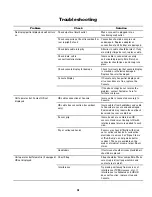
Страница 19: ...her assistance HR cable connection at Console Insure cable is connected securely to Console HR cable box connection recumbent only Insure cables from handlebars and cable to Console are secure and und...

Страница 20: ...e intact If any are cut or crimped replace cable Check data cable connections orientation Insure cable is connected securely and oriented properly Small latch on connector should line up and snap into...

Страница 21: ...t difficult to pedal Check crank to axle connection Crank should be tightened securely to axle Be sure cranks are connected at 180 degrees from each other Check locking pin Insure adjustment pin is lo...

Страница 22: ...22 22 22...

Страница 23: ...23 23 23...

Страница 24: ...us Inc 800 NAUTILUS 800 628 8458 www NautilusInc com Customer Service North America 800 605 3369 csnls nautilus com outside U S 01 360 859 5180 technics APLA nautilus com Printed in China 2009 Nautilu...

Страница 25: ...Nautilus Nautilus Nautilus U R514 U R514 U R514 V los V los V los d exercice d exercice d exercice 25 25 25...

Страница 26: ...41 Fonctionnement 35 D pannage 44 R glages 35 Coordonn es 48 Programme de d marrage rapide Quick Start manuel 36 26 26 26 Pour valider la couverture de garantie veuillez garder votre preuve d achat o...

Страница 27: ...omestique uniquement Ne portez pas de v tements l ches ni de bijoux Cette machine contient des pi ces mobiles Installez et utilisez cette machine sur une surface horizontale solide et de niveau Stabil...

Страница 28: ...TISSEMENT Gardez les enfants et les animaux de compagnie loign s de cette machine en tout temps Lisez et familiarisez vous avec le Manuel du propri taire et avec tous les avertissements avant d utilis...

Страница 29: ...n Tension de fonctionnement 9 V c c Courant de fonctionnement 1 500 mA Autorisations r glementaires Adaptateur c a R pertori UL certifi CSA ou quivalent class 120 V 60 Hz entr e 9 V c c 1 500 mA sorti...

Страница 30: ...orte bouteille d eau F Prise pour adaptateur c a N Ventilateur G P dales O Sangle de fr quence cardiaque H Niveleurs Console La console fournit des informations importantes propos de votre entra nemen...

Страница 31: ...du ventilateur appuyez dessus pour lancer le ventilateur et appuyez nouveau pour l arr ter G Bouton LOCK SCAN verrouillage analyse Navigue dans les variables de l entra nement 6 secondes chacune Appuy...

Страница 32: ...du moniteur de fr quence cardiaque MFC Avant de commencer un programme d exercices veuillez consulter votre m decin Arr tez de faire de l exercice si vous ressentez une douleur ou un serrement dans l...

Страница 33: ...fact musculaire qui peut interf rer avec la d tection du pouls Un l ger mouvement des mains alors qu elles sont en contact avec les capteurs peut produire une interf rence Des callosit s et de la loti...

Страница 34: ...gg r es en fonction de l ge Comme indiqu ci dessus votre fr quence cible optimale peut tre l g rement sup rieure ou inf rieure Consultez votre m decin pour conna tre votre zone personnelle de fr quenc...

Страница 35: ...e en position avant et le centre de la pointe du pied au centre de la p dale Votre jambe doit tre l g rement pli e 2 Si votre jambe est trop tendue ou si votre pied n arrive pas toucher la p dale abai...

Страница 36: ...d alimentation si vous appuyez sur un bouton ou si elle re oit une indication du d tecteur de RPM tr min suite l utilisation de la machine Arr t automatique mode veille En l absence de commande pendan...

Страница 37: ...enter diminuer pour naviguer dans les options du menu utilisateur Remarque ADD USER ajouter un utilisateur et GUEST USER utilisateur invit sont les seules options d utilisateur si aucun utilisateur n...

Страница 38: ...s totales poids de d part poids cible poids actuel variation de poids EDIT Vous pouvez mettre les valeurs suivantes jour Current Weight Target Weight Current Height Enter Age Custom Workout poids actu...

Страница 39: ...du HRM du programme HRC pour fonctionner ad quatement Si vous allez dans le programme HRC de votre profil d utilisateur le programme cible de fr quence cardiaque utilise votre ge et d autres informat...

Страница 40: ...er diminuer la distance par d faut est 20 km 20 mi Appuyez sur START ENTER 2 Entrez la vitesse du chronor gulateur l aide des boutons Incease Decrease augmenter diminuer la vitesse par d faut est 25 k...

Страница 41: ...vation 11 Appuyez sur START ENTER pour s lectionner 12 Appuyez sur les boutons Increase Decrease augmenter diminuer pour d terminer quelle version du logiciel vous souhaitez utiliser SW30 V1 0 machine...

Страница 42: ...la sueur sur votre machine et sur la console Remarque vitez toute humidit excessive sur la console V rifiez que la glissi re du si ge fonctionne bien ainsi que l inclinaison de console Nettoyez la mac...

Страница 43: ...ous d placez le v lo Tout mouvement brusque peut affecter le fonctionnement de l ordinateur 43 43 43 Mise niveau de votre v lo Les niveleurs sont situ s de chaque c t du stabilisateur arri re et sur l...

Страница 44: ...lacez la console Pas d affichage affichage partiel la machine ne d marre pas Si les tapes num r es ci dessus ne ressoudent pas le probl me communiquez avec le service client le pour obtenir de l aide...

Страница 45: ...place La console affiche le code d erreur E2 lectronique de la console Si les tests ne r v lent aucun autre probl me la console devrait tre remise en place V rifiez l int grit du c ble de donn es Tous...

Страница 46: ...le c ble est branch de fa on s curitaire et qu il est ad quatement orient Un petit loquet sur le connecteur doit tre align et s enclencher en place Ventilateur si quip ne se met pas en marche ou ne s...

Страница 47: ...47 47 47...

Страница 48: ...c 1 800 NAUTILUS 1 800 628 8458 www NautilusInc com Service client le Am rique du Nord 800 605 3369 csnls nautilus com en dehors des U 01 360 859 5180 technics APLA nautilus com Imprim en Chine 2009 N...

Отзывы: