


Replacing Headphone Jack
Over time the Headphone Jack may become worn and fail to function properly.
Tools Needed:
Phillips Head Screwdriver
Parts Needed:
Headphone Jack Kit Part# 001-1945
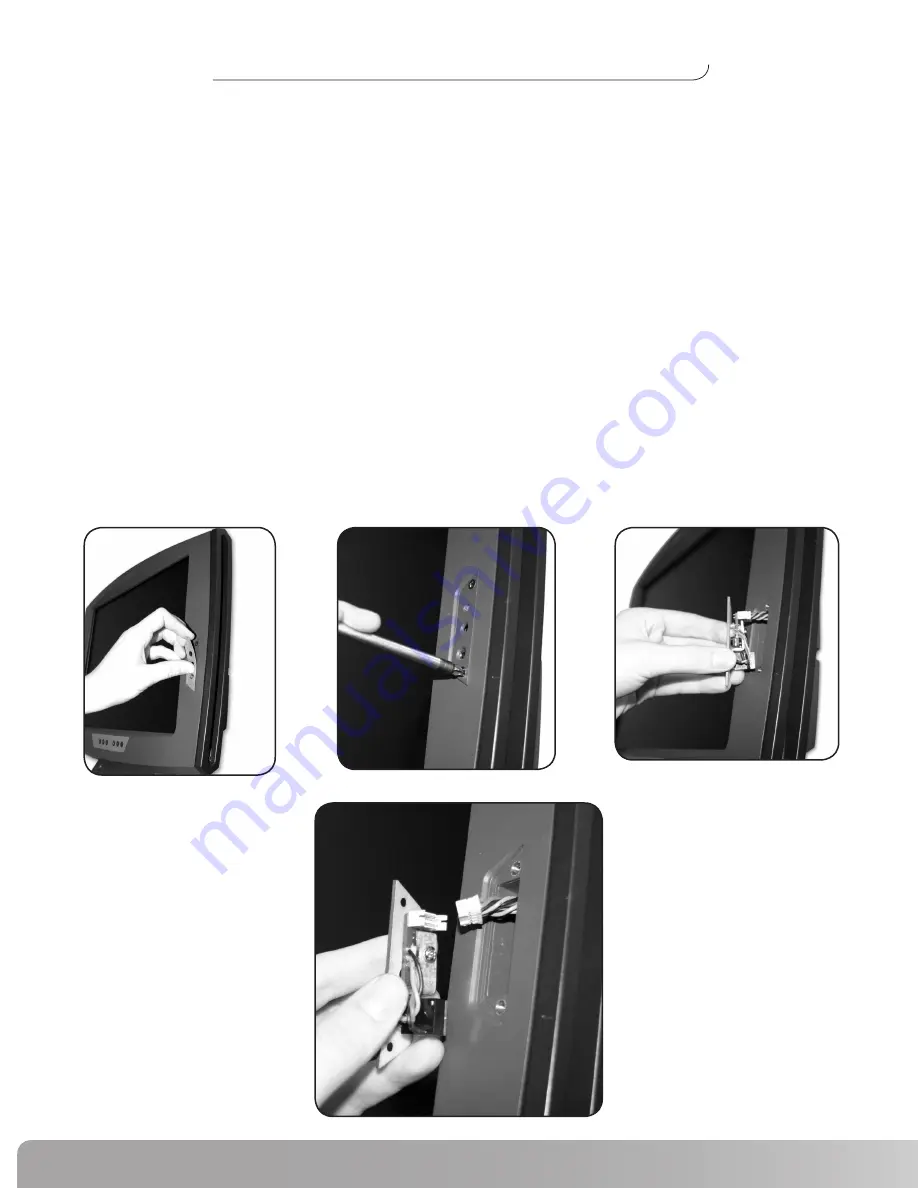
1.
remove the Decal covering the Headphone Jack. (Figure a)
2.
Use a phillps Head Screwdriver to remove the two screws securing the jack.(Figure B)
. Carefully remove the Headphone Jack from the LCD Monitor (Figure C) and disconnect the
wires. (Figure D)
. reverse the procedure to install the jack.
Replacing Headphone Jack
Figure a
Figure B
Figure C
Figure D


