background image


21 


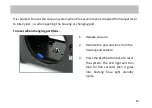
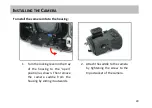
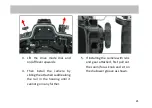
3.


Lift  the  drive  mode  dial  and 
on/off lever upwards.  
 

4.


Then  install  the  camera  by 
sliding the attached saddle along 
the  rail  in  the  housing  until  it 
cannot go in any further. 

5.


If installing the camera with lens 
and  gear  attached,  first  pull  out 
the zoom/focus knob and  sit on 
the shallower groove as shown. 

Содержание NA-GH5

Страница 1: ...1 ...

Страница 2: ... of our products We strive to achieve a high level of user friendliness by allowing stress free installation and easy operation of all important functions of the camera Each housing is individually inspected and water pressure tested to ensure optimum quality Please read this manual carefully before using the housing this will maximize its performance as well as its lifetime The illustrations in t...

Страница 3: ...Package Contents 7 Specifications 8 Identification of Parts 9 Opening and Locking the Housing 13 Preparation of the Housing 15 Installing the Camera 20 Mounting the Port 23 Changing the Viewfinder 26 Care and Maintenance 28 Optional Accessories 29 ...

Страница 4: ... authorized service center s Please note that this warranty only applies when the product is purchased in the territory where the service center is located NAUTICAM accepts no liability for any damage to and defects in the housing caused by improper use and or poor maintenance it is the responsibility of the owner to carefully follow the instructions in our manuals NAUTICAM does not hold responsib...

Страница 5: ...nt provided by NAUTICAM Discontinue use immediately should you notice any leakage Store the housing in a robust shock proof container during transportation avoid transporting with any equipment such as a camera inside the housing When travelling by air do not close the housing as this may lead to a pressure difference between the atmosphere and inside the housing Care must be taken when opening th...

Страница 6: ...unlight for prolonged periods Keep out of reach of children failure to do so could result in injury Defective products should be shipped to our distributors for service unauthorized disassembling and or modifications could result in malfunction or leakage Use only recommended battery with this product do not mix different specifications or old and new batteries Do not place excessive stress on you...

Страница 7: ... housing O ring remover CR2450 battery Lubricant Set of Allen keys Manual Instruction card For NA GH5SV NA GH5SV housing Spare silicone rubber O ring 90122 for housing M28 HDMI 2 0 Adaptor Pre installed O ring remover CR2450 battery Lubricant Set of Allen keys Manual Instruction card ...

Страница 8: ...e treatment Hard anodized Display window Abrasion resistant polycarbonate Dimensions Width 331mm Height 184mm Depth 110mm Weight Approx 2 36kg Buoyancy Slightly negative Depth rating 100 meters Port mount N85 Compatible cameras Panasonic Lumix GH5 camera GH5S camera ...

Страница 9: ...ical fibre mount Accessory coldshoe M14 accessory port Lens release button Drive mode dial M16 accessory port Zoom focus knob Port lock safety button Port lock lever M5 threaded hole for tripod leg mounting ball M28 HDMI 2 0 Adaptor on NA GH5SV housing ...

Страница 10: ...ial On off lever Shutter release lever Mode dial lock button Front dial Exposure compensation button AF AE lock lever M5 threaded hole for tripod leg mounting ball White balance lever ISO lever Fn1 button lock lever Handle is not displayed ...

Страница 11: ...ton x2 LVF Fn5 button Movie button DISP button Delete Cancel Fn4 button Left button Fn3 button Up button MENU SET button Right button Down button Playback button Q Menu Fn2 button Moisture alarm window Handles are not displayed Focus mode lever ...

Страница 12: ...12 Sacrificial zinc anode Threaded holes for tripod leg mounting ball 1 4 20UNC tripod socket x3 The maximum length of screws that can be used with the tripod sockets is 4mm ...

Страница 13: ...lat surface or in your lap When closing make sure there is nothing caught between the closing surfaces of the two halves of the housing The housing can be opened and closed by the two housing locks To open the housing 1 Press and hold the housing lock safety button on both sides 2 Turn the housing locks outwards as shown ...

Страница 14: ...14 To close the housing 1 To close turn both housing locks towards the housing all the way 2 Make sure they are locked in place securely ...

Страница 15: ...ove located in the front part of the housing is free from any foreign material the groove can be cleaned with the aid of a microfiber cloth 3 Place the main O ring into the groove first at the corners then the whole perimeter 4 Setting up the moisture alarm 1 Locate and install the battery provided into the battery compartment on the circuit board inside the housing ...

Страница 16: ...oes into flashing blue light standby mode 3 Test the alarm by connecting the two wires near the bottom of the housing with a damp cotton bud the alarm should start giving out a repeating beep sound along with a flashing red light The beep sound and the light should keep on going for 5 seconds after the removal of the damp cotton bud ...

Страница 17: ...s of the operation LED status identification On start up LED indicator Status Flash Blue light once Indicates a 2nd generation PCB Steady Blue light Battery is normal goes into flashing Blue light standby mode after 5 seconds Blue and Red lights alternating Battery low Replace battery as soon as possible Goes into standby mode after 5 seconds Steady Red light Battery empty replace battery ...

Страница 18: ...oisture is detected Flashing Yellow light Some vacuum is detected target vacuum level is not reached Steady Green light Target vacuum level is reached Rapidly flash Yellow light Vacuum is dropping Will occur only after target vacuum level is reached Rapidly flashing Red light Vacuum is totally lost Circuit stalled until switched off Will occur only after target vacuum level is reached After start ...

Страница 19: ...lly lost i e when opening the housing or changing port To reset when changing port lens 1 Release vacuum 2 Remove the port and lens from the housing and camera 3 Press the BLUE button once to reset the system The LED light will turn blue for five seconds then it goes into flashing blue light standby mode ...

Страница 20: ...the housing 1 Turn the locking lever on the tray of the housing to the open position as shown Then remove the camera saddle from the housing by sliding it outwards 2 Attach the saddle to the camera by tightening the screw to the tripod socket of the camera ...

Страница 21: ...ds 4 Then install the camera by sliding the attached saddle along the rail in the housing until it cannot go in any further 5 If installing the camera with lens and gear attached first pull out the zoom focus knob and sit on the shallower groove as shown ...

Страница 22: ...e locking lever to the lock position as shown 7 Gently push drive mode dial and on off lever downwards ensuring the actuator correctly engages with the ON OFF lever of the camera 8 Confirm that all the controls of the housing are correctly engaged ...

Страница 23: ...ble ports 1 Remove the O ring from the port inspect for any damage and lightly coat it with the provided lubricant before placing it back into its groove 2 Verify that the port opening of the housing is clean and free from foreign material 3 Push the safety button of the port locking lever downwards ...

Страница 24: ...Connect 24 4 Turn the port locking lever to the release position as shown 5 Lift housing cap ...

Страница 25: ...e port into the port opening of the housing until it cannot go in any further 8 Lock the port into place by turning the port locking lever to the inward position To ensure that the port is securely mounted confirm that the green line on the safety button of the port locking lever is visible ...

Страница 26: ...th the housing is designed so that it can be removed and re installed by the following simple steps described below To remove the viewfinder 1 Remove the retainer O ring of the viewfinder inside the rear half of the housing by making use of the recess on the viewfinder 2 Gently push the viewfinder form the inside of the housing Push ...

Страница 27: ...er periphery of the viewfinder body with lubricant 1 Align the viewfinder with the sleeve in the display window 2 Push the viewfinder from the outside of the housing until it cannot go in any further 3 Place the retainer O ring of the viewfinder back from inside of the housing ...

Страница 28: ...moved from its groove with the O ring remover and inspected for damage Also check that the O ring retains its original circular shape never stretch the O ring excessively or remove it with a sharp object The O ring groove should be cleaned to ensure it is free from any salt deposit or foreign material lightly coat the O ring with the provided lubricant before reinstalling it in the groove A damage...

Страница 29: ...th the Nauticam Mini Flash Trigger P N 26309 HDMI 1 4 Output The GH5 camera features a full size Type A HDMI Connector on the camera body providing a reliable user friendly connection for external monitors A new Nauticam Internal HDMI Cable 25075 supports this format P N 26309 Mini Flash Trigger for NA GH5 Housing P N 25217 HDMI D A Cable in 190mm Length for NA GH5 GH5SV for internal connection fr...

Страница 30: ...ls that attach directly to the bottom of NA GH5 GH5SV Top Mounting Ball The cold shoe base can be replaced with a 1 mounting ball for mounting heavier item like external monitor housing P N 25111 Strobe mounting ball for handle with screws P N 25217 Mounting Ball Set for Tripod for NA GH5 GH5SV ...

Страница 31: ...uticam 45 viewfinder for MIL housings P N 36059 O1250 Z Zoom Gear for Olympus 12 50mm EZ to use with GH5 EM1X for NA GH5 EM1X P N 36060 Macro Port and Zoom Gear Set for Olympus 12 50mm EZ to use with GH5 EM1X for NA GH5 EM1X P N 36061 P1442X PZ Zoom Gear compatible with NA GH5 for Panasonic Lumix G X Vario PZ 14 42mm F3 5 5 6 ASPH POWER O I S ...

Страница 32: ...ja V housing P N 17922 Nauticam Atomos Ninja V Housing for Atomos Ninja V 5 4Kp60 4 2 2 10 bit Recorder Monitor Player P N 25080 M28 M16 Step Down Adaptor P N 17909N Nauticam Atomos Flame Housing with HDMI 2 0 input for Atomos Ninja Flame Shogun Flame Shogun Inferno 7 10 bit 4K HD SDI HDMI Recorder Monitor Player housing ...

Страница 33: ...33 ...

Отзывы: