


Using my kit as a computer
To benefit from additional features, you can use the kit as a
desktop computer and access the code that runs your kit.
You can plug your kit into a screen with a HDMI cable.
You can use any TV for this as long as it has a HDMI input.
You will then need a mouse in order to navigate the
interface and a keyboard to type. We suggest using a
wireless keyboard and mouse for this as the dongle will
plug straight into the single USB socket on the Raspberry
Pi A+.
If you don’t have a wireless keyboard you can use a USB
splitter to connect multiple devices.
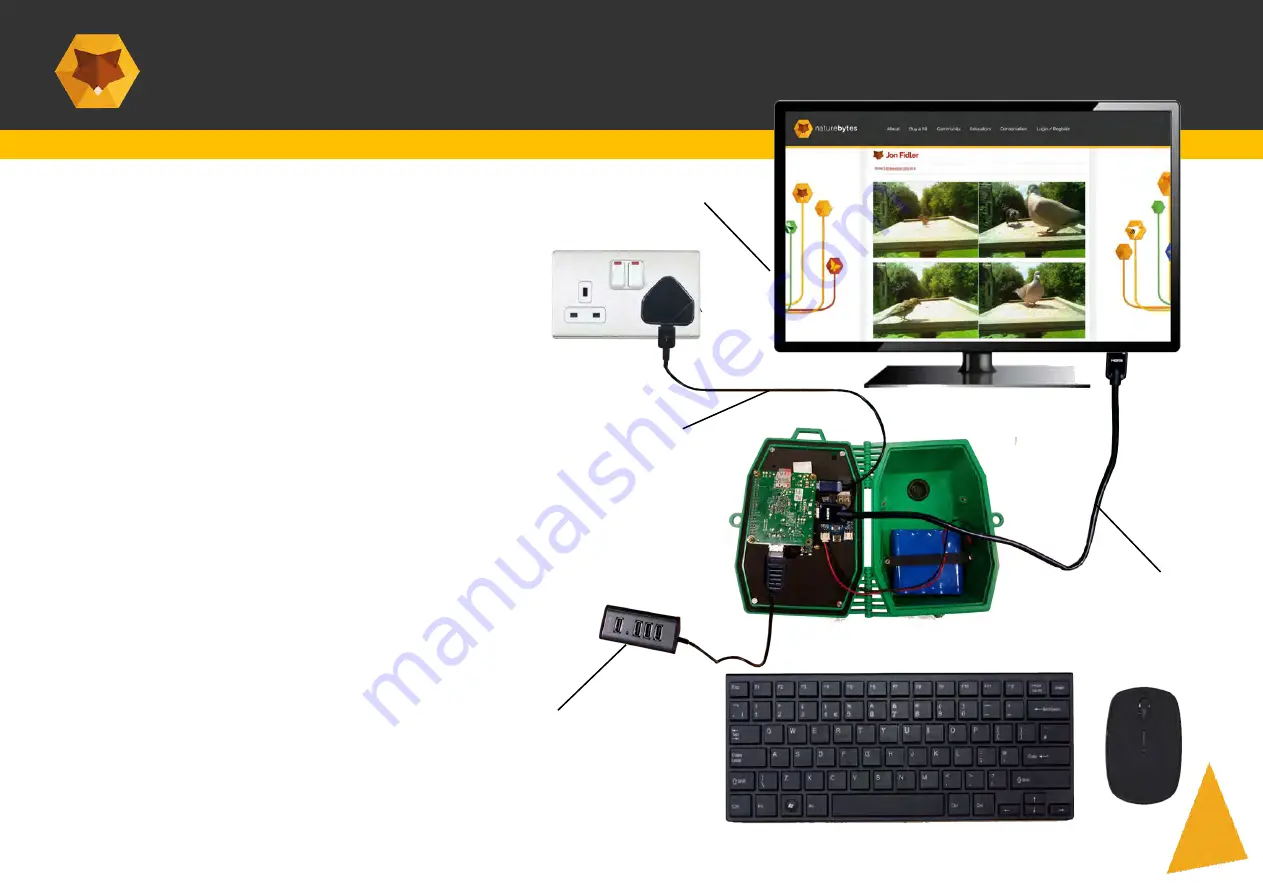
The image (right) illustrates how to set up the kit. Instead of
using a battery, you can power your kit with a 2A mains
supply and a micro-USB, similar to charging a mobile
phone.
You read more about setting up your Raspberry Pi here:
https://projects.raspberrypi.org/en/projects/raspberry-pi-setting-up/3
What you will need:
HDMI Wire
3 Port USB Hub
Mouse & Keyboard
Wireless WIFI dongle
Micro USB charger
Micro USB
charger
HDMI
Cable
USB Hub to connect
Mouse
Keyboard
��
Adapter
USB
Screen with
HDMI port
Keyboard and Mouse
38
Содержание Wildife Cam Kit
Страница 15: ...Your assembly should look like this LiPo rider optional 15 Front Back ...
Страница 24: ...Insert Assembly showing the LiPo Rider power option 24 ...
Страница 37: ...Additional Features ...
Страница 40: ...Powering up with the LiPo rider Option B only ...


