


1)
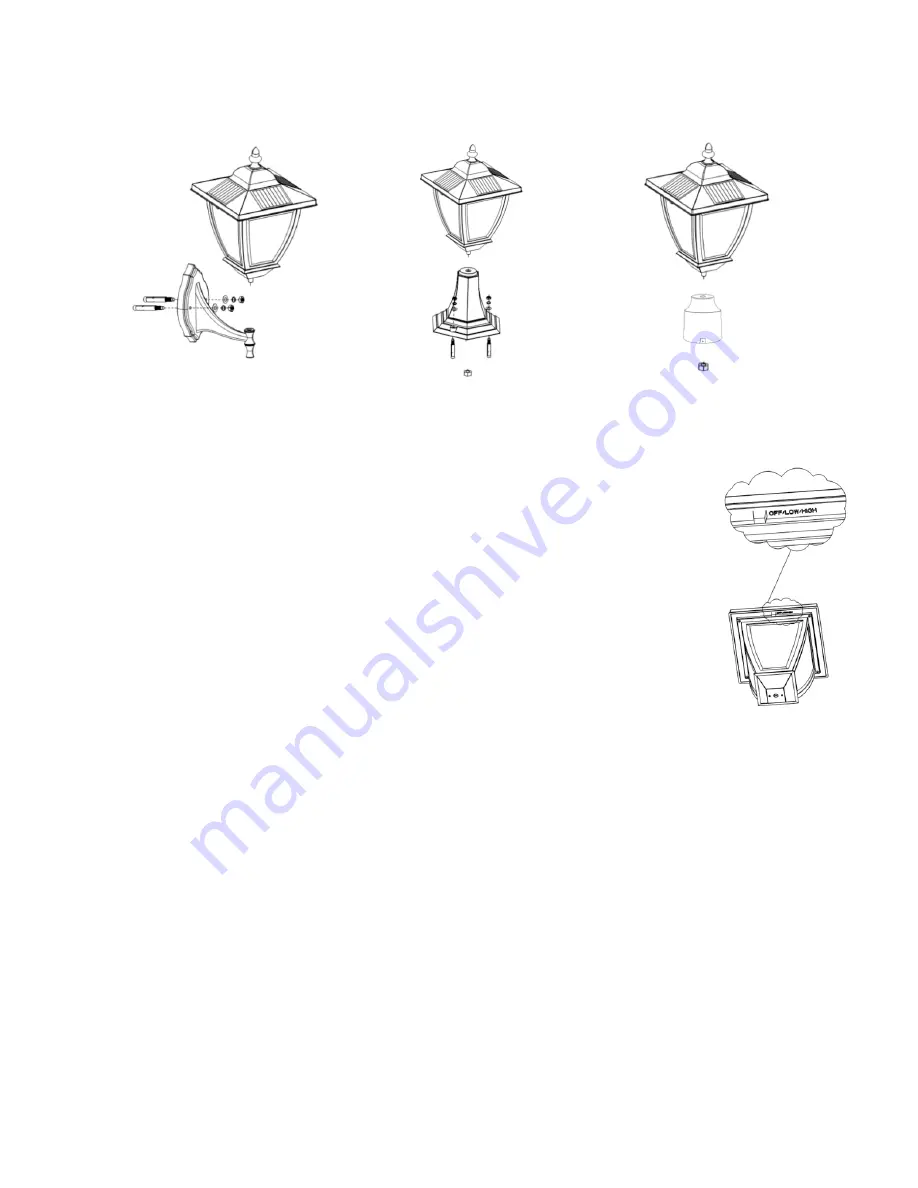
Insert the screw from the underneath of the lamp head into the post mount and fasten with supplied nut.
2)
Place the post mount onto an existing 3” post
using
the
3
screws
provided.
Diagrams
continued on
next page.
Wall Mount
Pillar Mount
3” Pole Fitter
OPERATION
The solar light must be left to charge for a minimum of 2 sunny days in the OFF position upon
purchase before best results are achieved.
1)
For daily/normal operation, adjust the switch to the “LOW” or “HIGH” position. “LOW” is for
dimmer light and longer runtime, whereas “HIGH” is for brighter light and shorter runtime. Light
will automatically turn on when the sun goes down.
2)
The performance of the solar light will vary with the time of year. It will deliver light for longer
times when it has had a full day in the sun rather than a day in overcast weather and likewise
the light will run for longer times in summer than in winter.
3)
The solar light must be left to charge for a minimum of 2 full sunny days upon purchase before
best results are achieved. Please locate your Solar Light in a position where it can absorb direct
sunlight on the Solar Panel, and generally free from cover and shade.
TROUBLESHOOTING
If your solar light does not turn ON at dusk despite observance of all the instructions, please try the following steps:
1)
Make sure the solar light is not being affected by any other light source; if this is the case move your solar light
to a location where there is less light interference.
2)
Make sure the solar light is not located in any shade during the day.
3)
Make sure the switch is either in the “HIGH” or “LOW” position.
4)
If your solar light turns on during the day, usually the sensor needs to be reset. To do this, turn the light into the
OFF position and take it into a dark room. Switch to the ON position and once the light comes on, the sensor has
been reset.


