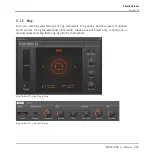


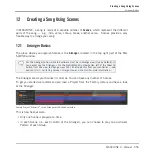


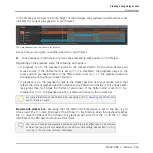
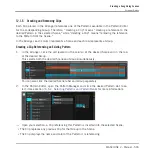

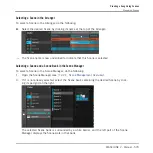
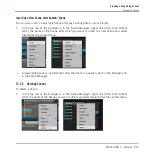

(6) Scene names: The top of the Arranger displays all Scenes of your Project, represented by
their name. All Clips located in the column under a Scene will be played together in that
Scene. Clicking a Scene name selects the Scene, moves the playhead to that Scene (see sec-
tion
12.3.2, Jumping to Other Scenes
), and sets the Loop Range (9) to that Scene. By creat-
ing, deleting, duplicating and moving Scenes (in the top row of the Arranger or in the Scene
Manager (3)) you can build up your entire arrangement. See section
If all Scenes cannot be displayed at once, use the horizontal zooming scroll bar (10) to navi-
gate to the hidden Scenes.
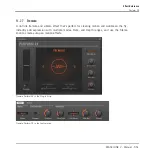
(7) Clips: In a particular row, each Clip represents a Pattern from the Group at the left of that
row in the Group List (4). Clips define which Pattern should be played in a Scene. Each Scene
can have one Clip of each Group, and the same Pattern can be referenced by Clips in various
Scenes.
(8) Playhead indicator: Shows the current playback position.
(9) Loop Range: Shows the region of your song that will be played in loop. In the timeline (6)
the Loop Range is indicated by a lighter gray region. Drag this region or any of its borders in
the timeline (6) to move or resize the Loop Range, respectively. You can also set the Loop
Range to a particular Scene by clicking the Scene name (5) at the top of the Arranger, or dou-
ble-click anywhere in the timeline (6) to set the Loop Range to all your Scenes together. See
section
12.3.1, Selecting a Loop Range
.
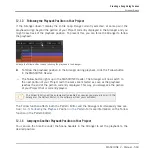
(10) Horizontal zooming scroll bar: Click the main part of the scroll bar and drag your mouse
horizontally to scroll through the Arranger on the horizontal axis (time), or drag it vertically to
zoom in/out on this time axis. You can also click the left or right handle of the scroll bar and
drag it horizontally to zoom in/out while keeping the opposite border of the display at a fix po-
sition in the arrangement. Double-click the main part of the bar to reset the zoom and display
all Scenes. See section
12.1.2, Navigating the Arranger
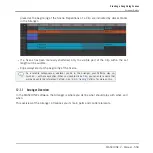
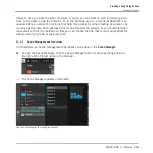
12.1.2 Navigating the Arranger
The Arranger can be scrolled and zoomed in or out to fit your current needs.
Navigating the Arranger Horizontally (Time)
A zooming scroll bar is available at the bottom of the Arranger. This tool allows you to both
scroll and zoom in/out horizontally in the Event area and the Control Lane on the time axis:
Creating a Song Using Scenes
Arranger Basics
MASCHINE 2 - Manual - 560
Содержание Maschine
Страница 1: ...MANUAL...
Страница 57: ...The Preferences MIDI page Basic Concepts Preferences MASCHINE 2 Manual 57...
Страница 60: ...The Preferences Default page Basic Concepts Preferences MASCHINE 2 Manual 60...
Страница 71: ...The Preferences panel the Plug ins page s Manager pane Basic Concepts Preferences MASCHINE 2 Manual 71...
Страница 79: ...The Preferences panel Colors page Basic Concepts Preferences MASCHINE 2 Manual 79...