36
CLEANING YOUR MICROSCOPE
National microscopes are designed to function with minimal maintenance, but certain components should be
cleaned frequently to ensure ease of viewing. The power switch should be turned off or the microscope should
be unplugged when not in use.
Do not disassemble your microscope
Disassembly may significantly affect the performance of the instrument, and may result in electric shock or
injury and will void the terms of the warranty.
Never attempt to dismantle any parts other than the ones described below. If you notice any malfunction,
contact your nearest National Optical supplier.
Optics
Keeping the optics of your microscope clean is essential for obtaining clear images.
Choosing the best cleaning method depends on the nature of the optical surface and type of dirt.
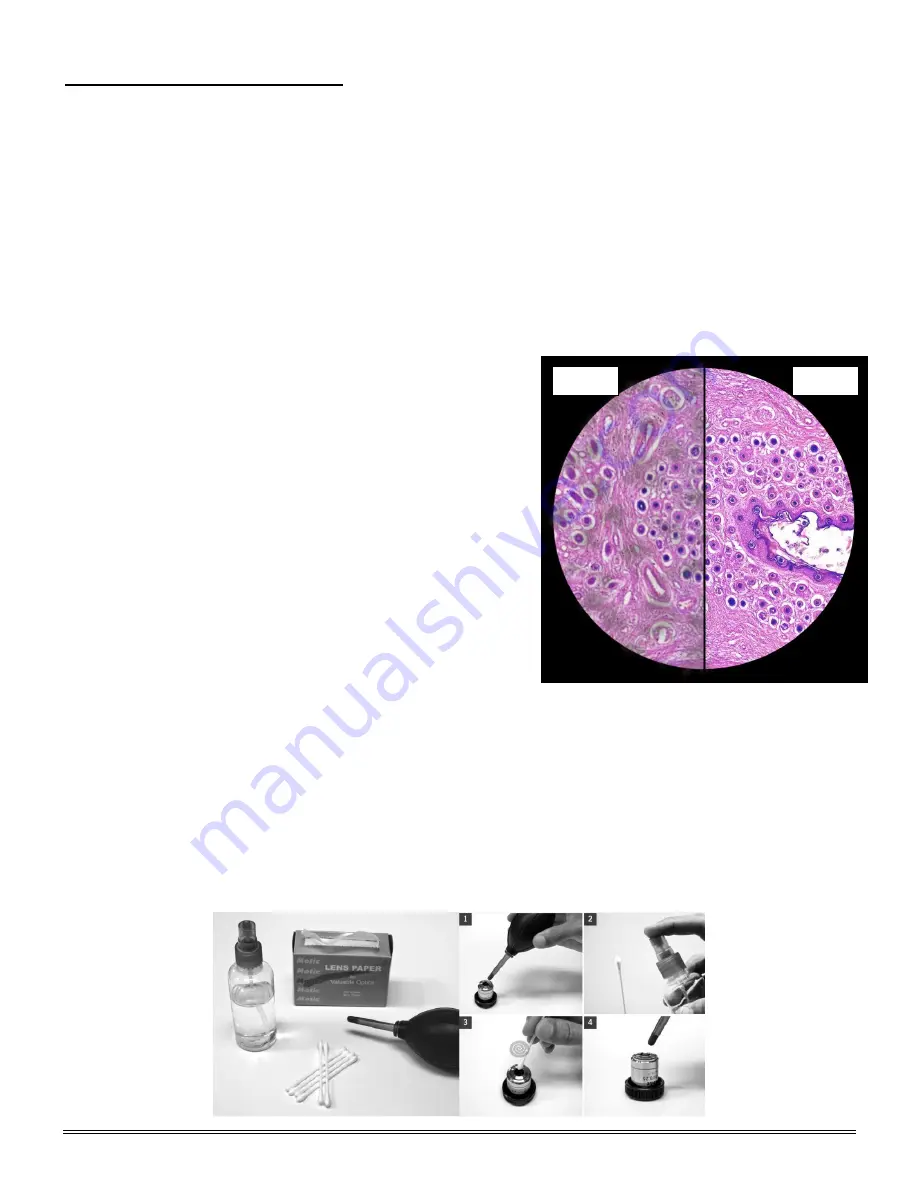
Dirtiness on the image may be caused by the following
variables:
Dirt on the outer or inner eyepiece lens.
Dirt on the front lens of the objective.
Dirt on the upper lens of the condenser.
Dirt on the surface of the sample slide glass.
Dirt on the upper lens of illuminator.
Dirt on other optical components of the microscope such
as mirrors, lamps, filters, intermediate lenses …
In the case of microscopes with a camera attached to it:
Dirt on the camera adapter.
Dirt on the protection filter of the camera sensor.
For Eyepieces with reticules:
Dirt on the outer or inner reticle glass.
Objectives
are the optical component of the microscope that
require the most maintenance. Because for their actual use,
they can get dirty easily.
For objectives that work without oil (dry): The first step is to carefully unscrew the objective from the nosepiece.
In order to make things easier and safer, screw the objective onto one of the objective cases supplied with
microscope. By doing it this way, the objective will be in a stable position avoiding possible falls.
(1)
Proceed by cleaning it using pressurized dry air - or an air gun if available
– and, if after this is done we still
observe spots of dust or dirt,
(2)
Clean with a cotton swab dampened with a low graduation of alcohol 70% or
with a mixture of alcohol and ether (ratio alcohol: 3 to ether: 7).
(3)
With a spiral movement (starting from the
center of the lens) we will then clean the surface of the lens.
(4)
Dry its surface by using pressurized dry air
and check that the lens is clean either with the help of a magnifying glass or by screwing the lens back on the
revolving nosepiece of the microscope.
Dirty
Clean
Содержание 167 Series
Страница 10: ...10 DC20 169 Series ASSEMBLY ...
Страница 17: ...17 This will open the Motic Images Help Manual ...


