background image

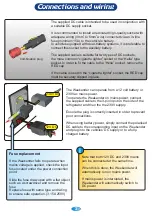
Connections and wiring

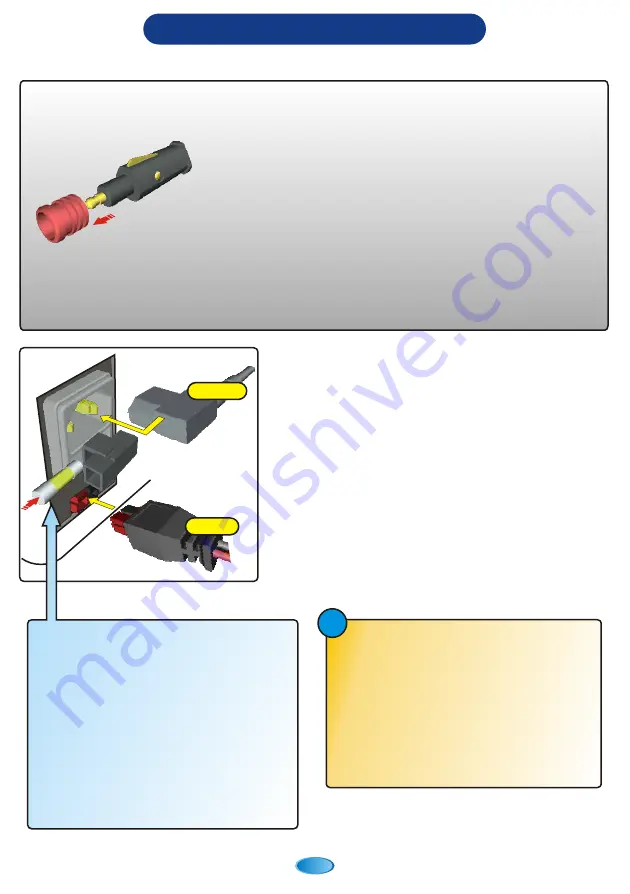
The supplied DC cable is intended to be used in conjunction with
a suitable DC supply socket.

It is recommended to install a dedicated high-quality socket with

2

adequate wiring (4mm  to 6mm wire) connected via an in-line 
fuse (minimum 15A) to the vehicle’s battery. 
In vehicles equipped with dual-battery systems, it is preferable to 
connect this socket to the auxiliary battery.

The supplied cable is suitable for two types of DC sockets ;
the more common “cigarette lighter” socket or the “Hella” type
socket. In order to fit the cable to the “Hella” socket, remove the
RED cap.

If the cable is used in the “cigarette lighter” socket, the RED cap
must be securely clipped in place.

Combination plug

Fuse replacement

If the Weekender fails to operate when
mains voltage is applied, check the input
fuse located under the power connection
point.

Slide the fuse draw open with a flat object
such as a screwdriver and remove the
fuse.
Replace fuse with same type and rating
to ensure safe operation. (3.15A 250V)

The Weekender can operate from a 12 volt battery or
230 Vac mains power. 
To operate the Weekender on mains power, connect
the supplied cable to the 3-pin input on the side of the
refrigerator and then the the 230V supply.

Ensure the plug is correctly inserted in order to prevent 
poor connections.

When using battery power, simply connect the polarised
DC cable to the corresponding input on the Weekender
and plug into the vehicles’ DC supply or to a fully-
charged battery.

230V AC

12V DC

Note that both 12V DC and 230V mains 
can be connected at the same time.

When this is done, the Weekender will 
automatically run on mains power.

If mains power is interrupted, the 
Weekender will automatically switch to 
DC power.

i

3

Содержание Weekender

Страница 1: ...Portable Fridge Freezer ...

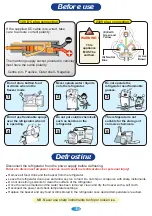
Страница 2: ...all food drink and the basket from the refrigerator Leave the refrigerator door open and allow any ice to melt Do not chip or scrape ice with sharp instruments Do not use strong solvents to clean the surface of the refrigerator Once the ice has melted and the water has been removed clean and dry the freezer with a soft cloth Reconnect the power and check temperature settings Replace the basket and...

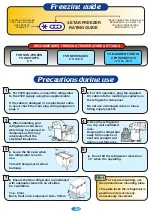
Страница 3: ...ampness as this may adversely affect the electrical insulation For 12V operation plug the supplied DC cable into the matching receptacle on the refrigerator side panel Do not use a damaged cable or loose fitting supply socket Ensure that the refrigerator is positioned with adequate clearance on all sides for ventilation Top Clear Back front and compressor side 50mm For secure mounting use the opti...

Страница 4: ...n mains voltage is applied check the input fuse located under the power connection point Slide the fuse draw open with a flat object such as a screwdriver and remove the fuse Replace fuse with same type and rating to ensure safe operation 3 15A 250V The Weekender can operate from a 12 volt battery or 230 Vac mains power To operate the Weekender on mains power connect the supplied cable to the 3 pi...

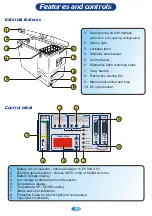
Страница 5: ... THE USER REQUIRE MAXIMUM POWER PRESS THE MANUAL TURBO BUTTON THE FRIDGE AUTOMATICALLY SELECTS HIGH SPEED AUTO TURBO FOR BATTERY 13 1V 1 2 3 4 5 6 7 8 9 Control panel External features 1 2 3 4 6 5 7 8 9 Battery cut out selector choose between 11 6V and 9 6V Running speed selector choose AUTO turbo or MANUAL turbo Battery voltage display Low voltage audible alarm on off selector Temperature display...

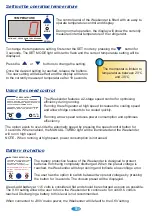
Страница 6: ...ll return to the currently measured temperature after 10 seconds The thermostat is limited to temperatures between 20 C and 30 C i The Weekender features a 2 stage speed control for optimising efficiency during running Running the refrigerator at high speed increases the cooling speed and allows fridge contents to be cooled quickly Running at low speed reduces power consumption and optimises effie...

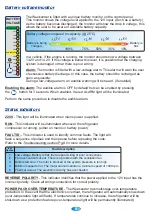
Страница 7: ...arge In this case the battery should be recharged as soon as possible During a low voltage alarm an audible warning will be heard If enabled Enabling the alarm The audible alarm is OFF by default but can be enabled by pressing the button for 3 seconds When enabled the red ALARM light will be illuminated Perform the same procedure to disable the audible alarm REVERSE POLARITY This indicator identif...

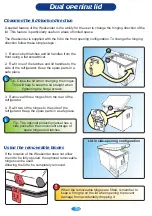
Страница 8: ...pare parts in a safe place 3 Remove all three hinges from the rear of the refrigerator 4 Re fit two of the hinges to the side of the refrigerator Keep the spare parts in a safe place Tip Close the lid when changing the hinges This will help to keep the lid straight when tightening the hinge screws i Tip The optional protection jacket has a side pocket for the convenient storage of spare hinges and...

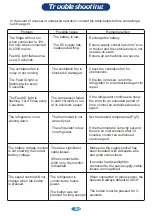
Страница 9: ...If the refrigerator continues to show the error for an extended period of time contact an authorised service agent The Fault ID light is flashing 3 or 4 times every 5 seconds The thermostat is not correctly set The refrigerator is low on refrigerant Set the desired temperature Pg 5 If the thermostat is correctly set and there is no improvement after 10 minutes contact an authorised service agent T...

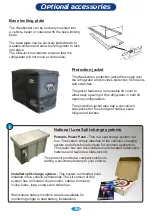
Страница 10: ...tion jacket also has a convenient side pocket for the storage of cables spare hinges and latches 9 National Luna Split charge systems i Portable Power Pack This is a split charge system in a box The system simply attaches to the vehicles charging system and offers fused outputs for common appliances The plastic box can accomodate most standard automotive batteries and features a slide lock lid Ins...

Страница 11: ...Luna shall not be responsible for any damages of any kind resulting from incorrect voltages or faults with regards to power supply which falls outside of the appliance operating parameters 6 National Luna shall not be responsible for damage to the appliance caused by negligent use storage of hazardous chemicals use of corrosive substances fire flood civil disturbances lightning or any other natura...

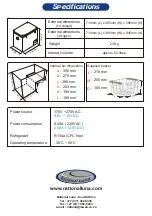
Страница 12: ...ight Internal volume Power source 170V 270V AC 9 6V 16V DC Refrigerant Operating temperature R134a CFC free Power consumption 0 40A 230V AC 2 50A 12 5V DC 30 C 60 C a b c d e f Internal bin dimentions a b c d e f 392 mm 270 mm 389 mm 203 mm 198 mm 189 mm 710mm L x 385mm W x 506mm H 710mm L x 385mm W x 845mm H 23 Kg approx 52 litres Supplied basket L W D 210 mm 250 mm 165 mm L W D www nationalluna ...

Отзывы: