


©
National Instruments Corporation
9
NI USB-9213 User Guide and Specifications
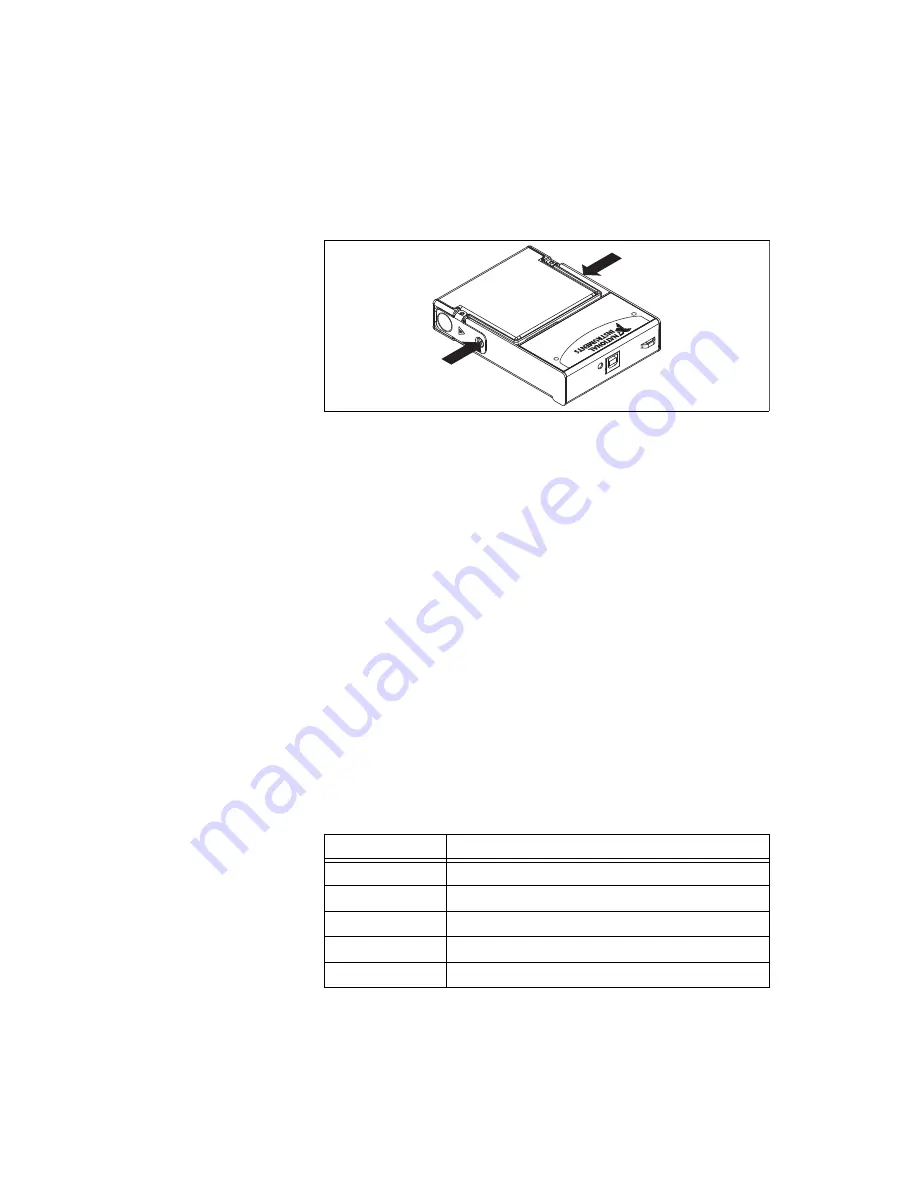
4.
Squeeze the latches and insert the NI 9213 module into the
NI USB-9162 carrier.
5.
Press firmly on the connector side of the NI 9213 module until the
latches lock the module into place, as shown in Figure 6.
Figure 6.
Locking Module into Place
Connecting the NI USB-9213 to a Computer
Plug one end of the USB cable into the NI USB-9213 and the other end into
an available USB port on the computer. Refer to the
NI-DAQmx for USB
Devices Getting Started Guide
that shipped with your device, and is also
accessible from
Start»All Programs»National Instruments»NI-DAQ
,
for more information.
LED Indicator
The NI USB-9213 device has a green LED next to the USB connector. The
LED indicator indicates device status, as listed in Table 2. When the device
is connected to a USB port, the LED blinks steadily to indicate that the
device is initialized and is receiving power from the connection.
If the LED is not blinking, it may mean that the device is not initialized or the
computer is in standby mode. In order for the device to be recognized, the
device must be connected to a computer that has NI-DAQmx installed on it.
If your device is not blinking, make sure your computer has the latest version
of NI-DAQmx installed on it, and the computer is not in standby mode.
Table 2.
LED State/Device Status
LED State
Device Status
Not lit
Device not connected or in suspend.
On, not blinking
Device connected, but no module installed.
Single-blink
Operating normally.
Double-blink
Operating normally.
Quadruple-blink
Device error. Refer to
ni.com/support
.


