©
National Instruments Corporation
13
SCXI Quick Start Guide
3.
Enter the chassis address setting in
Chassis Address
. Make sure the setting matches the address
setting on the SCXI chassis.
4.
Select whether to auto-detect SCXI modules. If you do not auto-detect modules, MAX disables
Communicating SCXI Module Slot.
5.
Click
Save
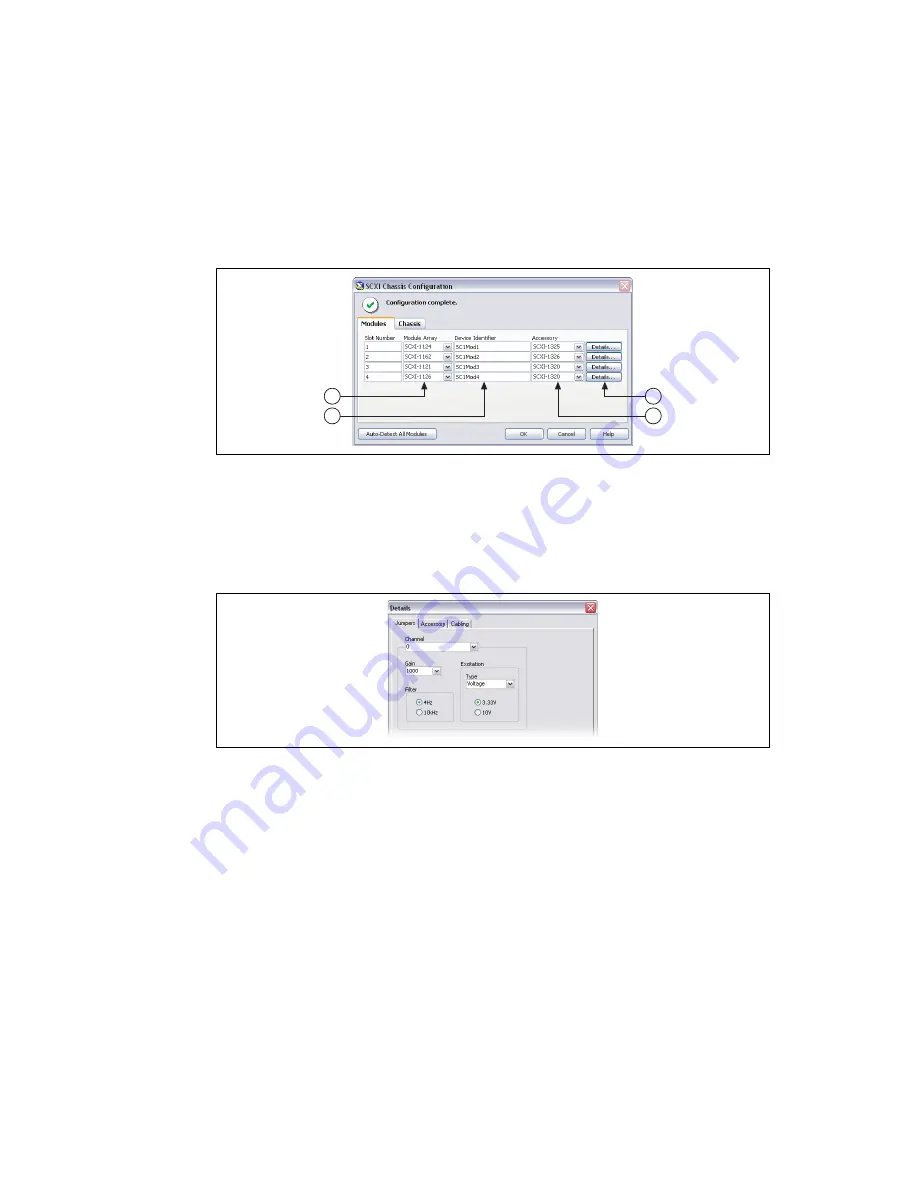
. The SCXI Chassis Configuration window opens. The
Modules
tab is selected by
default.
6.
If you did not auto-detect modules, select an SCXI module from the
Module Array
listbox.
Be sure to specify the module in the correct slot.
7.
Click in the
Device Identifier
field and enter a unique alphanumeric ID to change the name of the
SCXI module. MAX provides a default name for the Device Identifier.
8.
If you are using a connected accessory, specify it in
Accessory
.
9.
Click
Details
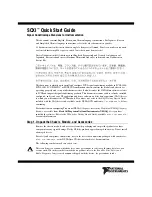
. The Details window opens.
10. If you are configuring an SCXI module with jumper-selectable settings, click the
Jumpers
tab and
enter the hardware-selected settings.
11. Click the
Accessory
tab. Select a compatible module accessory from the
Accessory
drop-down
listbox.
12. Click
Configure
to edit accessory settings. Not all accessories have settings. Refer to the accessory
documentation for more information.
13. If you are using an analog input module in parallel mode, in a multichassis configuration, or
another special configuration, click the
Cabling
tab to adjust the settings for cabling. If you are
using standard multiplexed mode operation, you do not need to change the settings.
14. Select the DAQ device connected to the SCXI module from the
Which device connects to this
module?
list.
6
7
9
8


