1-8
|
ni.com
Chapter 1
Getting Started
DIN Rail Mounting
Complete the following steps to mount your USB X Series device to a DIN rail using the
USB X Series mounting kit with DIN rail clip (part number 781515-01 not included in your
USB X Series device kit).
1.
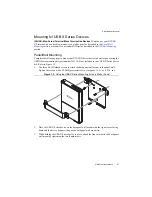
Fasten the DIN rail clip to the back of the backpanel wall mount using a #1 Phillips
screwdriver and four machine screws (part number 740981-01), included in the kit as
shown in Figure 1-4. Tighten the screws to a torque of 0.4 N · m (3.6 lb · in.).
Figure 1-4.
Attaching the DIN Rail Clip to the Backpanel Wall Mount
2.
Clip the bracket onto the DIN rail as shown in Figure 1-5.
Figure 1-5.
DIN Rail Clip Parts Locator Diagram
3.
Place the USB X Series device on the backpanel wall mount with the signal wires facing
down and the device bottom sitting on the backpanel wall mount lip.
4.
While holding the USB X Series device in place, attach the front bracket to the backpanel
wall mount by tightening the two thumbscrews.
1
DIN Rail Clip
2
DIN Rail Spring
3
DIN Rail
1
2
3
Содержание DAQ X NI 634 Series
Страница 1: ...PXIe 6349...


