background image

3

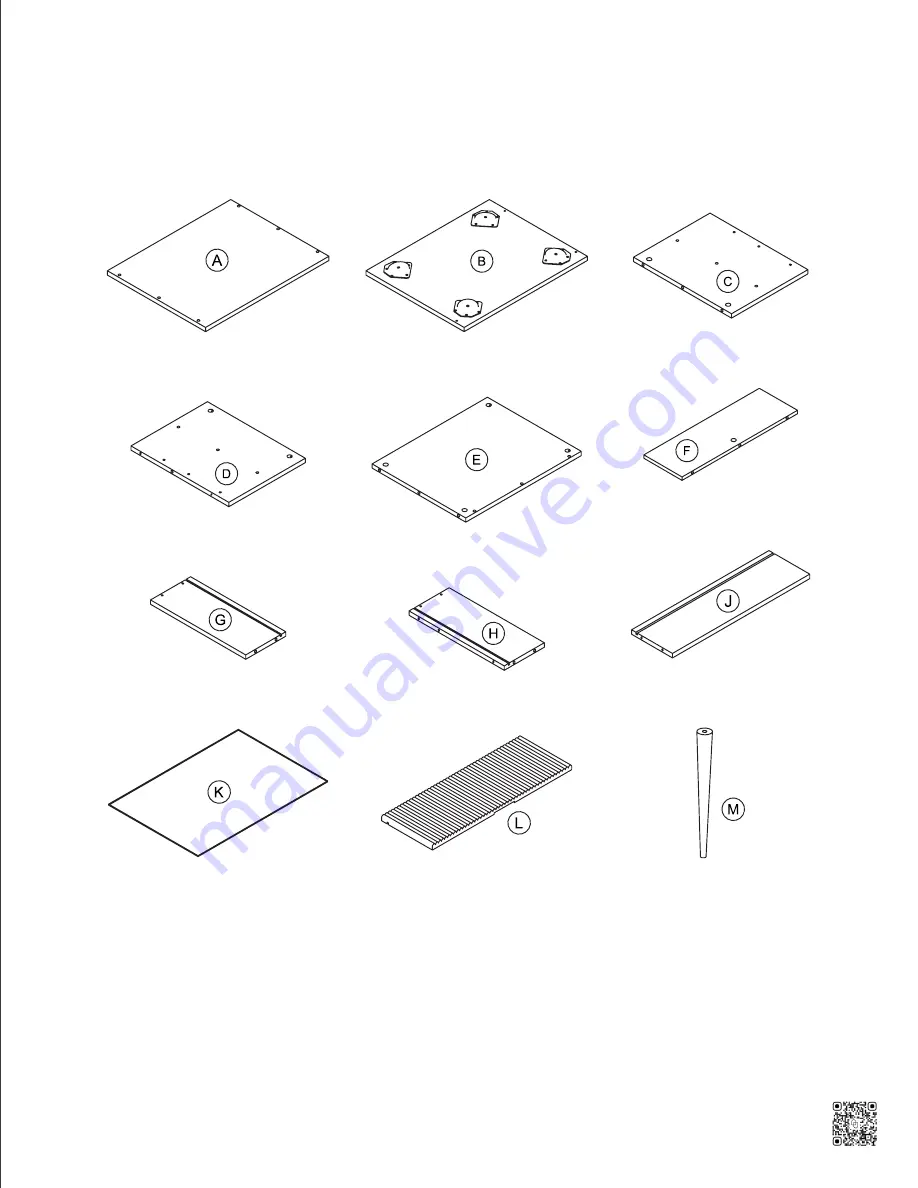
The goods

IMPORTANT

1. Do not tighten bolts / screws completely until all bolts / screws are lined up and  

inserted into holes.
2. Do not over tighten screws and bolts to avoid stripping.
3. Please use hand tools to assemble this product. Do not use power tools.

Содержание Jacklyn 33902

Страница 1: ...Jacklyn Side Table Let s build the 22 0207 Scan me Inspiration Digital Instructions Free Lifetime Warranty 65 6 5 MINU T E A S S E M B L Y SKU 33902...

Страница 2: ...head screwdriver Description Qty A Top Panel 1 B Bottom Panel 1 C Left Side Panel 1 D Right Side Panel 1 E Shelf 1 F Back Panel 1 G Left Drawer Side Panel 1 H Right Drawer Side Panel 1 J Drawer Back...

Страница 3: ...not tighten bolts screws completely until all bolts screws are lined up and inserted into holes 2 Do not over tighten screws and bolts to avoid stripping 3 Please use hand tools to assemble this prod...

Страница 4: ...y 1 Cam Bolt 13 2 Cam Lock 13 3 8 30 mm Wooden Dowel 6 4 6 30 mm Wooden Dowel 4 5 Foot Pad 4 6 M4 2 40 mm Screw 9 7 M3 5 12 mm Screw 12 8 M4 12 mm Screw 2 9 M8 50 mm Threaded Rod 4 10 Drawer Runner Se...

Страница 5: ...5 The goods...

Страница 6: ...and 2 8 30 mm Wooden Dowels 3 into the Left Side Panel C Insert 2 Cam Bolts 1 1 8 30 mm Wooden Dowel 3 and 1 6 30 mm Wooden Dowel 4 into the Right Side Panel D Insert 1 Cam Bolt 1 and 2 8 30 mm Woode...

Страница 7: ...s 10 to the Left Side Panel C and Right Side Panel D paying close attention to face them the right direction The rail labeled CL goes on the Left Side Panel C and the rail labeled CR goes on the Right...

Страница 8: ...ft Drawer Side Panel G and the Right Drawer Side Panel H to the Drawer Back Panel J using M4 2 40 mm Screws 6 Slide the Drawer Bottom Panel K into the groove in the drawer panels you just put together...

Страница 9: ...L with the holes on the front of the drawer base Use Cam Locks 2 to secure the panel in place Step 5 Step 6 Drawer runner x 1 set right drawer runner left drawer runner Now let s put the drawer runner...

Страница 10: ...ight Side Panel D to the Shelf E by aligning the Cam Bolts in the side panels C D with the holes in the Shelf E and secure with Cam Locks 2 Step 7 Now attach the Back Panel F by aligning the Cam Bolt...

Страница 11: ...gn the Cam Bolts to attach the Top Panel A to the base you ve just assembled Secure that in place using Cam Locks 2 Step 9 Attach the Bottom Panel B to the base of the cabinet using M4 2 40 mm Screws...

Страница 12: ...12 Twist the Threaded Rods 9 into the metal leg plates on the bottom of the cabinet Step 11 Time to add the legs Twist the Legs M onto the Threaded Rods you inserted in Step 11 Step 12...

Страница 13: ...protect those floors Step 13 You made it to the last step We re so proud of you Now for the finishing touches Place the PVC Stickers 12 over the exposed Cam Locks inside the cabinet Next attach the Ha...

Страница 14: ...t with zero hassle We really don t want you to go through the hassle of re packaging your item and sending it back because let s be honest nobody has time for that No heartburn when we handle the retu...

Страница 15: ...en DO NOT make temporary repairs DO NOT use outdoors Proper use Safety first fun later Safe use of this product starts with you Use this Jacklyn Side Table responsibly with the primary concern for you...

Страница 16: ...happy For starters thanks for being you Toll free at 1 866 619 1004 Help nathanjames com NathanJames com help We do our best to ensure your furniture arrives without any problems but occasionally mis...

Отзывы: