


- 8 -
VERTICAL BROACHER BM25
Operative
working place
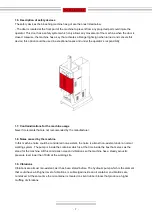
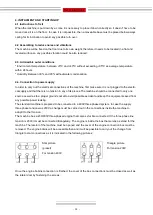
1.10. Operative working place
The broaching machine will only be used by an operative at the time who will be placed in front of the ma-
chine, never at a lateral of it because he ought to control the whole set of the machine. Moreover the ma-
chine main protection devices are thought for the frontal use of the machine.
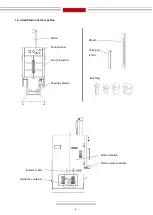
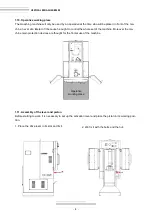
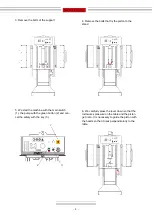
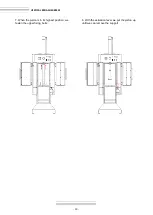
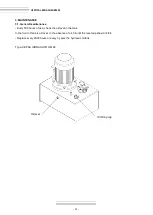
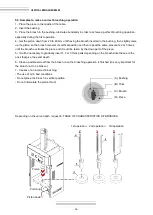
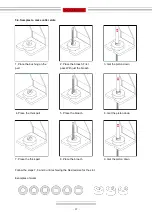
1.11. Assembly of the lever and piston
Before starting to work, it is necessary to set up the activation lever and place the piston in its working posi-
tion.
1. Place the drive lever in its slot and fix it.
2. We fix it with the bolts and the nut.
Содержание BM25
Страница 2: ...Thank you for choosing our machines www nargesa com...
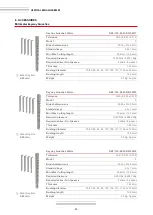
Страница 18: ...18 VERTICAL BROACHER BM25 6 TABLE OF CHARACTERISTICS OF BRUSHES 6 1 Millimeter keyway broaches...
Страница 19: ...19 6 2 Inches keyway broaches...
Страница 20: ...20 VERTICAL BROACHER BM25...
Страница 34: ...Technical annex Vertical broacher BM25 List of parts Piston assembly Hydraulic group Electric map Hydraulic map...
Страница 35: ...A3 VERTICAL BROACHER BM25 A1 List of parts...
Страница 36: ...A4...
Страница 37: ...A5 VERTICAL BROACHER BM25...
Страница 38: ...A6...
Страница 39: ...A7 VERTICAL BROACHER BM25...
Страница 40: ...A8 A2 Piston assembly...
Страница 41: ...A9 VERTICAL BROACHER BM25...
Страница 42: ...A10 A3 Hydraulic group...
Страница 43: ...A11 VERTICAL BROACHER BM25...
Страница 44: ...A12...
Страница 45: ...A14 A4 Electric box...
Страница 46: ...A15 VERTICAL BROACHER BM25...
Страница 47: ...A16...
Страница 48: ...A17 VERTICAL BROACHER BM25 A5 Electric map...