English
8
Technical Specification
Cordless drill screwdriver:
Model
ASV 7 E
Voltage.
.
7,.V
Accumulator.cell.type.
.
Li-Ion
Accumulator.capacity.
.
1,.Ah
Idle.speed.
.
0.–.400.min
-1
Max..torque.
.
1.Nm
Screwing.wood.screws.
.
max.ø.4,5.mm
Clamping.on.the.spindle.
.
¼“.hexagon
Weight.of.the.device.without.extensions.
0,8.kg
Charger:
Input.voltage.
.
0.–.40.V
Frequency.
.
50.Hz
Power.input.
.
5.W
Output.voltage.
.
7,.V
Charging.current.
.
500.mA
Charge.time.
.
ca.,5.hours
Weight..
.
0,8.kg
Class.of.protection.
.
II./
Description:
1 ...........Clamp sleeve
2 ...........Adjusting ring for torque setting
3 ...........LED lighting
4 ...........Reversing switch
5 ...........Switching-in push button with speed control
6 ...........Accumulator charge pilot lamp
7 ...........Jack
8 ...........Charger cable
9 ...........Charger
Information about noise level and vibrations
Weighed sound pressure level LPA is 66.3 dB(A).
Weighed sound power level LWA is 77.3 dB(A).
Weighed level of arm affecting vibrations is less than 2.5 m/s
2
.
Scope of use:
The cordless drill screwdrivers are specified for drilling into metals,
woods and plastics and for screwing.
Instructions for charging
1. Connect the charger cable (8) to the jack (7) on the bottom
screwdriver handle side.
2. Check that the mains voltage conforms to the voltage shown
on the charger rating plate. Connect the charger (9) to the
socket.
3. After the charger is connected to the socket, the charge pilot
lamp (6) will go on. The pilot lamp indicates the running
process of charging.
4. In most cases charging for ca 2.5 hours is quite enough. As
soon as the accumulator is charged, the charging pilot lamp
(6) will go off. Put the charger (9) out of the socket and then
disconnect its cable (8) from the device.
Attention!
DO NOT USE the device during charging.
Note:
· The accumulator is supplied unloaded by the manufacturer.
Therefore 5 to 10 cycles of charging and discharging are
needed to reach its full capacity.
· The charger works best at the room temperature.
· During charging both the charger and the screwdriver can
warm up. This is a normal phenomenon during the process of
charging and cannot be understood a problem.
Important instructions for charging:
· Do not charge the device in a humid or wet environment.
· The max. service life of the accumulator and the best
performance can be reached by charging the accumulator at
the ambient temperature range of 18°C to 24°C.
· Do not charge the accumulator battery at the temperatures
below 4.5°C or above 40.5°C to avoid serious accumulator
damage.
· During charging both the accumulator and the charger can
warm up. This is a normal phenomenon during the process of
charging and cannot be understood a problem.
· To avoid possible overheating do not cover the charger during
charging, do not charge the accumulator in direct sunlight or
close to heat sources.
If the accumulator is not charged dully:
a/ Place the charger and the accumulator to the environment
with the temperature ranging from 18°C to 24°C
b/ If the problems with charging persist, hand the device and the
charger over to the nearest authorized service centre.
· Charge the accumulator when it is no more able to reach the
original performance. If the accumulator is discharged, do not
use it before recharging. Follow the instructions for charging.
· Prevent penetration of el. conductive impurities to charger
contacts.
· When the charger is not operated, disconnect it from the
power supply.
· Before cleaning the charger, disconnect it from the power
supply.
· Do not expose the charger to frost, do not dip it into water or
another liquid.
WARNING!!
Prevent penetration of liquids into the charger as it could result in
electric shock. Do not let the machine in a hot environment so that
the accumulator may cool after use.
Содержание ASV 7 E
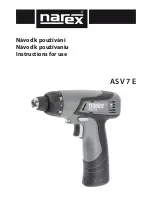
Страница 1: ...N vod k pou v n N vod k pou vaniu Instructions for use ASV 7 E...
Страница 3: ...1 3 2 3 4 5 6 7 8 9...
Страница 10: ...10...
Страница 11: ...11...


