


Operating
3-1
3 - Operating
3.1 Introduction
3.2 Serial port
connection
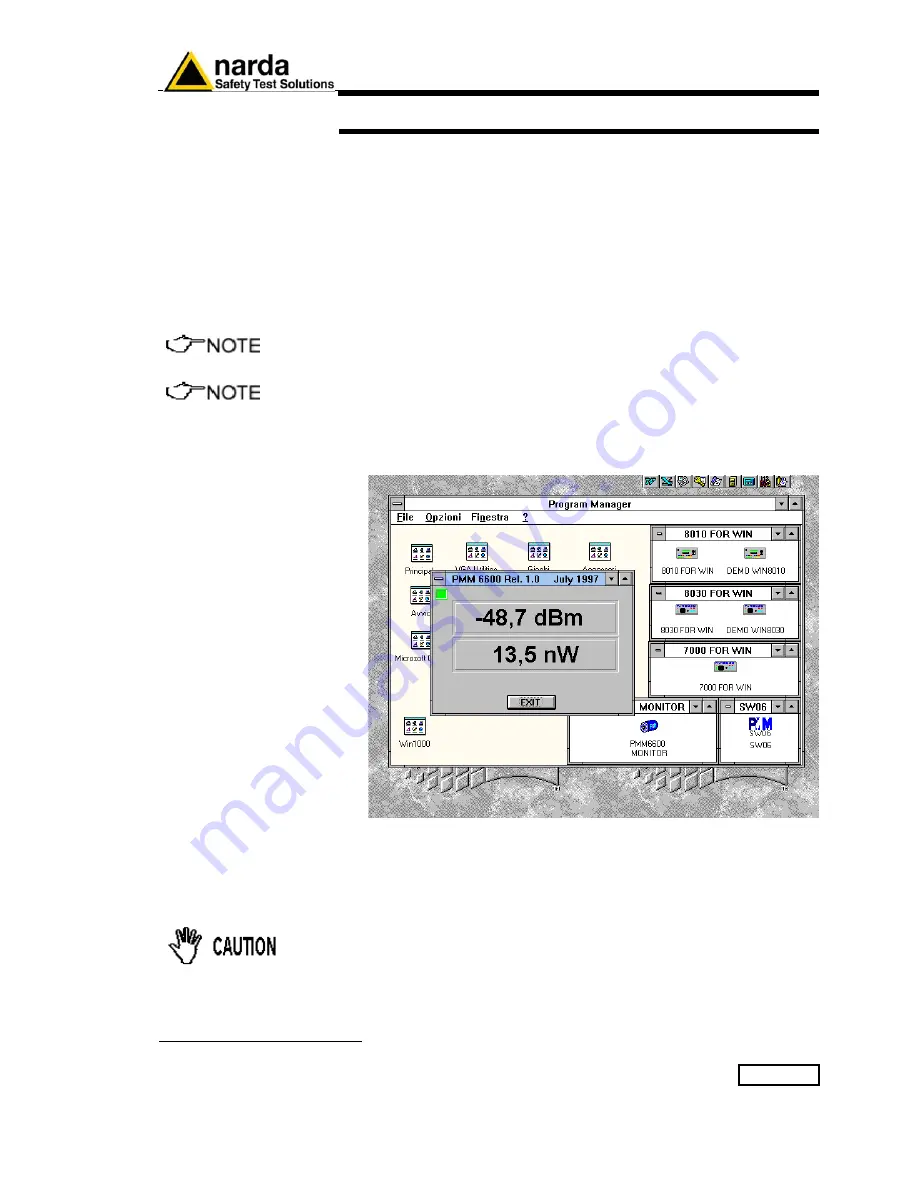
3.2.1 Typical PMM 6600
display
3.3 To connect
PMM 6600 input
to source
Before starting to use the PMM 6600 RF power meter, provide for a correct
hardware and software installation as recommended in Section 1.
By default software driver recognizes automatically PMM 6600 if
connected at
COM 2
serial port.
If this serial port is already busy, click once on PMM 6600 icon and open
Property window from Program Manager in Windows
TM
3.11, or select the
icon with the right mouse button and choose Property from menu in
Windows
TM
95, add the command
COMM=N
preceded by a space (in
capital letters) at the end of the Destination field where
N indicates the
serial port to be used. Then confirm by selecting
Apply.
The assigned COM port nr. must be between 1 and 9.
In other operating system the Destination field is enclosed in double
quotation marks (“); in this case, the command COMM=N, preceded
by a
space must be outside.
From Program Manager click on PMM 6600 icon. The software will then
prompt:
Connect the PMM 6600 input connector to the source you want to
measure.
The display will show the measured power expressed both in
dBm
and in
Watt
.
Click
EXIT
if you want to terminate.
Be sure not to apply more that 1 Watt to PMM 6600 input. A
permanent damage could occur.
Make sure that PMM 6600 input connector is well tight to the source N type
RF connector. Grounding problems can cause wrong readings.
Document 6600EN-00705-1.10 -
© NARDA 2007
Содержание PMM 6600
Страница 9: ...General information 1 3 1 6 Front and rear panel Fig 1 1 Front Panel Fig 1 2 Rear Panel...
Страница 14: ...2 4 Installation This page has been left blank intentionally...
Страница 18: ...4 2 Maintenance and Servicing This page has been left blank intentionally...
Страница 20: ...5 2 Serial Communication Protocol This page has been left blank intentionally...
Страница 22: ...Suggerimenti Commenti Note Suggestions Comments Note...


