background image


14 


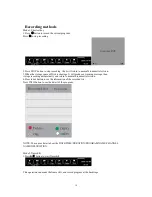
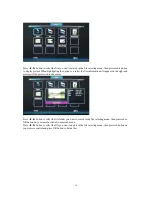
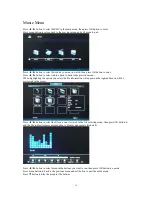
Press ◄ / ► button to select the file you want to watch in the file selecting menu, then press media button 
to display picture.When highlighting the option you select,the file information will appear on the right and 
picture will be previewed in the center. 


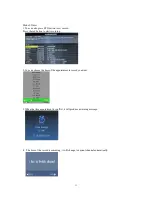
Press ◄ / ► button to select the file folder you want to search in the file selecting menu, then press red or 
OK button on your remote control to enter sub-menu. 

Press ◄ / ► button to select the file you want to delete in the file selecting menu, then press red button on 
your remote control and press OK button to delete files. 


Содержание NPL-LED 3230

Страница 1: ...AWING 4 4 5 COAXIAL DRAWING 5 4 6 YPBPR INPUT DRAWING 5 4 7 EARPHONE DRAWING 5 5 CONFIGURATION OF THE LED 6 5 1 PICTURE SETTING 6 5 2 SOUND SETTING 6 5 3 TIME SETTING 7 5 4 LOCK SETTING 7 5 5 SETUP SE...

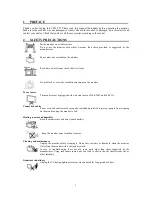
Страница 2: ...r source The monitor must be plugged with a tension source of 100 240V and 50 60 Hz Connection cables Power cord and cables must be properly routed and protected to prevent people from stepping on the...

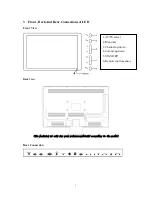
Страница 3: ...Connections of LED Front View Back View The backview is only for your reference details according to the model Rear Connection 1 AV TV select 2 Menu key 3 Channel up down 4 Volume up down 5 STANDBY 6...

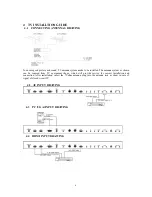
Страница 4: ...led The antenna system as shown can be sourced from TV equipment shops which will provide service for correct installation and connection After installation insert the 75 ohm antenna plug into the ant...

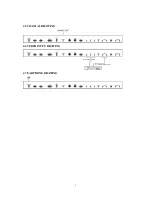
Страница 5: ...5 4 5 COAXIAL DRAWING 4 6 YPBPR INPUT DRAWING 4 7 EARPHONE DRAWING...

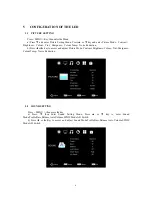
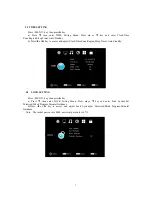
Страница 6: ...Temp Noise Reduction b Press or key to access and adjust Picture Mode Contrast Brightness Colour Tint Sharpness Colour Temp Noise Reduction 5 2 SOUND SETTING Press MENU then press key a Press then ent...

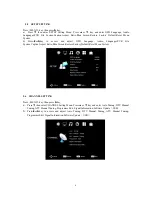
Страница 7: ...ss and adjust Clock Time Zone Region Sleep Timer Auto Standby 5 4 LOCK SETTING Press MENU key then press key a Press then enter LOCK Setting Menu Press or key and enter Lock System Set Password Block...

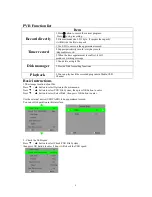
Страница 8: ...Language Audio Languages PVR File System Caption Aspect Ratio Blue Screen Restore Factory Default Reset Menu System 5 6 CHANNEL SETTING Press MENU key then press key a Press then enter CHANNEL Settin...

Страница 9: ...ger 1 Can delete a single file 2 Provide Disk formatting functions Playback 1 You can play back the recorded program in Media USB Channel Basic instructions 1 The storage location of out file Press bu...

Страница 10: ...will produce a warning message then it stops recording automatically and return to normal broadcast television 4 Press index button to see the information of the recorded list Press INFO button to see...

Страница 11: ...Press the red button to start recording 2 You can choose the time of the appointment to record you want 3 When the time appointment is conflict it will produce a warning message 4 The time of the reco...

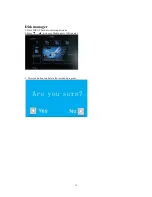
Страница 12: ...12 Disk manager 1 Press INPUT button to enter input source 2 Press to choose Media press OK to enter 3 Press red button can delete the recorded program...

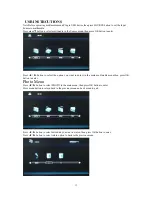
Страница 13: ...r Press button to select the option you want to adjust in the main mutilmedia menu then press OK button to enter Photo Menu Press button to select PHOTO in the main menu then press OK button to enter...

Страница 14: ...will appear on the right and picture will be previewed in the center Press button to select the file folder you want to search in the file selecting menu then press red or OK button on your remote co...

Страница 15: ...hlighting the option you select the file information will appear on the right and music will be previewed in the center Press button to select the file you want to watch in the file selecting menu the...

Страница 16: ...utton to operate Press menu button to back to the previous menu and exit button to quit the entire menu Text Menu Press button to select TEXT in the main menu then press OK button to enter Press menu...

Страница 17: ...17 6 REMOTE CONTROL INSTRUCTIONS...

Страница 18: ...15 CHANNEL Press to change the TV channels 16 SOURCE Press to display the input source menu 17 CH LIST channel list 18 FAV Press to display the favorite channel list which you stored before 19 20 21 2...

Страница 19: ...e the battery cover 7 1 BATTERY USAGE CAUTION To prevent battery leakage this may result in bodily injury or damage to the remote 1 Install all batteries correctly and as marked on the remote control...

Страница 20: ...cal devices or appliances Double or multiple display image May be the result of an electrical wave disturb from other TV Computer and Game machine or Radio Snow on the screen The cables of the antenna...

Страница 21: ...socket 75 Audio Output L R 10W 2 Input AV Video 1 0Vp p 75 Audio20k RCA PC Standard VESA mode HDMI MAX 1080P YPbPr 1 0Vp p 75 RCA MAX 1080P Output Audio L R 200mVmrs max3 0vp p 20K RCA Net Weight 12...

Отзывы: