


W415-1158 / A / 11.19.13
11
EN
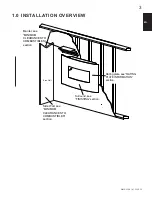
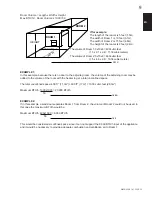
3.5 MOUNTING THE APPLIANCE
A.
Level and affi x the paper template to the wall at desired location and height. See “MINIMUM
CLEARANCES TO COMBUSTIBLES” section for the minimum clearance requirement.
B.
Using the paper template, mark the mounting screw locations.
C.
Install the mounting bracket onto the wall using the two screws as shown in Figure 1. Make sure the
mounting bracket is level on the wall and the slots are facing upward.
NOTE: The mounting screws
must go into a wall stud or proper anchors.
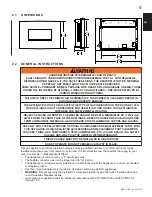
D.
Mount the appliance onto the mounting bracket by placing the appliance into the slots until it is
secured in place, see Figure 2.
NOTE: Ensure the appliance is resting securely in the slots.
E.
Further secure the bottom of the appliance with the two screws, see Figure 3.
NOTE: It is strongly
recommended that the appliance be screwed into the wall studs where possible. If the wall
studs cannot be used, ensure that the proper anchors (not supplied) are used to affi x the
appliance to the wall and the appliance is adequately secured.
FIG. 1
FIG. 2
FIG. 3


