


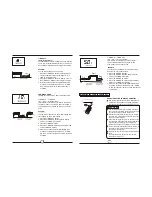


Indicators on LCD
Fan speed indication
Mode display
Information are displayed when
the remote controller is powered
up.
Displayed when data transmitted.
Displayed when remote controller is ON.
Low speed
NO display
Medium speed
High speed
Auto fan speed
Note:
All indicators shown in the figure are for the purpose
of clear presentation. But during the actual operation
only the relative functional signs are shown on the
display window.
Displayed when TIMER ON time is set.
Indicated all the current settings are
locked
Displayed when TIMER OFF time is set.
Show set temperature or room
temperature, or time under TIMER
setting.
AUTO
HEAT FAN
COOL DRY
5
5
6
6
TIMER ON OFF
TIMER ON
TIMER OFF
FAN
HIGH
MED
LOW
HIGH
MED
LOW
AUTO
COOL
DRY
HEAT
Active/Disable Turbo function. Turbo
function enables the unit to reach the preset
temperature at cooling or heating operation
in the shortest time(if the indoor unit does
not support this function, there is no
corresponding operation happened when
pressing this button.)
14
TURBO Button
13
LOCK Button
Press this recessed button to lock all current
settings, and the remote controller will not
accept any operation except that of the LOCK.
Use the LOCK mode when you want to
prevent settings from being changed
accidentally. Press the LOCK button again to
cancel the LOCK function. A lock symbol
will appear on the remote controller display
when the lock function is activated.
TEMP
AUTO
COOL
DRY
HEAT
FAN
HIGH
MED
LOW
MODE
FAN SPEED
TIMER ON
ECO
ON/OFF
TIMER OFF
RESET LOCK
1
2
4
5
6
7
8
3
10
9
11
12
13
14
O
SET TEMPERATURE( F)
SWING
SWING
LED
DISPLAY
TURBO
RG51F1/E
NOTE:
Buttons design is based on typical model
and might be slightly different from the
actual one you purchased
the actual
shape shall prevail.
All the functions described are
accomplished by the unit. If the unit has no
this feature, there is no corresponding
operation happened when press the relative
button on the remote controller.
When there are wide differences between
Remote controller Illustration and
USER'S MANUAL on function description,
the description of USER'S MANUAL
shall prevail.
,,
,,
,,
, ,
, ,
, ,
TIMER OFF Button
12
Press this button to initiate the auto-off time
sequence. Each press will increase the auto
-timed setting in 30 minutes increments.
When the setting time displays 10.0, each
press will increase the auto-timed setting
60 minutes increments. To cancel the auto-
timed program, simply adjust the auto-off
time to 0.0


