


2
IBR-TOUCH & IBR-TOUCH-WL Quick Start Guide
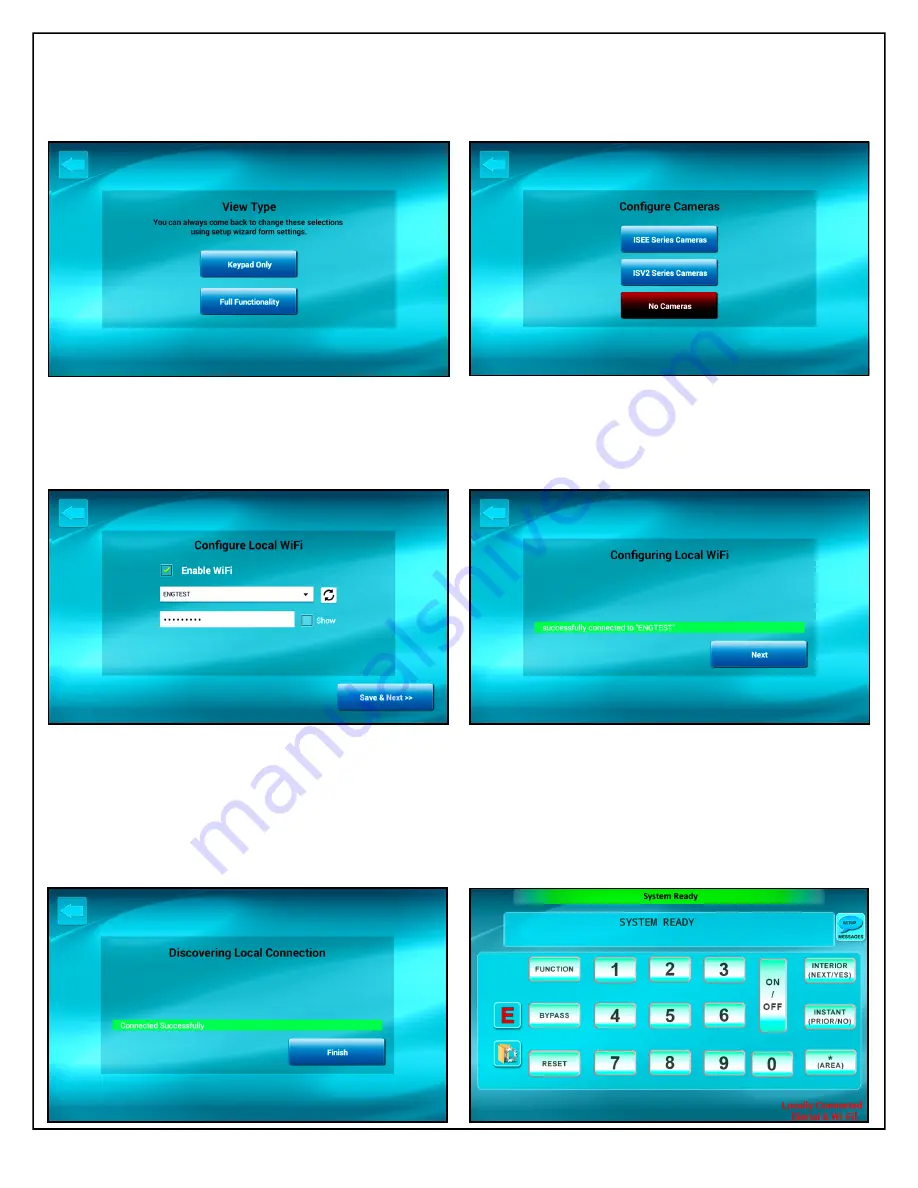
If you have an ISEE-WAP with existing older iSeeVideo
cameras, tap
ISEE Series Cameras
; if your system in-
cludes the newer
ISV2
models, tap
ISV2 Series Cameras
;
for systems without cameras, tap
No Cameras
(cameras
can always be added later).
Note:
ISEE
and
ISV2
camer-
as cannot be combined.
Select how the IBR-TOUCH / IBR-TOUCH-WL will be
used. If it will only be used as a security system key-
pad, tap
Keypad Only
(jump to step 9). To include
video camera and Z-Wave functions, tap
Full Func-
tionality
(and go to step 8).
7
8
9
10
Wait until the message indicates the connection to
the customer's wireless router is complete, then
tap
Next
.
12
If you selected
Keypad Only
in step 7, the virtual
security system keypad will appear (shown be-
low). Stop here -- you're finished!
If you selected
Full Functionality
, you're almost
finished...go to next step...
11
The system will then automatically try to connect
to the "local"
StarLink Connect
radio or the
iBridge
(zRemote) Z-Wave Controller that is
physically located "locally" (i.e. inside the prem-
ises). When connected, tap
Finish
.
To connect through the customer's wireless router, check
Enable WiFi
; select the router name* from the pull-down
and have the customer type their router Password (click the
"Refresh" button to the right of the pull-down if the custom-
er's router is not listed). When finished, tap
Save & Next
.
*Note:
The default name "
Public
" is used with ISEE-WAP installations.


